博文地址:https://blog.thunderbird.net/2025/04/thundermail-and-thunderbird-pro-services/
Thundermail的服务内容
- Thunderbird Appointment: 日程安排工具,目前已处于封闭测试阶段。
- Thunderbird Send: 就是以前的Firefox Send,端到端加密的文件共享服务,允许将大文件上传到该服务,并与他人分享下载链接。Thunderbird Send 目前处于 Alpha 测试阶段,并将很快进入封闭 Beta 阶段。
- Thunderbird Assist: AI工具
- Thundermail: 包含日历、联系人的电子邮箱服务,可以使用自己的域名。
Thundermail网址
https://tb.pro/ 或 https://thundermail.com/
可以提交自己的邮箱地址加入候补名单。
邮箱特色
- 注重隐私,端到端加密,无广告;
- 每个邮箱账户提供10个免费别名;
- 注册时无须提供手机号码等敏感信息;
- 支持两步验证和通过phrase找回账户密码;
- 支持邮件自动回复。
注册邮箱
登录Atomic Mail官方网站atomicmail.io,点击右上角“Create a free account”或直接打开链接https://atomicmail.io/app/auth/sign-up,输入”First name”和”Last name”后点击“Submit”提交。
在“Your mail address”下方输入你想要注册的用户名,长度为5至30位。点击“Submit”提交后输入密码再次点击“Submit”。
下载保存“Your Seed Phrase”用于密码找回。
创建别名
登录邮箱后,点击右上角头像,依次打开“Setting”、“Alias”,点击“Create alias”按提示输入相关信息即可。
隐私信息
访问Atomic Mail网站会收集以下信息:
- IP地址以及基于IP地址的所在位置、时间;
- 浏览器及浏览器默认语言、OS系统信息等。
- 相关log信息保存7天;
- 邮件删除后,会加密保留该邮件3天。
邮箱注册
注册地址:https://inleed.xyz/register,可以点击网页右下角的国旗切换到相应的语言,支持英语和瑞典语。
邮箱前缀Username最短支持1位,字母、数字皆可。
收到邮件后,点击邮件中的激活链接”Verify Email Address”激活邮箱。
两步验证
进入邮箱后台,点击右上角“Settings”打开设置列表,选择第二项“Security”开通两步验证。
添加域名
在设置选项列表中,选择第三项“Domain”,在“Add domain”处输入自己的域名,点击“Connet domain”,然后按照网站给出的DNS记录设置自己域名的DNS记录。
设置完后,点击“Check all DNS posts”验证DNS记录是否正确。
添加用户
在“Setting”页面选择第四项“Email Accounts”。
- 激活@mail24.se后缀:点击右侧的“Create account”
- 添加自定义域名邮箱账户:在域名区域点击“Add account”
目前测试可以添加多个域名。
客户端设置
IMAP:inleed.xyz SSL, Port 993
SMTP:inleed.xyz SSL, Port 465
POP:inleed.xyz SSL, Port 995
下载地址
- Google Play Store: https://play.google.com/store/apps/details?id=net.thunderbird.android.beta
- Github: https://github.com/thunderbird/thunderbird-android/releases
安卓版Thunderbird路线图
- 9月30日 - 第一个Beta版发布
- 10月的第三周 - 第一个候选版发布
- 10月的第四个周 - 安卓正式版发布
端到端加密
跟k-9客户端一样,目前邮件的加解密仍然需要OpenKeychain的支持.
试用体验
没什么特别的。
桌面版导入的Zip备份文件无法直接导入。
感兴趣的可以下载测试,并帮助官方测试以下功能:
- Automatic Setup (user only provides email address and maybe password)
- Manual Setup (user provides server settings)
- Read Messages
- Fetch Messages
- Switch accounts
- Move email to folder
- Notify for new message
- Edit drafts
- Write message
- Send message
- Email actions: reply, forward
- Delete email
- NOT experience data loss
域名邮箱设置
- 登录Skiff邮箱账户,点击左侧“Settings”进入设置选项;
- 在弹出的账户设置中,选择“Custom domains”,然后选择右侧的“Confihure domain”;
- 输入域名,点出“Next”获取DNS相关信息;
- 根据Skiff提供的信息配置DNS解析记录然后等待验证,其中MX的优先级为“0”,有一些域名注册商可能不支持可以使用CloudFlare。
添加别名
- 在邮箱设置页面左侧选择“Aliases”;
- 在Aliases管理页面点击“Add alias”,然后在“New email address”处输入喜欢的邮箱ID,“@skiff.com”处下拉选择已添加域名,点出“Add”按钮即添加成功。
EForw功能
- 支持Catch-All;
- 收费版支持转发到多个邮箱地址;
- 收费版可以配合Gmail使用邮箱邮箱地址发送邮件。
EForw注册
打开官方网站 https://www.eforw.com/,往下拉,在“Choose the plan that works for you”选择免费方案,点击“Get Started”。
在新打开的页面中输入你的邮箱地址,点击“Get Code”,然后输入邮箱中收到的code密码即可。
EForw设置
添加域名
进入EForw管理后台,选择左侧的“Domains and aliases”,然后在右侧输入你要添加的域名,并点出右侧“Add new domain”按钮。
点击右上角的“Finish DNS setup”,按要求添加DNS解析记录,DNS解析记录添加完成后,点击右上角的“Check DNS setup”验证DNS解析记录是否正确。
添加邮件转发规则
左侧填写你添加的域名邮箱地址,右侧填写接收转发邮件的邮箱地址。免费版只能转发到你的注册邮箱地址。
如果左侧填写通配符“*”则代表启用Catch-All功能。
SMTP accounts
该选项主要是生成邮箱地址,以配合Gmail发送邮件,仅限收费版,具体使用方法见官方文档:https://www.eforw.com/how-to-setup-sending-emails-from-a-custom-domain-with-gmail/
]]>在邮件发送的过程中,防止邮件被恶意篡改,保证邮件内容的完整性;
避免对外发送的邮件被标记为垃圾邮件。
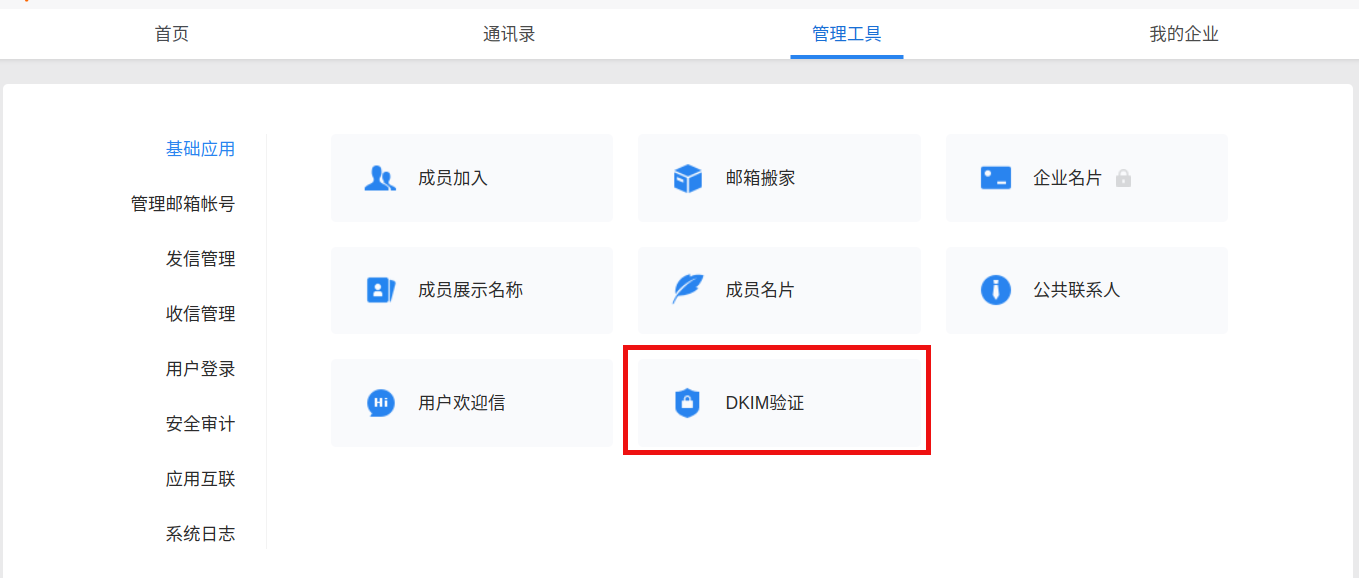
登陆QQ企业邮箱管理后台,依此点击“管理工具” –> “基础功能” –> “DKIM验证” –> “立即配置”,然后根据提示添加DNS解析记录,添加完成后等待验证即可。
设置完成后可以通过网站https://www.learndmarc.com/查看结果。
]]>免费升级后的容量不会再降回去。
此前QQ邮箱每90天手动免费扩容一次,扩容后邮箱容量翻倍,而且当你容量用到50%之后也会自动翻倍。
QQ邮箱是一款腾讯在2002年推出的,向用户提供安全、稳定、快速、便捷电子邮件服务的邮箱产品,已为数亿用户提供免费和增值邮箱服务。
以下为QQ邮箱网站的“邮箱容量升级说明”。
新的容量策略为:免费提供最大可达16G的邮箱容量,可按需扩容;也可以通过付费将邮箱容量升级至2048GB;
1、邮箱初始容量为2GB,免费容量最大可达16GB;
2、我们将根据邮箱容量的使用情况自动扩容,你也可以手动升级容量,每3个月(按90天计算)可手动扩容一次;
3、免费升级后的容量不会再降回去,可放心使用;
4、若需要更大的邮箱容量,可付费升级邮箱容量至2048GB;付费到期后,邮箱容量将恢复为付费前的容量;
5、节约是种美德。我们依然推荐大家定期清理用不到的邮件。此外,我们将普通附件的大小限制也已提升到了50M。
转自:https://www.williamlong.info/archives/6989.html,感谢网友Jason投稿。
]]>具体方法如下:
将收件人的邮箱地址,如”sender@example.com“ 替换为”sender_at_example.com”,即以”_at_“代替邮箱符号”@”,然后再以下划线”_”连接你duck.com的邮箱地址作为收件人的邮箱地址。收件人的完整邮箱地址就变成了:”sender_at_example.com_xxx@duck.com“。
If, for example, you want to send an email to **sender@example.com, use the address: sender_at_example.com_XXX@duck.com**
* “XXX@duck.com“替换成你自己的duck.com邮箱地址。
最后,用你接收duck.com邮箱转发邮件的邮箱地址发送即可。
注意事项:
- 只能使用你用于接收duck.com邮件的邮箱地址发送,如果使用其它邮箱地址会收到duck.com无法送达的邮件提醒。
- 对方通过原邮件回复后,发送人的邮箱地址是”sender_at_example.com_XXX@duck.com“而非”sender@example.com“。
账户注册
用户名“Username”长度必须大于4位数,注册成功后会自动添加一个后缀为“@cliffmail.com”的邮箱地址。
姓名“Your Name”长度必须大于5位数。
邮箱地址必须为真实的邮箱地址,注册成功后需要验证自己的邮箱地址,且免费版用户不支持修改,收到的所有邮件都会默认转发到该邮箱。
添加域名
点击左侧菜单栏“My Domain”进入添加域名页面。点击右上角“Add Domain”,根据页面指导依此添加TXT验证记录、MX记录、SPF和DKIM记录以及DMARC解析记录,然后输入域名点击“Validate and Add Domain”验证DNS解析记录并添加域名。
MutantMail支持添加子域名。
添加邮箱账户
点击左侧菜单栏“Email IDs”进入添加邮箱账户页面后,再次点击右上角的“Create Email ID”,“Select Your Domain”处可能选择邮箱的后缀,未添加域名的可以使用MutantMail提供的免费二级域名“@free.mutantmail.com”,“Email ID Format”可以选择邮箱的用户名,自己定制或系统随机。”Recipient/Destination/Control Email IDs”是邮件转发邮箱账户,默认是你注册时验证的邮箱。
邮箱地址状态为“Active”后才能正常使用。
添加PGP密钥
左侧菜单栏“Control IDs”,在“Encryption”下点击“Add key”,但是我在添加的过程中一直提示错误,未能成功添加。
]]>如下图所示:
其实现的方法就是添加TXT记录解析,具体步骤如下:
设置DMARC
要想使用BIMI功能就需要先设置DMARC解析,因为DMARC记录中包含对SPF和DKIM的验证方法,所以相应的SPF和DKIM记录也要有,可以看一下前期的文章:域名邮箱真实性设置指南:DKIM、DMARC和SPF。
在DNS中添加“TXT”类型解析记录,以httpsmail.com为例,名称或主机记录为“_dmarc.httpsmail.com”,内容或值为:
v=DMARC1; p=reject; pct=100; adkim=s; aspf=s;
其中p=必须为reject或quarantine,pct=必须为100(目前只有谷歌提及必须要有pct=100)。
上传Logo文件到服务器
Logo文件必须为”.svg”格式。
但谷歌在其网站上 https://support.google.com/a/answer/10911027?hl=en&ref_topic=10911234 还列出不少要求和建议,我看下来后的感觉就是好麻烦,不想设置了,我也不一一翻译了。可以使用谷歌推荐的Adobe Illustrator创建”.svg”文件。
- Format must be SVG Tiny Portable/Secure (SVG Tiny PS), which is a version of SVG.
- The
baseProfileattribute must betiny-ps. - The
versionattribute must be1.2. - Include a
<title>element that reflects your organization name. There are no strict requirements for the title value. - Don’t include external links or references, other than to the specified XML namespaces.
- Don’t include scripts, animations, or other interactive elements.
- Don’t include
x=ory=attributes in the<svg>root element.
谷歌的建议:
- The image should be a square, and graphics should be centered.
- The file should be as small as possible. We recommend no larger than 32 KB.
- The image background should be a solid color. Transparent backgrounds don’t always display as expected.
- Include the
<desc>(description) element to support accessibility.
申请VMC认证(可选)
要想申请VMC认证,你的Logo需要为注册商标,所以这一步就不介绍了。
每家邮箱的要求不同,Gmail要求必须同时有Logo文件和Logo证书才能在收件箱内显示Logo图标。
设置DNS解析记录
解析记录类型为”TXT”,主机名为”default._bimi.httpsmail.com”,这是固定格式。值或内容为:
v=BIMI1; l=https://www.httpsmail.com/images/logo.svg; a=
其中:v=为BIMI的版本号,l=为.svg格式的Logo文件地址,a=为VMC证书的地址。
注册方法
- 移动端:将DuckDuckGo程序升级到最新版本,依次选择“Setting”,“Email Protection”注册。
- 桌面端:打开网站duckduckgo.com/email,下载浏览器插件,然后按指示操作注册。
DuckDuckGo邮箱功能
- 注册成功后会获得一个后缀为“duck.com”的邮箱地址,该邮箱只能接收邮件和回复邮箱,不能主动发送邮箱。
- DuckDuckGo能够删除邮件中多种类型的跟踪器,保护个人隐私。
- 如果使用DuckDuckGo的浏览器插件或移动端App,当您浏览不同的网站时,DuckDuckGo 会自动检测电子邮件字段然后生成唯一的邮箱地址以额外保护免受电子邮件地址分析。
原文地址:
https://www.spreadprivacy.com/protect-your-inbox-with-duckduckgo-email-protection/
]]>本次列出的邮箱符合以下三个标准:
- 免费邮箱;
- 支持PGP Mime,不再考虑支持PGP Inline的邮箱;
- 在网页端就可以使用,无需使用第三方客户端。
Protonmail
Protonmail,这个应该也不用多说了,应该算知名度最高的加密邮箱了。
Mailfence
以前介绍过这个邮箱,我个人还是很喜欢用的,就是每次登录都要输入一次两步验证的验证码有点不方便。还有一点很不错的地方,付费可以使用Exchange同步。
Mailfence - 一个禁止中国IP注册的免费邮箱,注册需要自备梯子。
Disroot
邮箱注册地址:https://user.disroot.org/pwm/public/newuser,Web客户端基于Rainloop,前一段时间升级了Web客户端,已支持PGP Mime发送加密邮件。
以前也介绍过过这个邮箱:Disroot - 支持PGP的免费邮箱。
Vivaldi
基于Roundcube。以前也介绍过,但已经做了较大的改动。
Pissmail
Pissmail同样基于 Roundcube,PGP也是刚支持没多久。
以前的文章:PissMail免费邮箱
Mailo
在这几个邮箱里面。Mailo为邮箱后缀应该算好看的了,但邮箱的界面应该算最丑的了,详见Mailo功能全面的免费邮箱。
]]>使用方法
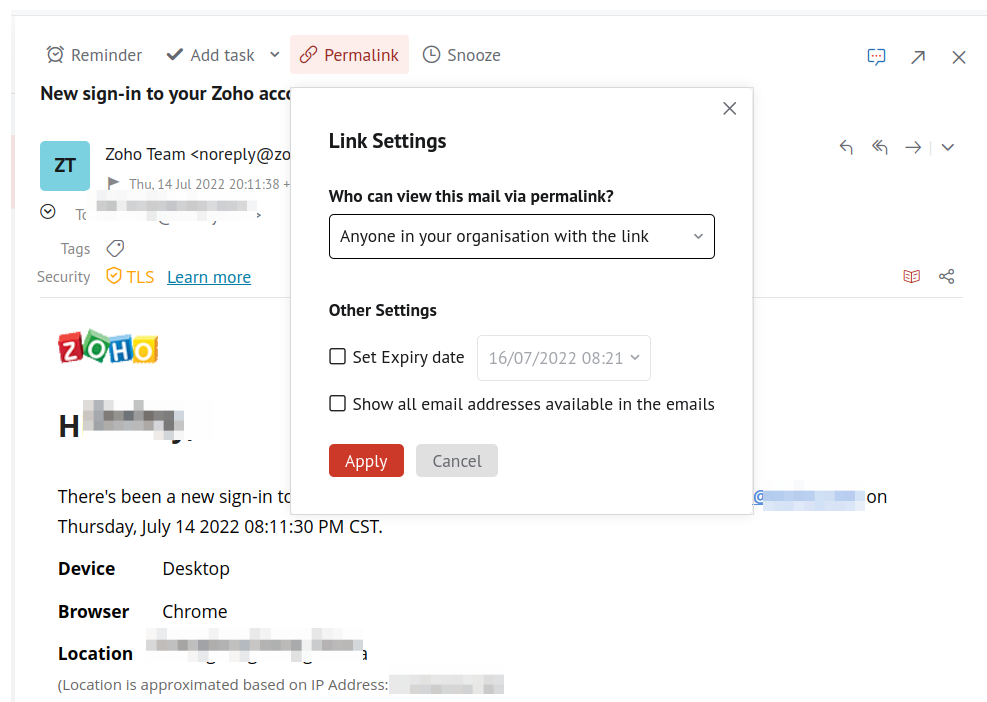
打开邮件,点击邮件最上方菜单栏”Permalink“,会自动生成一个短链接,复制后粘贴在浏览器中就可以查看邮件内容,权限默认为”Anyone in your organisation with the link can view“,即组织内的任何人都可以查看该分享邮件。
点击下方的”Link Setting“,可设置查看权限,日期和是否显示其他人的邮箱地址。权限包含三个:仅自己可以查看、组织内的任何人都可以查看和任何人,分别对应”No one, just me“, “Anyone in your organisation with the link”和”Anyone with the link”。为了安全和隐私建议选前两个,选前两个好像又没什么用,第三个好像也没什么用。
”Delete link“就是删除生成的邮件分享短链接。
Zoho邮箱在功能和界面等方面还是非常不错的,经常有点小创新,就是在邮件发送方面差点,什么都配置上也还是容易进对方的垃圾箱。
]]>Privian除提供马甲邮箱服务外,还提供无广告搜索、网页统计和网络书签等功能,比较鸡肋的是即使能够绑定自己的域名也仅可以生成一个邮箱地址。
账户注册
浏览器中打开官方网站https://privian.io/,可以使用谷歌账户关联登录也可以使用自己的邮箱地址注册登录。以使用自己的邮箱注册为例,点击下方的“Sign up”输入邮箱址和密码并确诊就会收到一封主题为“ Please confirm: verify email”的邮件,打开点击确诊即注册成功。
绑定域名
登录成功后,点开右上角菜单按钮,点击“ Control panel”进入控制面板,打开左侧“Domains”进入域名管理页面。根据提示使用DNS验证域名就可以了,我个人绑定的是二级域名。
域名验证成功后,点击刚添加的域名,启用Email功能,添加MX解析记录后就可以使用马甲邮箱服务了。
创建邮箱地址
点击右侧上方的邮箱图标,进入收件箱。再点击左侧的“Create inbox”创建马甲邮箱地址,可以使用自己的域名或“Random address”,选择“Random address”的话会自动生成一个后缀为“@privian.email”的邮箱地址。
在创建马甲邮箱地址是有三个选项:Virtual inbox,Forwarding和Webhook。选择Virtual inbox会自动创建一个收件箱,需要登录Privian才能查看邮件,邮件会保存7天;选择Forwarding即将邮件转发到指定的邮箱;Webhook应该是类似于触发事件之类的。
]]>邮箱特色
- 免费版邮箱容量大小为2GB,收、发邮件最大支持25MB;
- 支持S/MIME加密;
- 支持邮件定时发送;
- 支持POP3、IMAP和SMTP;
- 最多可添加两个邮箱别名;
- 官方客户端支持Windows和Mac平台。
邮箱注册
- 打开网站https://www.inbox.de/然后点击右上角“Signup”或直接打开https://www.inbox.de/signup,按要求填写相关信息即可,带星号“*”为必填项;
- 填写“First name”和“Surname”,选择喜欢的用户名,注册时只能注册@inbox.de后缀邮箱,@inbox.net和@inbox.org需要以添加别名的方式注册,输入密码后点击“NEXT”进入下一步;
- “Address”相关信息可以不填,直接点击“NEXT”进入下一步;
- “Contact Details”中需要填写备用邮箱“Alternative email”用于找回密码,直接“NEXT”;
- “Voucher Code”也不需要填写,直接“Next”;
- “Complete Signup”需要验证,然后选中同意“Privacy Policy”和“TOS”,点击“SUBMIT”即注册成功。
添加别名
登录邮箱,点击右上角小齿轮“设置”选项进入设置页面,左侧“Aliase”打开即可添加邮箱别名,每个免费账户只可添加两个邮箱别名,建议选择@inbox.net和@inbox.org,类型推荐选择第二个“ Sender and Recipient”,即别名可以用于发送邮件也可以用于接收邮件。
添加S/MIME证书
点击设置选项页面左侧“Keyring”选项,”Import Certifacate”导入.p12或.pfx的证书;“Request Certificate”生成证书,但在实际使用时会提示“Sorry, we cannot issue a certificate for you at this time for unknown reasons. Please try again later and contact us in case the problem persists.”的错误信息,暂时不清楚原因。
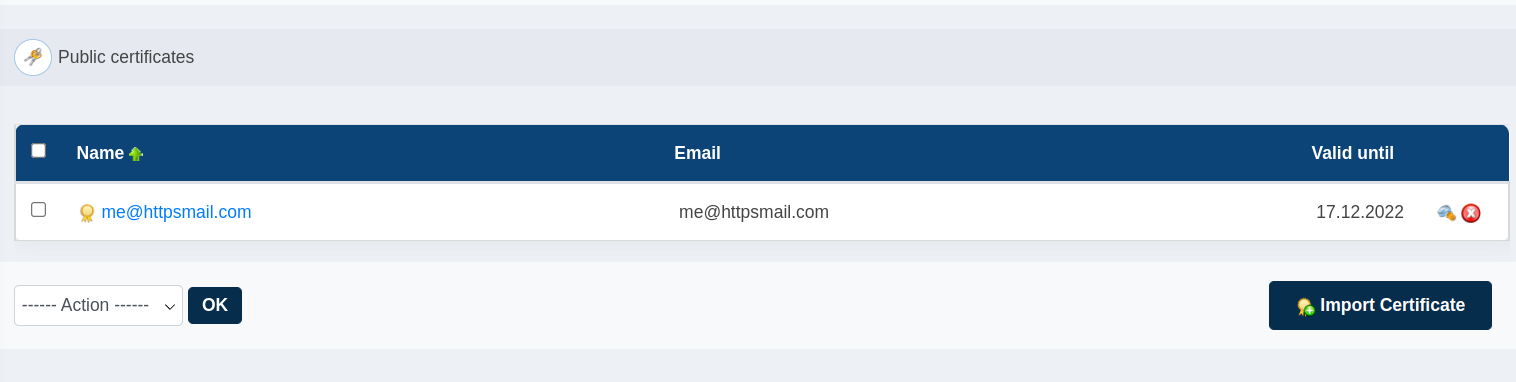
如果给对方发送S/MIME加密的邮件,需要在“Public certificates”下导入.pem格式的证书。
客户端设置
- POP3:mail.inbox.de,995,SSL
- IMAP:mail.inbox.de,993,SSL
- SMTP:mail.inbox.de,465,SSL
其它问题
用inbox.net后缀发送到飞书邮箱会退信,需要将域名添加到白名单中,其它后缀未测试。
]]>特色
- 邮箱容量大小为1GB,但Skiff主页介绍是10GB,不知是有误还是后期会增加;
- 支持别名,最多添加2个别名;
- 支持两步验证;
- 端到端加密;
- 支持iOS、Android和Mac系统;
- 数据存储可以选择IPFS去中心化存储方式;
- 邮箱UI简洁,看上去很舒服;
- 除了邮箱功能外自带Workspace,可以发布分享“Page”。
注册
- 点击邮箱注册链接https://app.skiff.com/signup?referral=fuckyou(含个人推荐链接),打开网站后输入自己的邮箱地址然后点击下方按钮“Continue”,等待接收确认邮件;
- 收到邮件后,点击邮件内的“Confirm email”按钮(如果没有收到邮件查看一下垃圾箱),在打开的页面中输入密码并确认;
- 保存“recovery key”,直接点击“Save key as PDF”按钮即可;
- 选“Team”或“Personal”没什么区别,为了简化注册过程建议选“Personal”;
- 注册Workspace成功后,在页面顶端“You’re invited to Skiff Mail’s Alpha release. Switch to your inbox to send end-to-end encrypted, private emails.”通知后点击“Claim account”激活邮箱地址;
- 邮箱ID需6位数以上,可以包括字母、数字和英文句号,每个邮箱账户最多可以设置3个邮箱ID。(跟谷歌一样,”httpsmail”和“https.mail”是一样的,在邮件收发时会自动忽略英文句号,所以在注册的时候可以通过添加英文句号补足7位数长度)
设置
- Profile & Appearance:设置显示名称、主题以及时间格式。
- Security:开启两步验证、更改密码、生成账户恢复码。
- Verification:验证身份,其他Skiff用户可以通过验证密码验证你的身份。
- Account:更改数据依存格式,可选Skiff服务器和IPFS;除此之外,还可以添加邮箱别名、删除账户。
- Plans:套餐升级以及生成邀请链接等,每邀请一个用户10美元。
Workspace
使用方法我就不介绍了,用起来还可以。
其它
主页的介绍中,Skiff是支持自定义域名邮箱的,但目前暂未发现如何设置。
]]>在前期已经将旧版转换为Google Workspace,如果个人使用可以联系谷歌团队。
如果我将 G Suite 免费版(旧版)用于个人用途,该怎么做?
如果您将 G Suite 免费版(旧版)用于非商业用途,则可以点击此处或前往 Google 管理控制台,选择不转换到 Google Workspace。您可以继续通过自定义域名使用 Gmail,继续使用 Google 云端硬盘和 Google Meet 等免费 Google 服务,以及保留购买内容和数据。
如果您不采取任何行动,您的帐号将于 2022 年 8 月 1 日被暂停。如要重新激活您的帐号,您需要升级到 Google Workspace,或者以不用于商业用途作为理由选择不转换。
G Suite 免费版(旧版)仅可用于非商业个人用途。如果您将 G Suite 免费版(旧版)用于商业用途,我们会将您的帐号转换到 Google Workspace。G Suite 免费版(旧版)不提供支持服务,而且我们未来可能会移除某些商务功能。
如果您在 2022 年 1 月 19 日之后转换到了 Google Workspace,而且您将 G Suite 免费版(旧版)用于个人用途,则可以与支持团队联系。
详细信息见官方通告:https://support.google.com/a/answer/60217?hl=zh-Hans
]]>生成密钥
对于不熟悉PGP密钥的可以使用在线PGP工具https://pgpsuite.com/简单、快速生成GPG密钥,如下图所示:
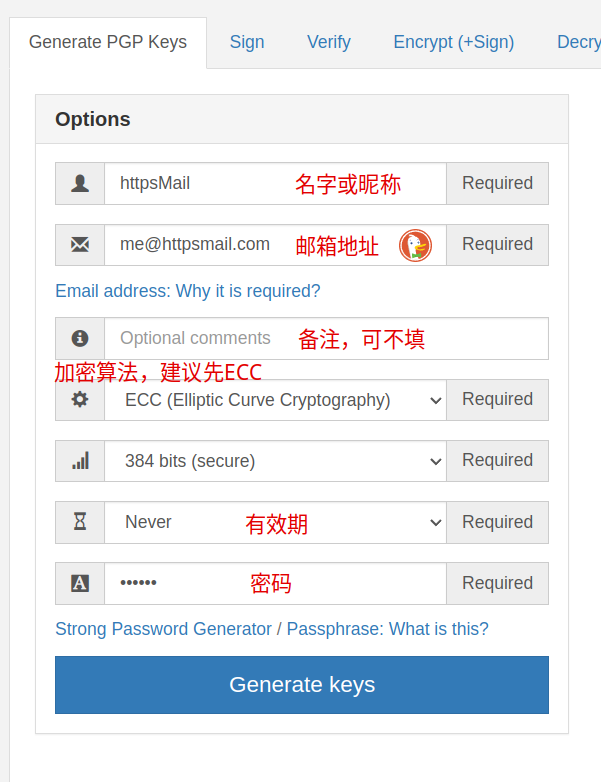
依此输入名字、邮箱地址、算法、密钥长度、密钥有效期和密钥密码,然后点击下方的”Generate Keys“即在右侧生成”Public Key“和”Private Key“,其中”Public Key“即公钥,可公开,主要用于对方向你发送加密邮件;”Private Key“即私钥,需要安全保存,可用于解密邮件、签名等。
上传公钥
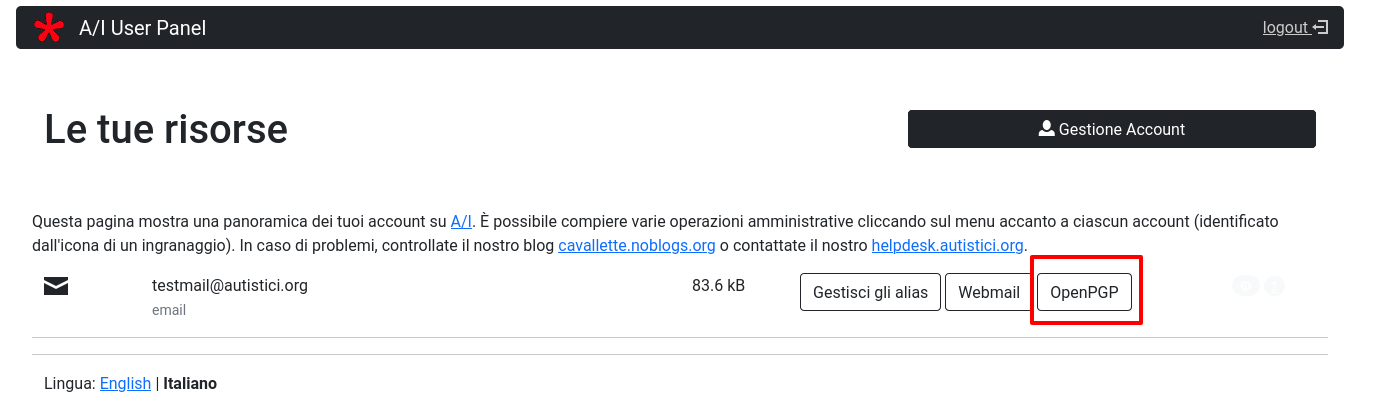
浏览器访问https://accounts.autistici.org/登陆邮箱账户管理界面,点击右侧的”OpenPGP“链接,在打开的链接中粘贴邮箱ascii格式的公钥并点击”Upload Key“上传即可。
官方指南详见:https://www.autistici.org/docs/userpanel#pgp
WKD测试
关于WKD(Web Key Directory)可以查看前期的文章——”利用WKD发布自己的PGP公钥(https://www.httpsmail.com/wkd.html)“,简单来说,就是从网址导入PGP公钥。
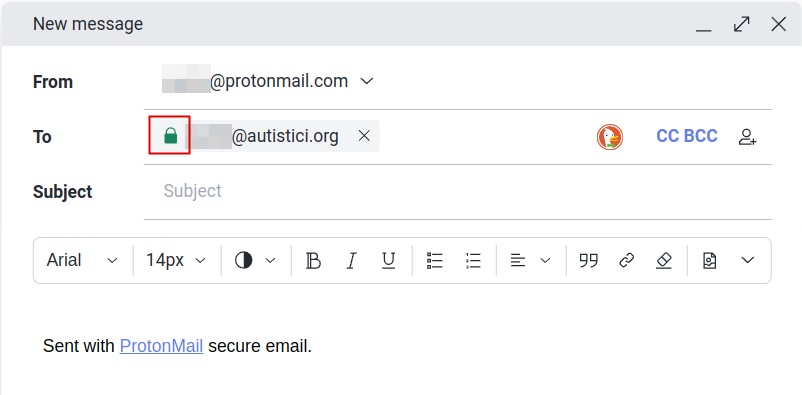
像常用的加密邮箱Protonmail和Mailfence都是支持WKD的,包括Thunderbird邮箱客户端,以Protonmail为例,成功上传Autistici邮箱公钥后,在Protonmail邮箱中新建邮件,在收件人中输入Autistici的邮箱地址,如果在Autistici邮箱前有一个绿色的、锁住的小锁即表示WKD链接正确,如下图所示:
2
3
4
5
6
7
8
9
10
11
12
13
14
15
16
17
18
19
20
21
22
>
> CTemplar is closing and the last day of operation for this email service will be on May 26 of 2022.
>
> To transfer your contact list:
>
> - Go to https://mail.ctemplar.com/mail/contacts
> - Click on the button to export your contacts.
> - Select your preferred format (CSV or VCF).
>
> To transfer your emails:
>
> - Visit ctemplar.com/ctemplar-is-shutting-down and wait for the instructions to be updated within a day or two. We are generating a backup of each account and it will available to download soon.
>
> Remember to change your account usernames to the new service.
>
> Please transfer all your data out of this email service by May 26 of 2022 or it will be permanently lost.
>
> A huge thank you to everyone that supported us,
>
> The CTemplar Team
>
联系人等相关信息可访问https://mail.ctemplar.com/mail/contacts,登录后导出CSV或VCF格式文档,方便导入其它邮箱。
邮件等相关数据近日内将会有相关操作提示,下载备份邮件。
其它信息可访问Ctemplar博客https://ctemplar.com/blog/
]]>从这个名字来看,应该跟Cock.li差不多,也是个“中二少年”,其个人网站也是二次元的风格。
目前支持的邮箱后缀有:
- @pissmail.com
- @incel.email
- @shitposting.expert
- @hatesje.ws
- @child.pizza
- @genocide.fun
- @dmc.chat
用户名最短支持1位数,注册过程简单,仅需要输入用户名、密码和验证问题即可。
邮箱注册
打开邮箱注册网址https://pissmail.com/register.php,按页面要求填写用户名、密码及验证,完成后点击左侧的“Confirm”即注册成功。
服务条款
- 仅提供免费邮箱服务,无担保,不负责其它。
- 服务条款会随时更改且不另行通知。
- 有下列情形的会冻结邮箱账户:发送垃圾邮件;进行任何违反美国法律的活动;使用该邮箱地址滥用其它服务;未列出的其它情形。
客户端设置
- SMTP:mail.pissmail.com:465 (SSL/TLS)
- IMAP: mail.pissmail.com:993 (SSL/TLS)
邮箱的隐私政策感兴趣的可自行查看:https://pissmail.com/privacy.html。
总之,玩玩即可。
]]>启用方法
登陆邮箱Web页面,系统会提示“Add ###@proton.me to your account for free, for a limited time only. Activate”,点击“Activate”按提示激活即可。
如图所示,默认邮箱发件人会显示新激活的“@proton.me”的邮箱地址:

已在Thunderbird和K-9客户端测试,分别发送PGP加密邮件至Protonmail和Mailfence邮箱,结果一致。
如下图:
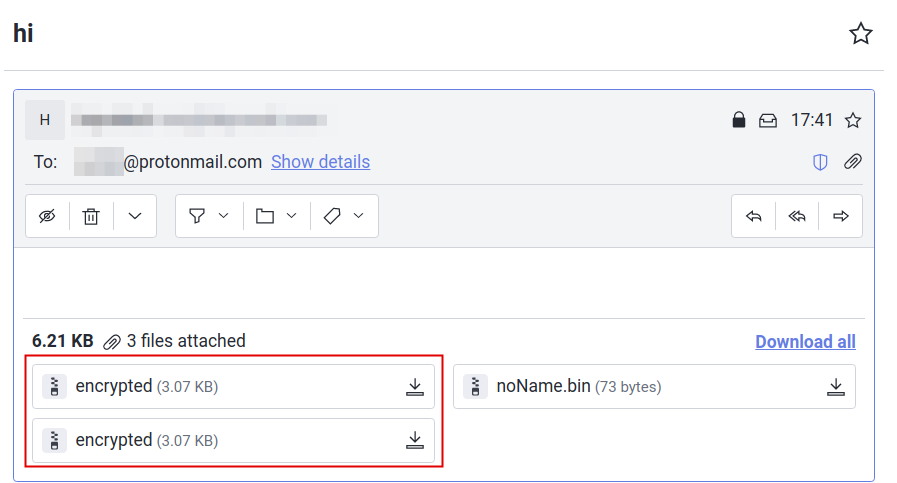
通过Thunderbird第三方邮件客户端发送PGP加密邮件至Protonmail邮箱,如图所示,附件个数为3个,其中两个附件用户名相同,可能因此导致Protonmail无法判断该解密哪个文件进而无法正确解密文件。将两个“encrypted.asc”下载后,使用其它工具均可以正常解密该PGP邮件信息。
更有意思的是:使用163邮箱通过第三方客户端发送PGP至飞书邮箱,在飞书邮箱收到的邮件中也是3个附件,而在163的发件箱中附件则为2个。
- 飞书收件箱
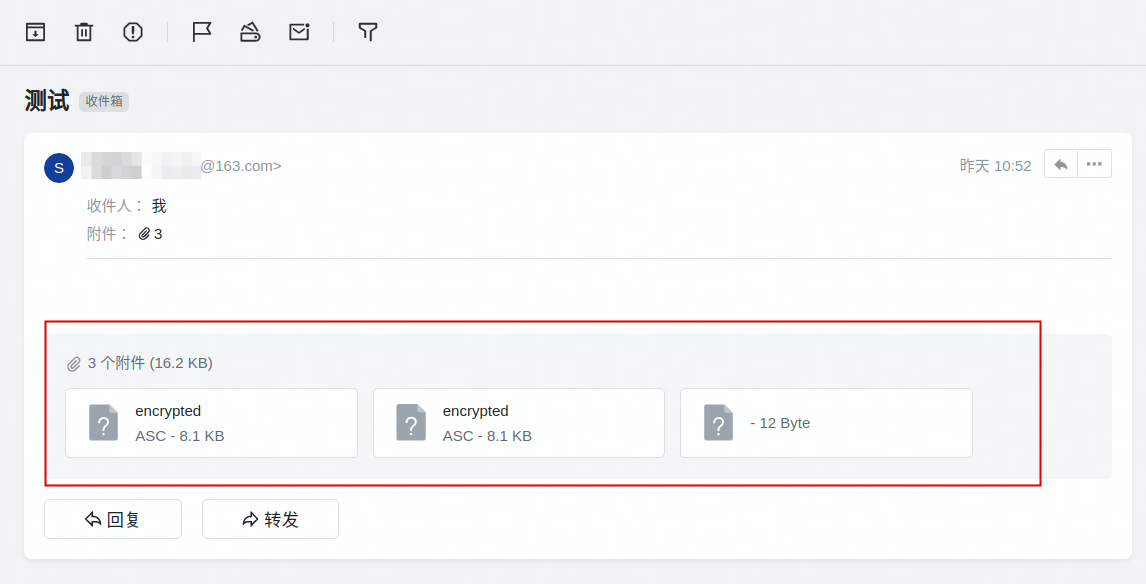
- 163发件箱

跟飞书客服反馈,虽然对方也没说出个456来,但也有一个意外小收获:

在意隐私问题的慎用。
]]>为什么需要这么多邮箱帐户呢?简而言之,个人安全与隐私的需要。具体就不去讨论了,直奔主题了解一下4个邮箱账户的用途。
- 第一个,主要用于银行和金融等比较敏感的账户。
直白一点就是跟钱相关的,我个人是使用的腾讯企业邮箱,与微信绑定能即时收到邮件通知,而且在国内很少会有收不到银行邮件的问题。但无论你是使用腾讯还是网易,为了账户的安全一定要开通两步验证。
- 第二个,只用于个人通信,包括家人和朋友等。
但咱中国人家人和朋友之间交流主要还是微信,可根据自己的实际情况把范围扩大一些,如网友之类的。我个人使用的是自己的域名邮箱,域名为个人名字的全拼,好记。
- 第三个,用于其它网站注册。
主要用于接收优惠信息、网站用户验证以及垃圾邮件。
- 第四个,用于与政府部分通信。
以上4个帐户的分类及使用仅供参考,毕竟国情不同,但邮箱账户专户专用还是值得提倡的。
]]>除了邮件收、发方面外,切换到飞书还有以下多个方面的原因:
- 邮箱容量足够大
注册用户200GB,通过企业或组织认证后邮箱容量可达500GB,个人使用200个GB应该是足够了。
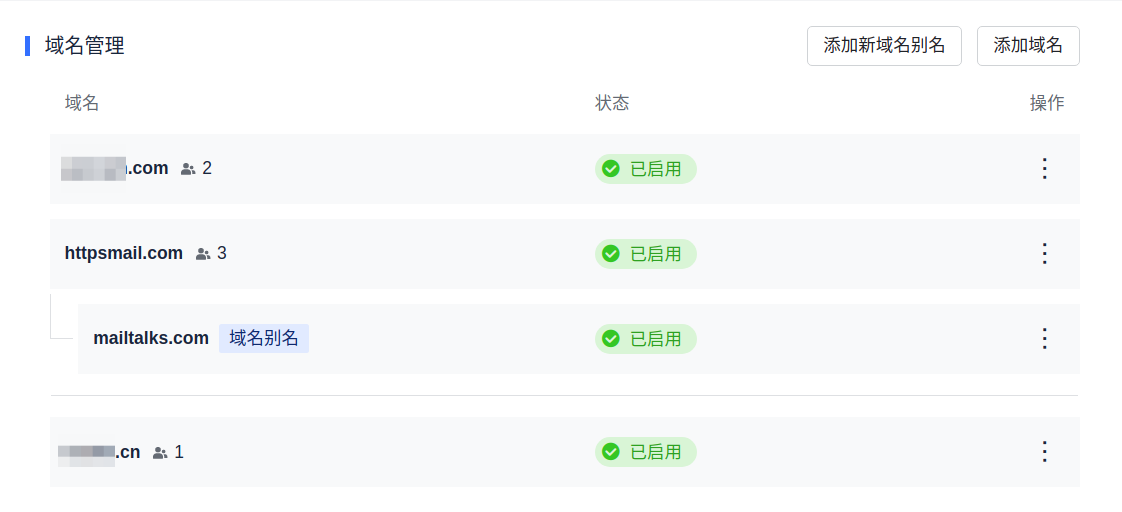
- 支持添加多个域名、域名别名和邮箱别名
目前已添加多个域名,在数量方面应该是没有限制的。
- 邮箱界面简洁
配色简单,一眼看上去就挺舒服。

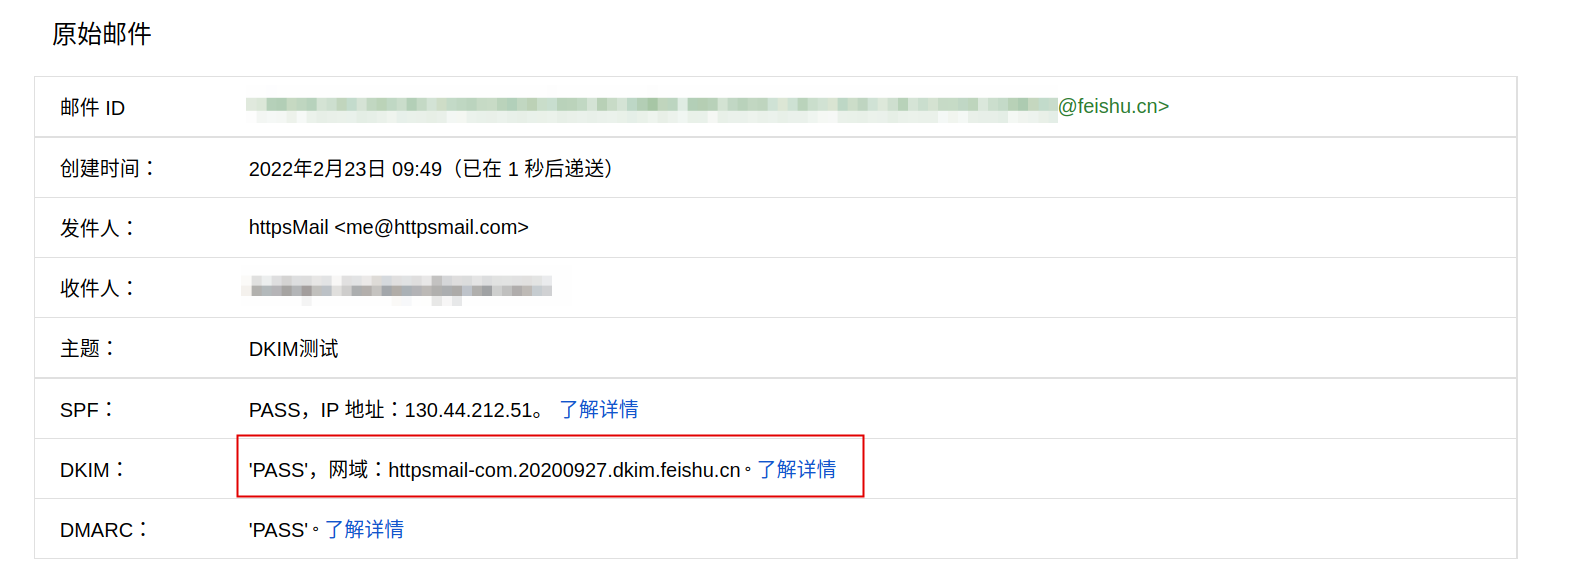
- 支持DKIM
虽然在配置DNS解析记录的时候并未显示添加添加DKIM记录,但在已发送的邮件header中是包含DKIM的。
- 支持IMAP和SMTP
需下载飞书客户端,点击左上角头像进入设置界面,选择“邮箱”选项,在“第三方邮箱客户端登录”下点击“进入设置”,生成专用程序密码然后按照提示添加即可。
- 邮箱登陆方式比较安全
类似于微软别名,无法直接使用域名邮箱登陆,需使用手机或绑定的邮箱地址才能登陆,更加安全。当然了可能也有人不喜欢这种方式。
- 支持邮件一键归档
很简单的一个功能,就是把收件箱的邮件移动到“归档”文件夹,但国内的大多数邮箱都不支持,需要自己新建个文件夹然后再把邮件移动到该文件夹。
唯一的缺点可能就是不支持Catch all,但这样也少了些垃圾邮件,好在在添加邮箱别名方面没有什么限制可以弥补一下。
目前仍在使用的其它域名邮箱:
- Microsoft 365:主要使用的邮箱,大部分网站的注册都是使用的该邮箱地址,可惜只能添加一个域名、一个邮箱地址。
- Tutanota:另一个主邮箱,个人其它网站的联系方式都是使用的该邮箱地址,老版账号已绑定了4个域名。
- 腾讯邮箱:与微信绑定,主要用于接收银行账单和其它需要即时通知的服务。
- Mailway + Gmail:绑定了两个域名,转发到Gmail并使用Gmail发信。
- Microsoft E5:绑定了两个域名。
- Zoho:老版账号,还能使用客户端同步。
- Postale:能在线使用PGP邮件加密和解密。
邮箱特色
- 邮箱容量大小为1G;
- 每天邮件发送和转发数量分别为15封;
- 支持创建别名以及修改默认邮箱;
- 支持恢复25天内删除的邮件;
- 支持两步验证,TOTP和U2F两种方式;
- 支持PGP邮件加密存储;
- 支持POP3、SMTP和IMAP,需使用专用程序密码;
- 支持自动回复。
邮箱注册
- 可以通过普通浏览器访问https://onionmail.com/或https://onionmail.org/,但对IP要求较高;推荐使用TOR浏览器访问http://pflujznptk5lmuf6xwadfqy6nffykdvahfbljh7liljailjbxrgvhfid.onion/,如果该IP无法成功创建用户时可切换IP两次尝试。优先推荐荷兰IP地址。
- 打开官网后,点击页面右上角或页面中心的“Creat account”进入邮箱账户注册页面;
- 依此输入名字、用户名和密码即可,然后勾选服务协议,点击“Create new account”,如果没有错误提示即注册成功。注意:用户名注册成功后无法修改,但邮箱地址可以删除,使用客户端时邮箱地址即使修改但用户名仍为该用户名。
- 登录邮箱即代表激活邮箱。
PGP加密
OnionMail邮箱的PGP加密仅支持邮件加密存储,不能在线解密收到的加密邮件或发送加密邮件。如需使用须配合客户端。
设置方法:
- 登录邮箱后点击页面右上角名字图标,在下拉菜单中选择“Security”进入设置界面;
- 选中“GPG Encryption”选项卡,勾选“Enable encryption”启用加密;
- 将邮箱公钥粘贴到输入框内保存更新后即可。可使用官网上方的PGP工具https://pgpsuite.com/
注意事项
3个月内未使用,系统会删除用户。
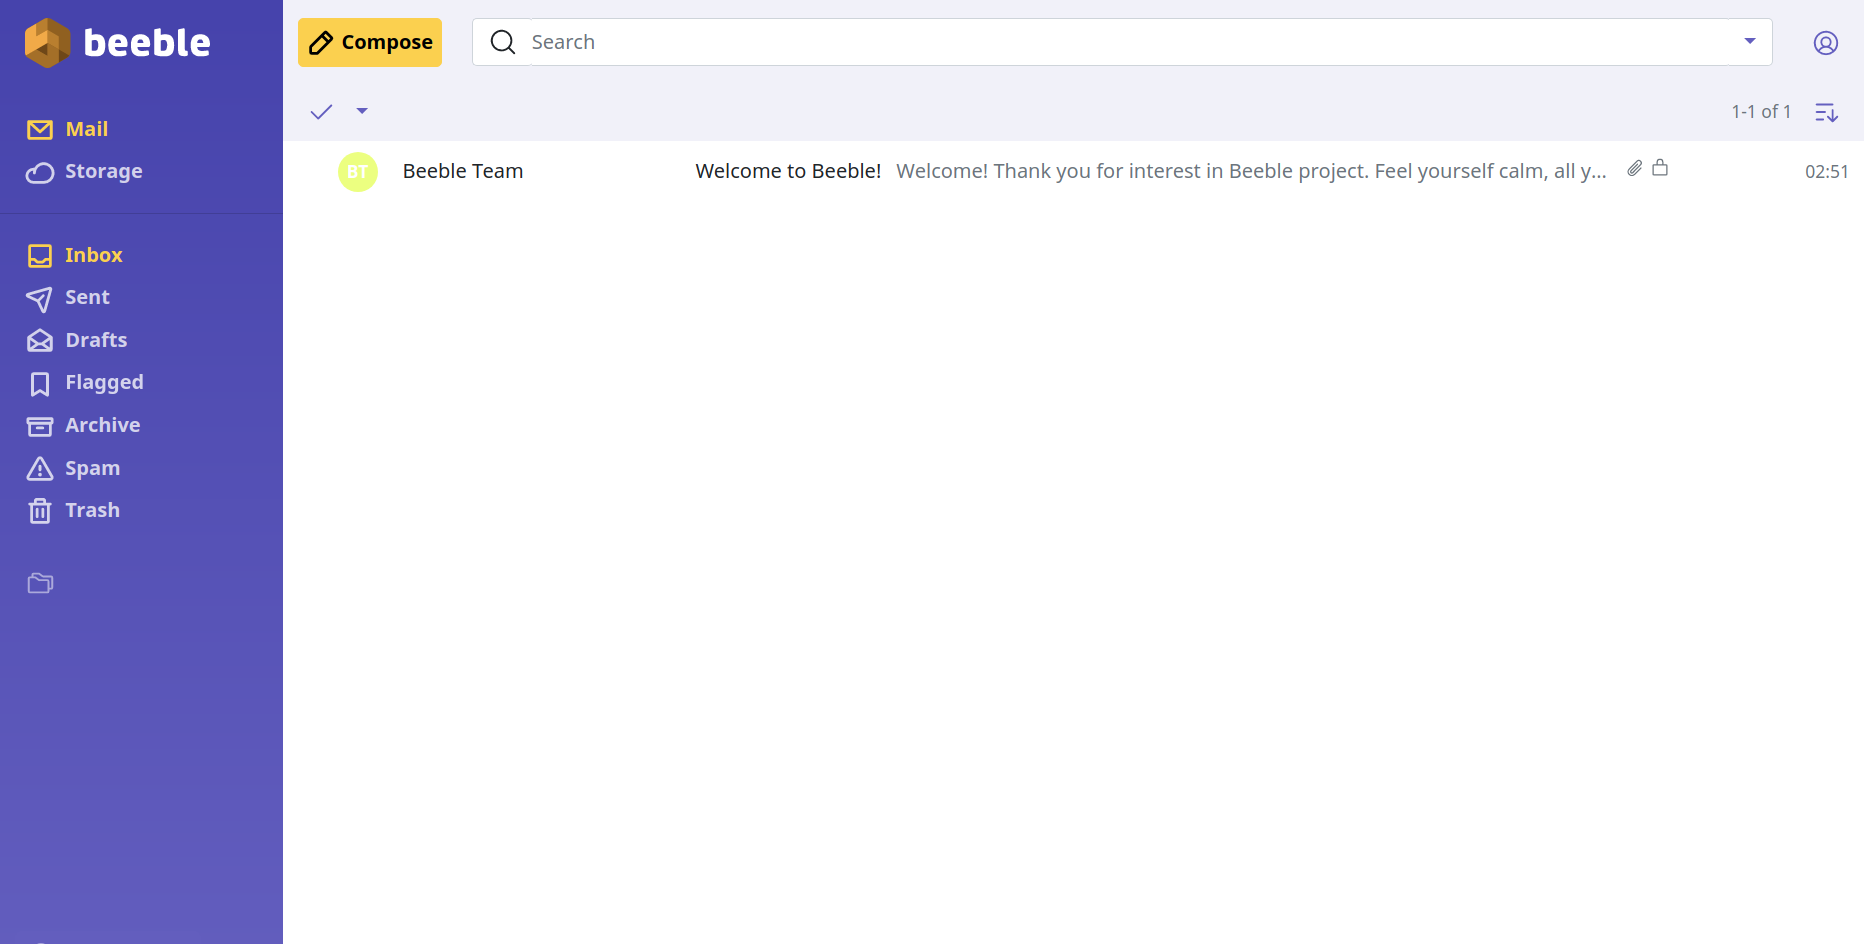
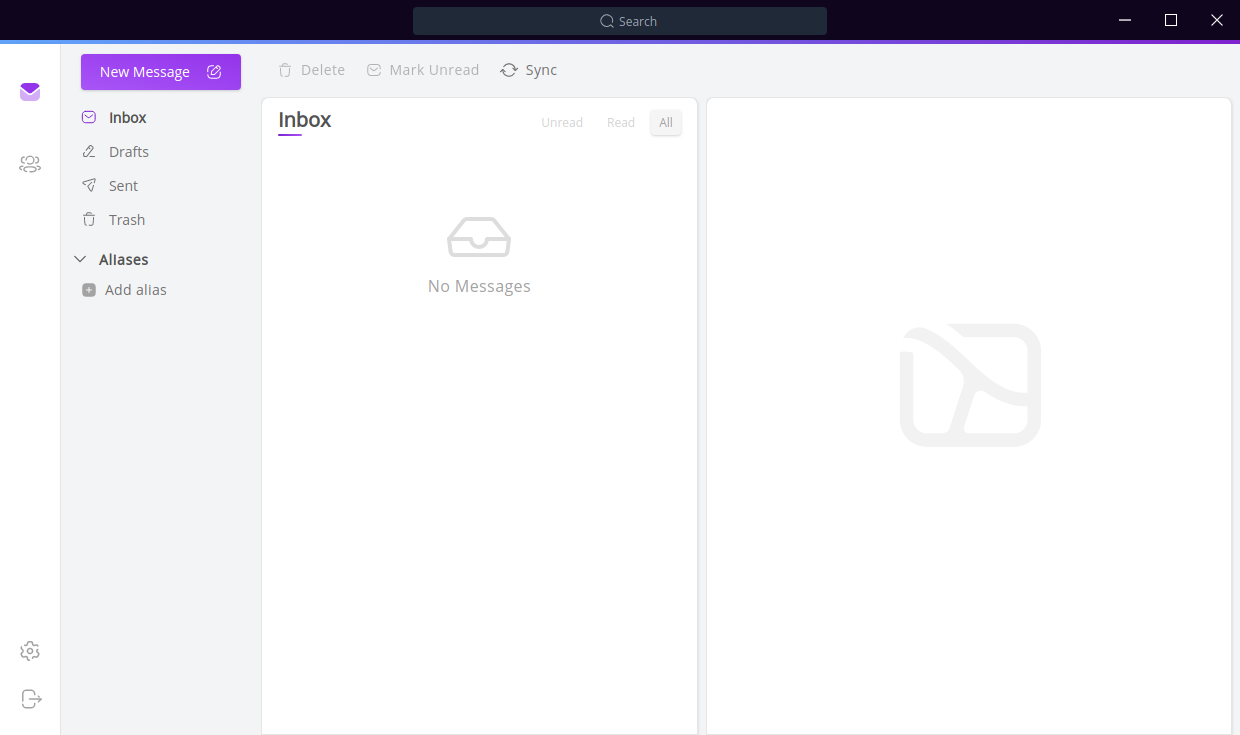
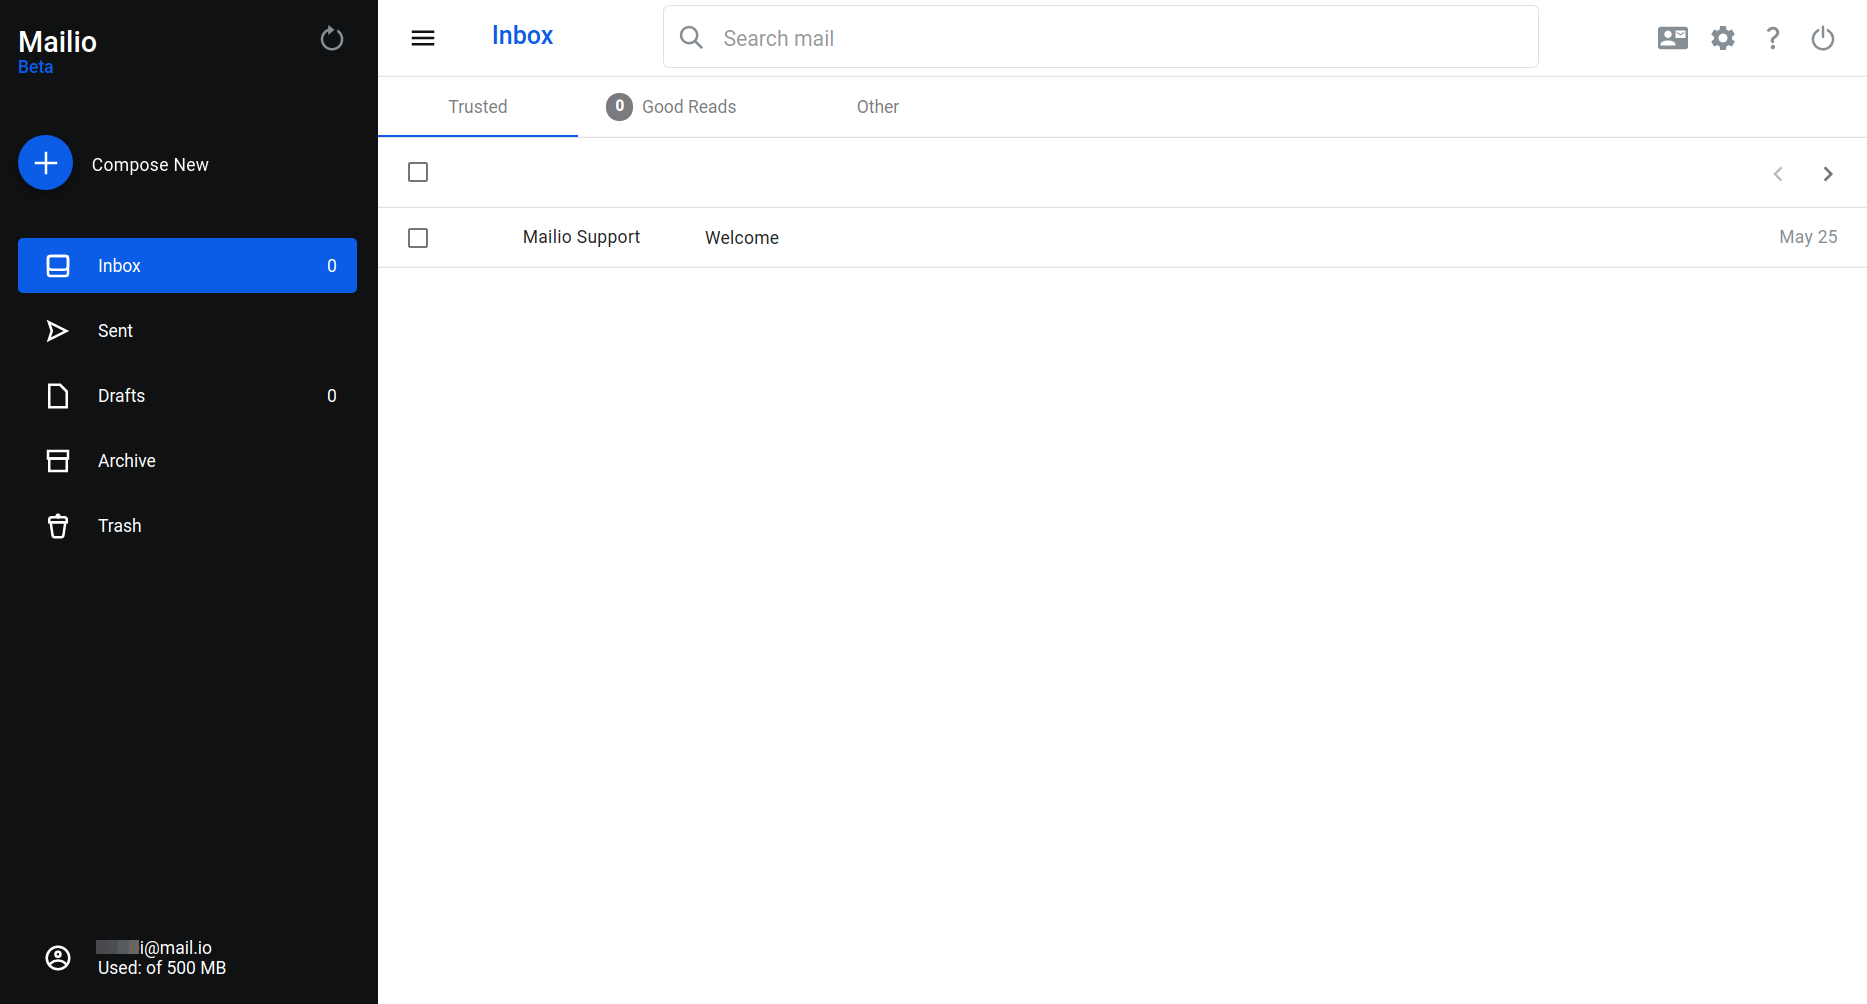
]]>邮箱界面如下:
邮箱特色(免费版)
- 1GB邮箱容量;
- 支持2048位长度PGP密钥;
- 每天最大可发送邮件150封,个人使用足够了;
- 附件最大支持10MB;
- 支持中文。
邮箱注册
- 打开网站https://mail.beeble.com/,在上方导航栏点击“pricing”然后选择“Free”方案;
- 填写自己喜欢的用户名,长度需大于3位数、允许以数字开头;
- 输入密码并确认,密码长度必须大于12位且包含大写字母、小写字母和数字;
- 填写其它项并勾选服务协议;
- 填写完成后点击“Sign Up”等待Beeble完成新用户注册;
- 复制并保存账户恢复备用码。
其它问题
- 密码如果忘记无法恢复,这也是大多数加密类邮箱的特性;
- 数据以加密的形式存放在多个数据中心;
- 不支持POP3、IMAP和SMTP,无法使用第三方客户端;
- PGP的支持不完善,无法导入、导入密钥。
邮箱特色
- 无广告
- 官网介绍支持端到端加密(Give end-to-end encrypted Emails that are safe throughout the delivery process and cannot be accessed by Email servers.)???存疑;
- 支持DKIM和DMARC,但是没找到在哪设置DKIM;
- 支持IMAP、POP3和SMTP。
邮箱创建
进入官网https://500mail.com/,使用Google账户登陆按要求填写相关信息。使用微软或自己的域名邮箱一直无法成功新建用户。
点击“Add Domain”添加域名;
输入域名后点击“Generate DNS Instructions”,然后依次添加SPF、MX(注意优先级,3条MX记录优先级依次为1、2、3)、CNAME(记录值改为“数字.500mail.com”)和DMARC(主机记录值应为“_dmarc”不是“_dmrac”)解析记录,添加完毕后点击“Veryfy & Save”等待验证(验证所需时间非常长);
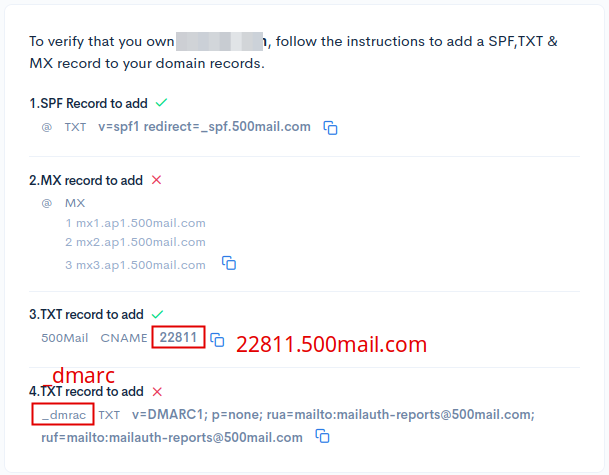
验证完成后,点击“Add MailBox”添加用户。
客户端设置
- IMAP/POP3: mail.ap1.500mail.com SSL/TLS
- SMTP: mail.ap1.500mail.com SSL/TLS 587
使用体验
邮箱界面如下图:
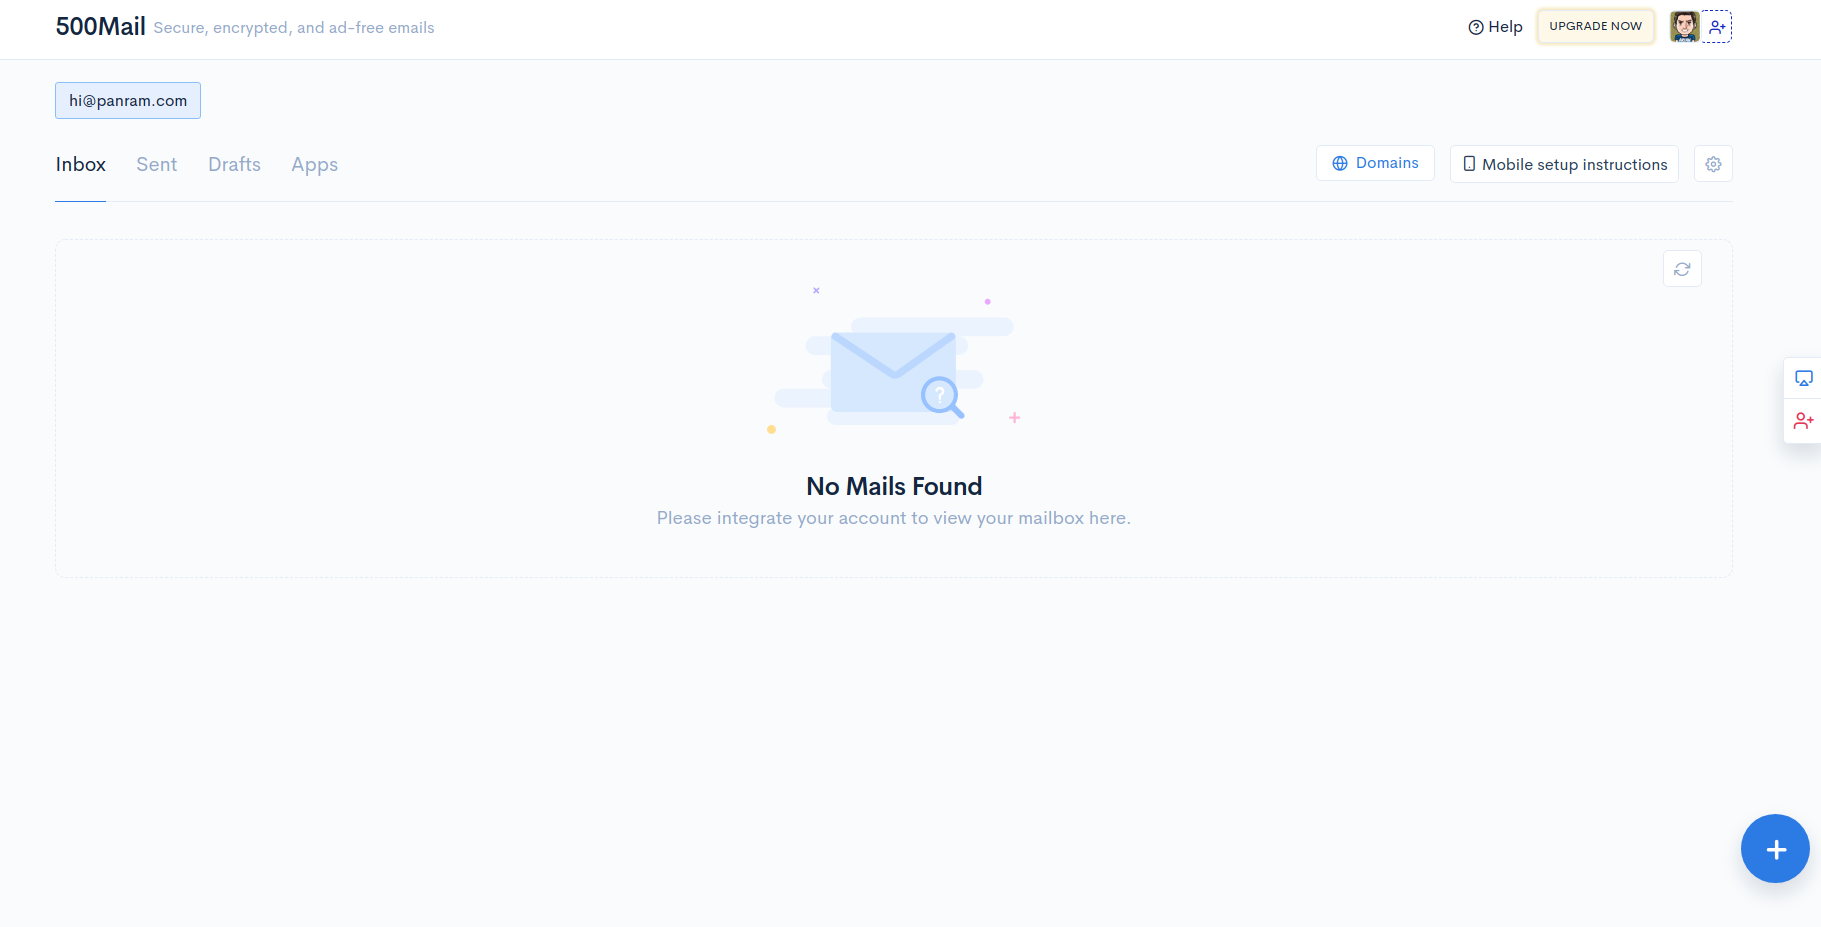
点击右下角的“+”是新发建邮件。
分别发送邮件至Yandex域名邮箱、微软邮箱和谷歌邮箱,Yandex域名邮箱3分钟内未收到,微软进垃圾箱,谷歌提示邮件未加密。
从收到邮件的Header信息来看应该也是用的Amason。
综合使用下来感觉一般。
]]>目前邮箱在Beta测试阶段,可在官网https://www.telios.io/#/输入自己的邮箱加入等待列表,5天左右可能就会收到邀请码。
邮箱特色
- 开源;
- 邮件收发点对点,虽然采用的P2P模式收、发邮件但还是存在一个中心服务器以便与其它邮箱地址联系,而且当用户不在线时,邮件会暂时以加密的形式存放在服务器中;
- 端到端加密;
- 所有数据以加密的形式存放于自己的设备中。
邮箱注册
在收到的邀请邮件中点出”Download“下载桌面客户端。
- 输入收到的邀请码;
- 勾选相关声明及协议;
- 选择自己的用户名,可包括字母、数字及英文句点”.”,长度最短应该支持4位(试过多个3位数ID都提示不可用);
- 输入密码,输入时下方会提示暴力破解该密码需要的时间;
- 输入备用邮箱;
- 下载密钥。
目前支持WDK的邮箱有:
对于个人用户来讲,只需简单地将邮箱的公钥上传到服务器指定的文件目录即可,开始之前请确保:
- 邮箱地址为自己的域名邮箱;
- 服务器为Linux。
创建目录
登录Linux服务器,在域名网站的根目录下创建”.well-known/openpgpkey/hu“,
mkdir -pm 755 .well-known/openpgpkey/hu
注意,”.well-known“前有一个英文句号标点”.”,且全部为小写。
然后在”.well-known/openpgpkey“文件夹下新建”policy“文件。
touch policy
上传公钥
首先,需要在自己的电脑上获取邮箱公钥的Hash值,终端输入:gpg -k --with-wkd-hash me@httpsmail.com,显示结果如下:
1 | pub rsa3072 2019-11-20 [SC] [expires: 2024-08-23] |
其中,me@httpsmail.com下面的”s8y7oh5xrdpu9psba3i5ntk64ohouhga“即为该公钥的Hash值。
第二步,导出公钥。终端运行:gpg --export me@httpsmail.com > s8y7oh5xrdpu9psba3i5ntk64ohouhga导出邮箱对应的公钥。
注意事项:公钥必须为二进制格式文件且公钥文件名为该邮箱的Hash值。
最后将公钥上传到服务器”.well-known/openpgpkey/hu“文件夹下。
结果测试
打开测试网址https://metacode.biz/openpgp/web-key-directory,在文件框内输入邮箱地址”me@httpsmail.com“然后点击右侧的”Check“按钮。
1 | Direct: key: https://httpsmail.com/.well-known/openpgpkey/hu/s8y7oh5xrdpu9psba3i5ntk64ohouhga?l=me |
显示”found key“即已成功。
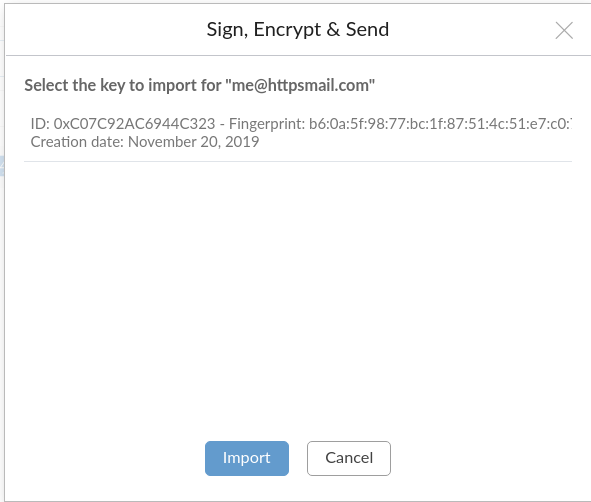
登录Mailfence邮箱,新建邮件并选择使用OpenPGP加密,输入邮箱地址点击发送就会自动查找相应的公钥,选中并点出导入即成功发送PGP加密邮件。
如下图:
其它
- Protonmail添加联系人后未自动导入,我得再研究研究。
- WDK有两种方式:Advanced和Direct,以上方法为Direct方式,Advanced方式是通过DNS域名解析,感兴趣的可以参考一下下方所列的参考资料。
参考资料
]]>邮箱界面见下图:
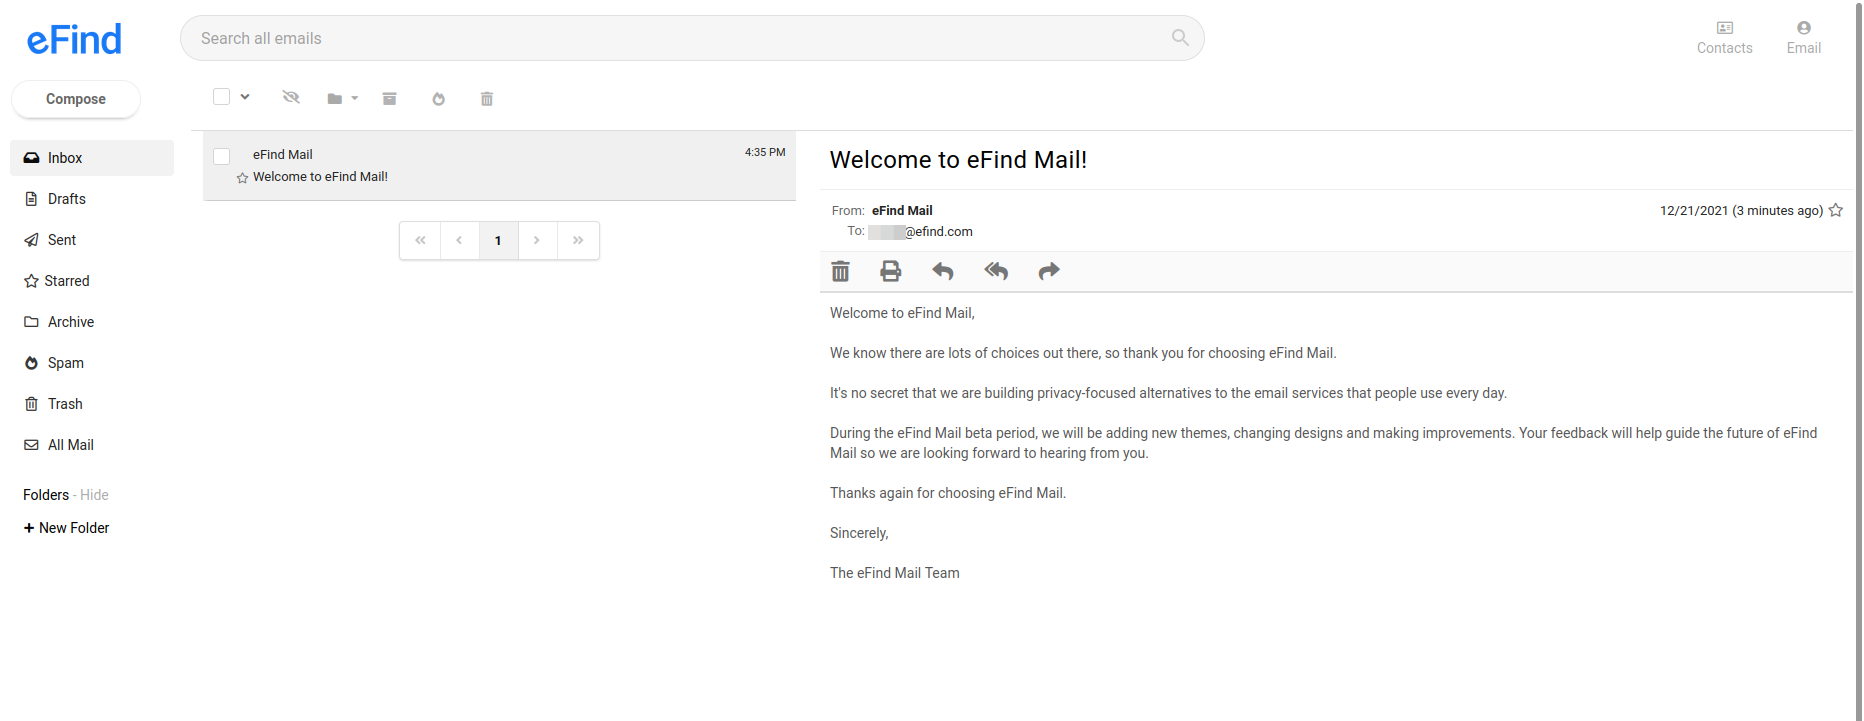
注册地址:https://mail.efind.com/sign-up
注册过程很简单,打开网站后,简单填写用户名(最短支持4位数ID)、密码和备用邮箱,填写完成后点击“Create Free Account”即注册成功。然后查看备用邮箱中收到的eFind.com验证邮件,点击链接确认即可。
友情提示一点,我用微软邮箱作为备用邮箱一直未收到验证邮件,包括“Live.com”和“Outlook.com”两个后缀。
邮箱设置
邮箱的设置选项很少,“设置”选项位于界面的右上角。
- Mailbox:返回邮箱;
- Account: 修改邮箱签名、关闭邮箱小尾巴、修改备用邮箱;
- Folders:新建、管理邮箱文件夹;
- Security:修改密码;
- Deactivate:删除账户。6个月内可恢复,6个月后删除。
打开 https://lockrmail.com/open-beta/ 直接注册。
申请优先体验
打开官方网站 https://lockrmail.com/ ,点击“Join the waitlist”,在弹出的窗口中输入邮箱地址并确认;大约2天之后就可以收到邀请注册的邮件。
邮箱注册
- 在邮箱中打开注册链接;
- 输入申请邀请码时的邮箱,点击“Next”进入下一步;
- 输入“Fisrt Name”和“Last Name”;
- 选择自己喜欢的用户名;
- 输入密码,密码长度必须超过6位数,且包含至少一个大写字母、小写字母、数字和特殊符号;密码输入完成后,勾选下方的两个协议,点击“Finish”完成注册;
- 注册完成后,邮箱将收到一封激活邮件,点击链接激活即可。
其它
每添加一个收件人可获得一个邀请名额,邀请5个人可赠送一幅太阳镜,邀请10个人可赠送一顶帽子。
]]>Firefox Relay与Duck邮箱、AnonAddy和SimpleLogin是一样的,只不过有的叫”Masked Email”,有的叫“Email Protection”或“Anonymous Email Forwarding”,中文统一叫“马甲邮箱”就可以了,主要的作用是通过提供一个类似于别名的邮箱地址来保护自己的真实的邮箱地址,同临时邮箱一样,但在隐私和安全方面比临时邮箱要更好一些,但是马甲邮箱无法规避垃圾邮件除非该马甲邮箱地址不再使用。因为Firefox Relay使用的是Amazon SES(Amazon Simple Email Service),所以Relay对垃圾邮件的判定也是基于Amazon SES。
与其它马甲邮箱不同的是,Relay可以使用马甲邮箱地址对收到的邮件进行回复,但回复时间必须在收到邮件起3个月内。除此之外,Relay支持附件转发,但邮件的总大小不得超过150KB,相当于不支持。
了解或使用Firefox Relay,可访问https://relay.firefox.com。
]]>注册地址
https://www.infomaniak.com/en/free-email,邮箱用户名最短支持3位数。
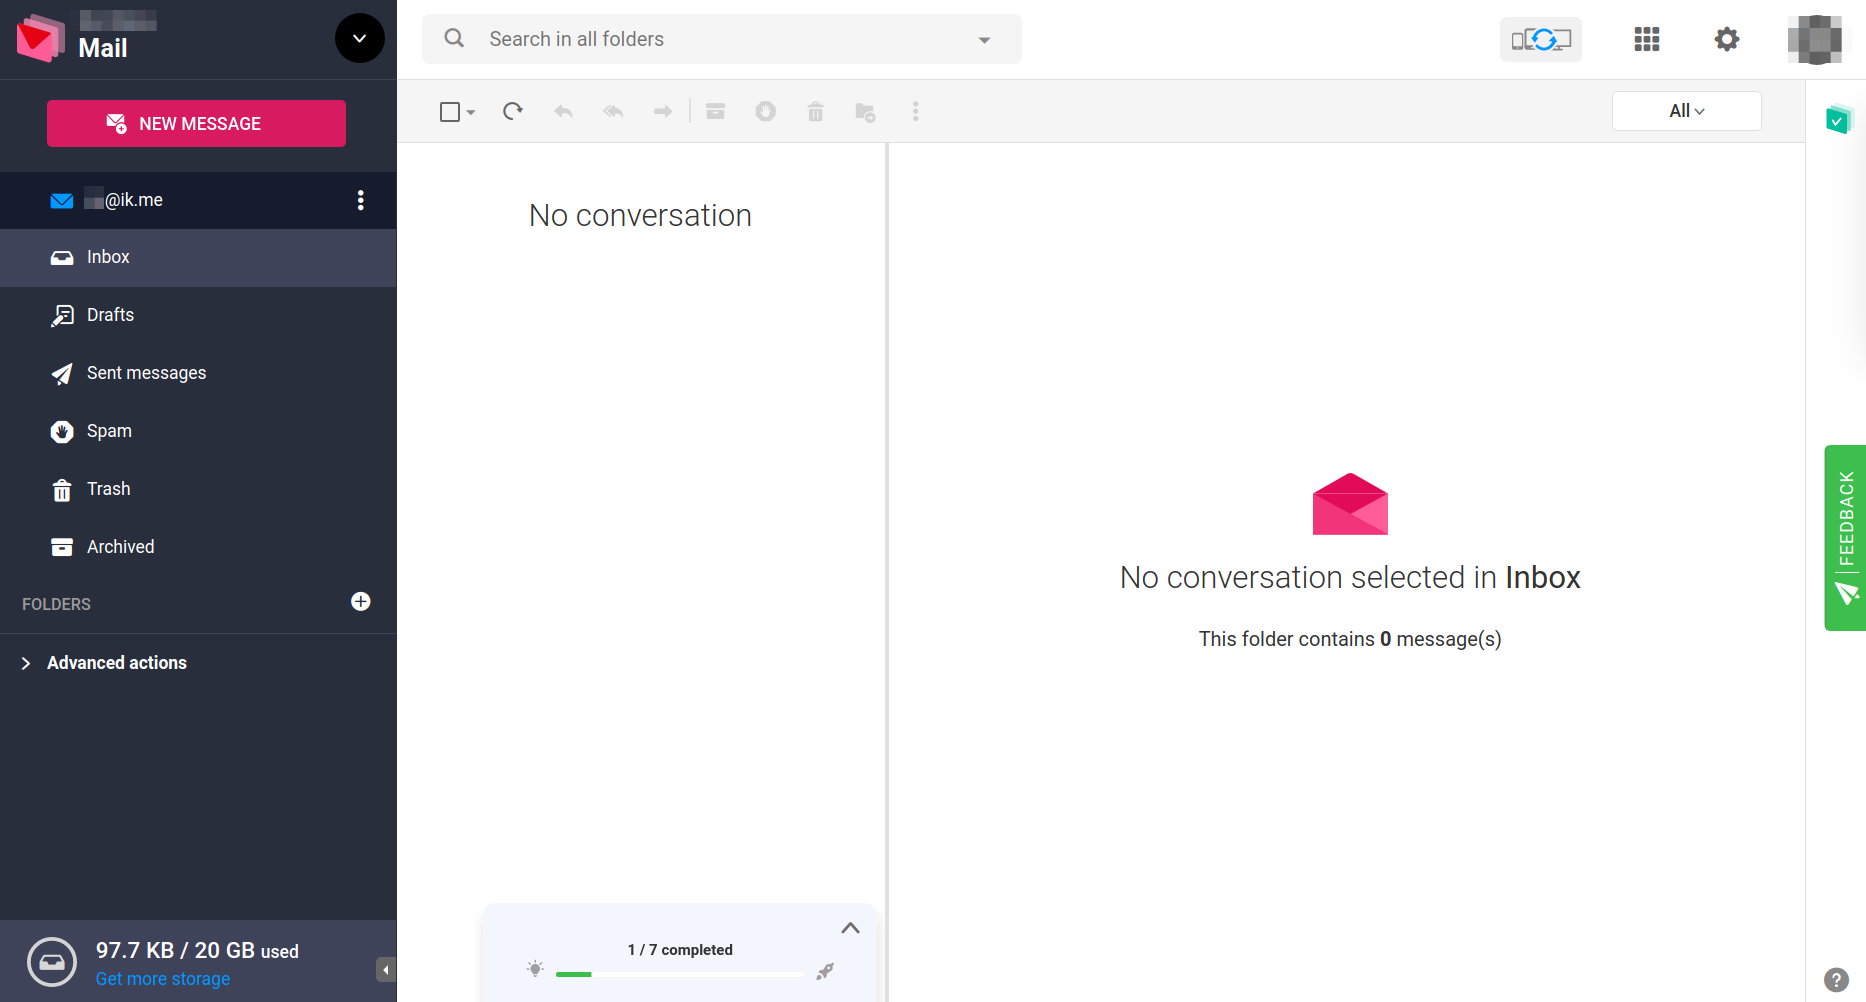
其它可参考前期文章:Infomaniak - @ik.me免费20GB大容量邮箱
]]>免费版邮箱容量仅为50MB(是地,是50MB),收费版容量为1GB,月付2美元年付18美元,容量每1GB需要10美元,开通自定义域名需要10美元。除些之外,收费版还支持邮箱别名和临时邮箱功能。
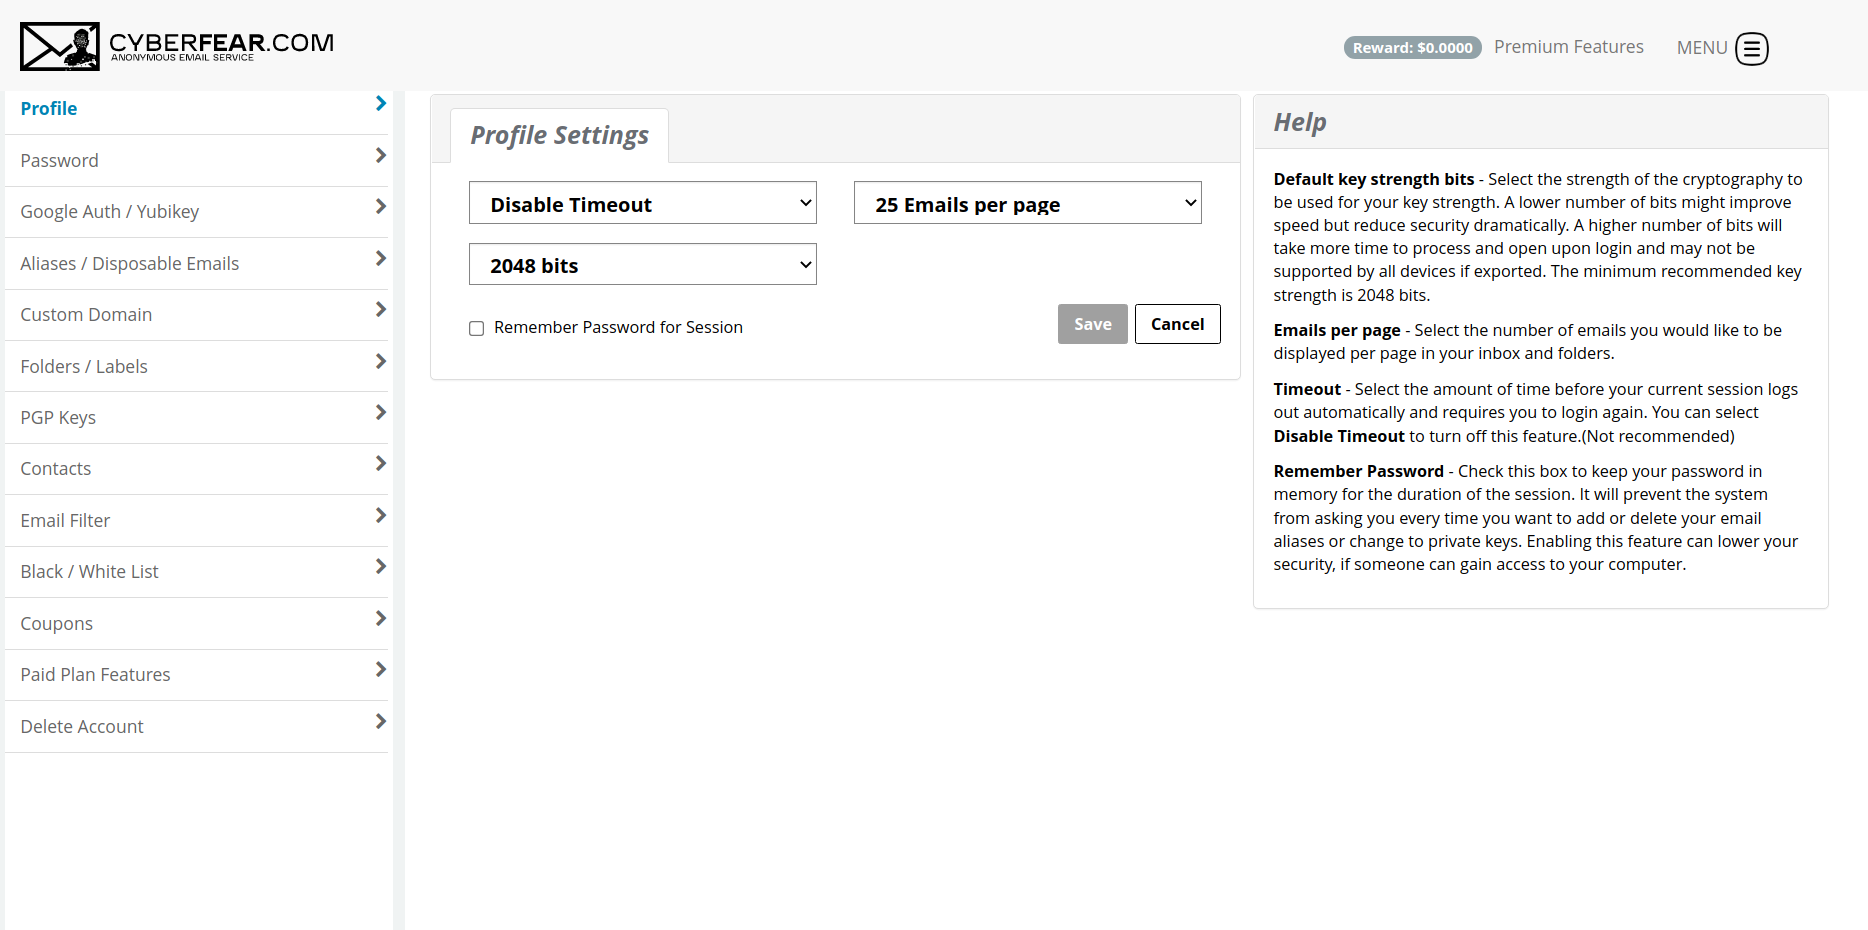
邮箱注册
登录网站https://cyberfear.com/,点击右上角的“Sign Up”弹出邮箱注册页面,选择用户名(用户名支持最短3位数),输入密码和邀请码(邀请码为非必选项,我的邀请码 4e2d5916d0aacf2c581f5bbc4076001e )后点击下方的“SIGN UP”按钮,如果注册成功会提示“Your account was successfully created!”,然后点击“Download Token”下载密钥(密钥很重要,可用于重置密码和解密),注册成功后登录邮箱选择“Free (Some cool features are disabled)”免费的版本。
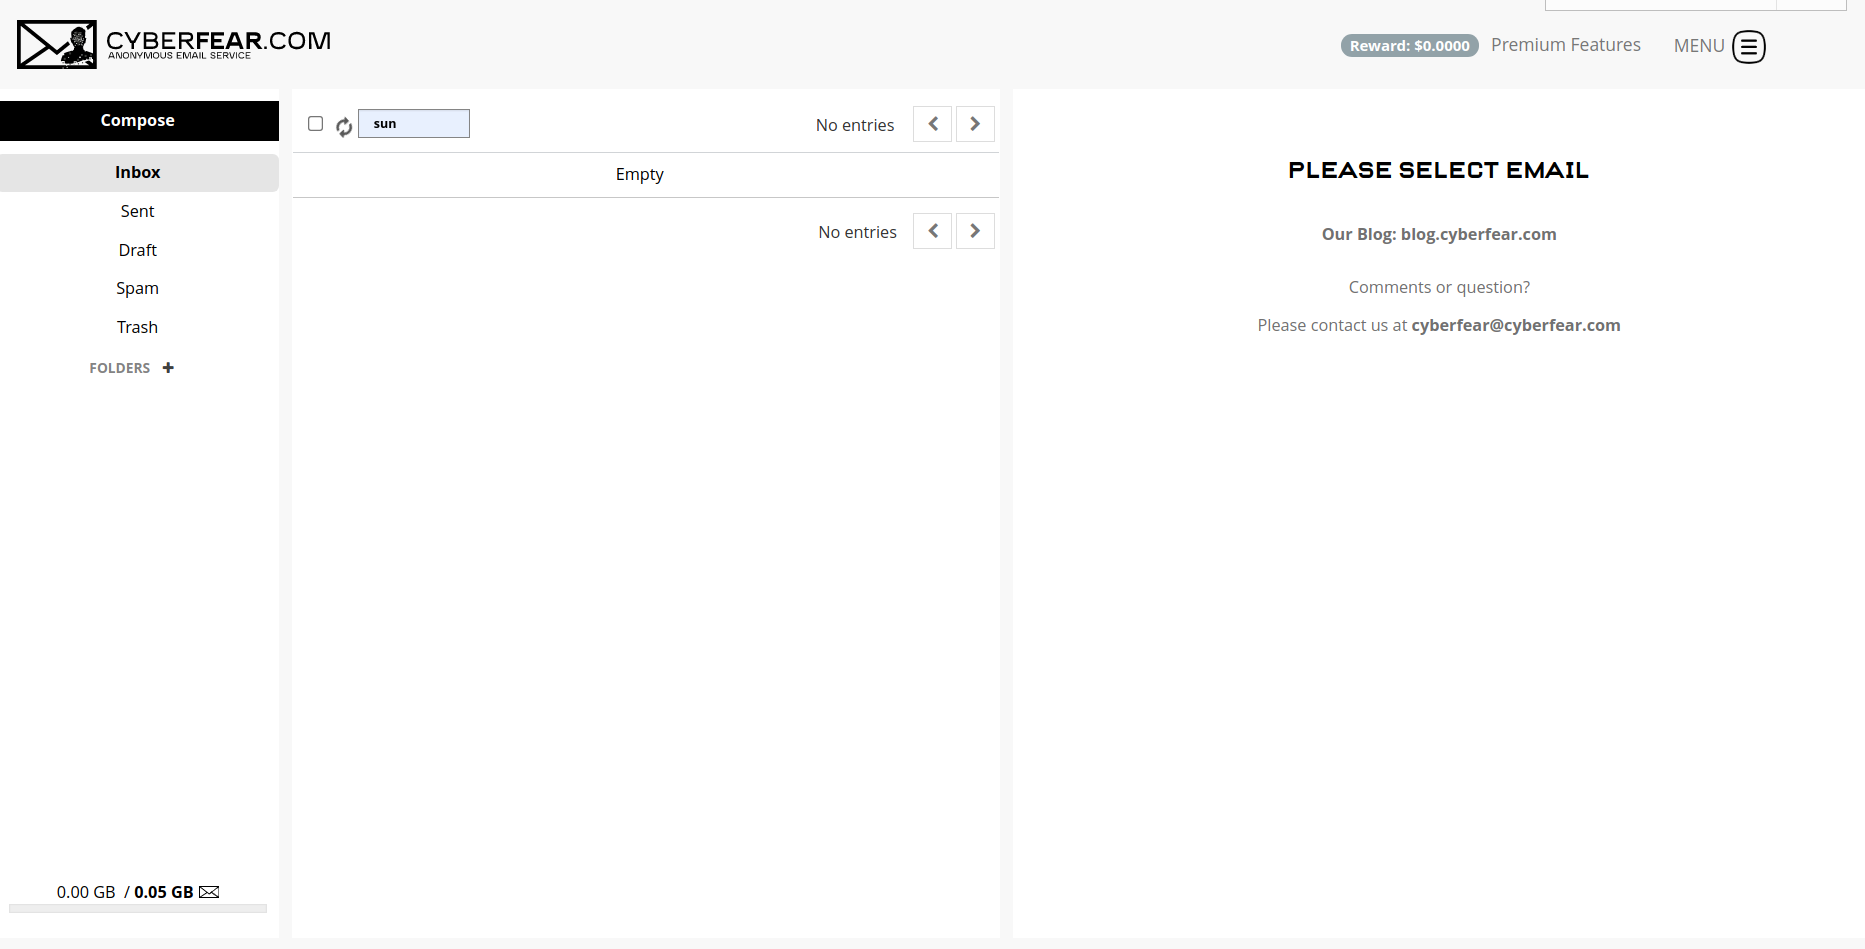
邮箱界面如上图,看上去还是比较简单的 ,但是跟另一个已经死了的安全邮箱ScryptMail非常像,再看一下Cyberfear邮箱的设置界面,跟ScryptMail一模一样,高度怀疑是ScryptMail另一个版本。
在Ubikom的官网上是这样介绍的:
Ubikom is free, open-source email framework based on the concept of Self-Sovereign Identity. You own your identity (which, in this case, means your private key), and all the outgoing and incoming messages are encrypted and signed by default.
Ubikom是基于自我主权身份概念的免费开源电子邮件框架。您拥有自己的身份(在本例中,这意味着您的私钥),默认情况下,所有传出和传入的消息都经过加密和签名。
邮箱注册
邮箱的注册过程很简单,打开官网https://www.ubikom.cc/,在“identifier (i.e. bob)”处输入你想要的用户名(最短支持3位数的长度),然后点击右侧的“Next”,在打开的页面中输入密码并确诊,然后再点击“Next”,等待几秒钟你的免费邮箱地址就创建完毕,格式为“用户名@ubikom.cc”。
注册完成后,下载并保存你的“Private Key”和由24个单词组成的“Private Key Recovery Phrase”。
“Private Key”主要用于修改设置:
you might need it in future if you want to make any changes to your configuration, for example, change your POP3/SMTP credentials, redirect email to a different server
客户端配置
Ubikom邮箱支持POP3和SMTP。 POP3和SMTP的服务器地址均为“alpha.ubikom.cc”,POP3端口为995 SSL/TLS,SMTP的端口为465 SSL/TLS。
注意事项
跟其它E2E安全邮箱类似,只有Ubikom用户之间互发邮件默认是加密的,邮件只有对方才能解密。
]]>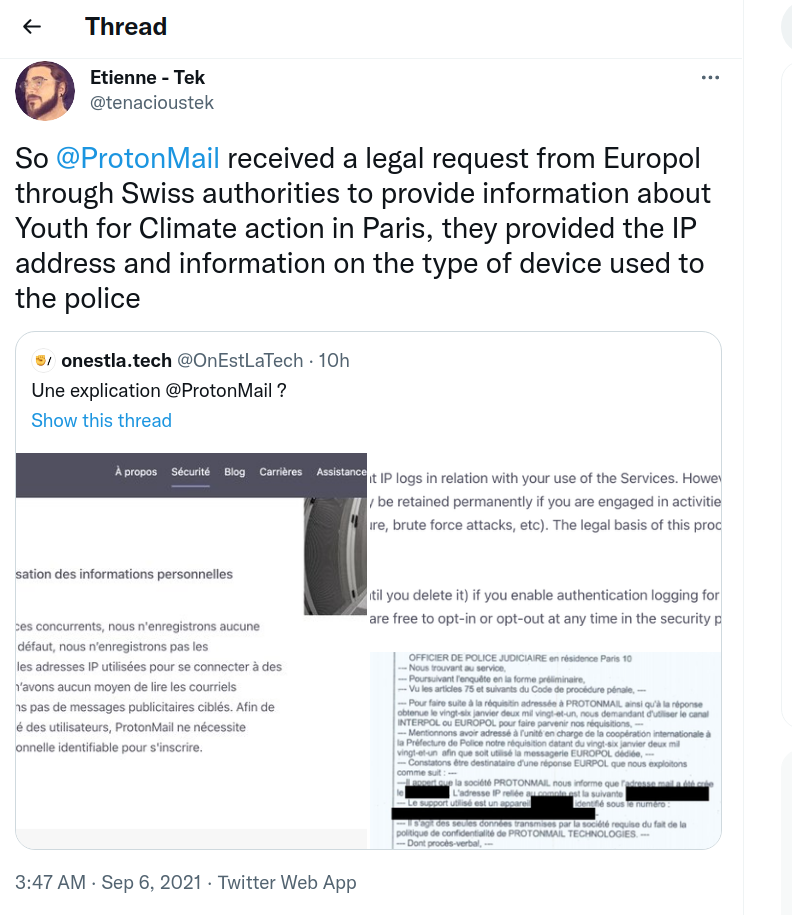
对此,Protonmail在Reddit上作出回应:
- Protonmail收到了瑞士联邦司法部的法令,Protonmail有义务遵守该命令。同时Protonmail强调,根据瑞士法律,在获得特定账户的法令前提下,Protonmail会被迫收集涉及刑事案件用户的账户信息,但在任何情况下,账户的加密系统都无法绕过。
- 该用户确实发生了违反瑞士法律的行为。Protonmail将继续打击此类法律和滥用行为。
以下为原文:
Hi everyone, Proton team here. We are also deeply concerned about this case. In the interest of transparency, here’s some more context.
In this case, Proton received a legally binding order from the Swiss Federal Department of Justice which we are obligated to comply with. Details about how we handle Swiss law enforcement requests can found in our transparency report:
https://protonmail.com/blog/transparency-report/
Transparency with the user community is extremely important to us and we have been publishing a transparency report since 2015.
As detailed in our transparency report, our published threat model, and also our privacy policy, under Swiss law, Proton can be forced to collect info on accounts belonging to users under Swiss criminal investigation. This is obviously not done by default, but only if Proton gets a legal order for a specific account. Under no circumstances however, can our encryption be bypassed.
Our legal team does in fact screen all requests that we receive. And we fight often on behalf of users. Few people know this (it’s in our transparency report), but we actually fought over 700 cases in 2020 alone, which is a huge amount.
However, in this case, it appears that an act contrary to Swiss law did in fact take place (and this was also the determination of the Federal Department of Justice which does a legal review of each case). This means we did not have grounds to refuse the request and Swiss law gives us no possibility to appeal this particular request.
The prosecution in this case seems quite aggressive. Unfortunately, this is a pattern we have increasingly seen in recent years around the world (for example in France where terror laws are inappropriately used). We will continue to campaign against such laws and abuses.
想了解其它用户评论可点击此处前往。
]]>个性化的电子邮件地址功能设置路径为:“设置” - “高级” - “功能” - “个性化的电子邮件地址”。
以下两种方法我都试过,都能成功添加域名,我个人使用的是第一种,即使用GoDaddy的DNS托管服务。
方法一:使用GoDaddy DNS托管服务
登录GoDaddy,在DNS下拉菜单中选择“添加DNS托管”或直接从该网址登录https://dcc.godaddy.com/domains/dnsHosting/add,输入你要添加的域名然后点击“下一步”将显示两个DNS服务器,然后将你域名的DNS服务器修改为GoDaddy的DNS服务器。等几分钟就可以添加该域名了。
方法二:使用域名注册商DNS服务器
“Get started” “Get a domain”,会打开一个新窗口,网址为“domainconnect.godaddy.com/v2/domainTemplates/providers/outlook.com/services/personalizedoutlookemail/apply?mxRecordValue=101676785&state=***.html”,将“mxRecordValue=”后的数字复制下来,该数字为个人的ID,以我的为例,数字ID为“101676785”,设置时需将该数字改为自己的数字ID。
然后根据自己的数字ID和表格中的DNS记录,配置DNS解析记录:
| 主机记录 | 记录类型 | 记录值 |
|---|---|---|
| _outlook | TXT | 101676785 |
| _domainconnect | CNAME | _domainconnect.gd.domaincontrol.com |
| autodiscover | CNAME | autodiscover.outlook.com |
| TXT | v=spf1 include:outlook.com -all | |
| MX | 101676785.pamx1.hotmail.com |
DNS解析设置完成后,进入添加域名页面,选择最下方的“I already own a GoDaddy domain”,在打开的页面中输入已完成DNS解析配置的域名,点击“Validate”验证,然后点击“Sign in”将打开一个新的登录页面,不需要登录直接关闭即可。
打开Outlook设置就可以看到添加的域名了。
遇到的问题
- 成功添加域名后,配置的时间太长;
- 在添加邮件别名时如果第一次无法正常添加,删除域名再重新添加一次即可。
使用飞书邮箱需要先创建新团队,点击左下角的加号“+”,选择“创建新团队”,在随后的“完善团队信息”页面,填写团队名称、行业类型和团队规模,然后点击“创建并切换至新团队”即创建成功。成功创建后会自己分配一个形式为“*.feishu.cn”的二级域名,该域名可修改一次。
开通企业邮箱
点击左上角的头像,选择“管理后台”,进入后台管理页面,在左侧的菜单栏的“功能管理”项目下依此选择“邮箱” - “服务管理”进入域名配置页面,在“@”后输入域名点击提交,然后选中“启用新的邮箱服务”,根据提示添加DNS解析记录,包括域名验证记录,MX记录和SPF记录,然后点击“立即验证”验证DNS配置是否正确,验证通过后点击“下一步”根据提示添加邮箱地址。
分配邮箱地址
管理后台左侧,依此选择“组织架构” - “成员与部门” - “添加成员”,在弹出的“添加成员”页面输入姓名和手机号码并分配邮箱前缀,点击“完成”即成功添加并分配邮箱地址。除分配一主邮箱外还可添加多个别名。
邮箱登陆
登陆网址:www.feishu.cn/mail或“二级域名/mail”
邮箱界面如下:
如上图所示,飞书邮箱界面简洁。
第三方客户端登录
首先需要开通权限,在管理后台选择“邮箱” - “安全设置” - “权限控制” - “第三方邮箱客户端登录”开通第三方客户端登录权限。其它详细设置见官方文档https://www.feishu.cn/hc/zh-CN/articles/360049068017(我在网页版没有找到邮箱设置在哪,以官方文档为准)。
]]>首先要使用iCloud域名邮箱服务必须先创建一个“@iCloud.com”后缀的邮箱地址,因为我常用的邮箱ID都被注册占用了,为了体验iCloud的邮箱服务,不得不创建了一个iCloud邮箱地址。
邮箱设置
首先,登陆iCloud,我看很多文章都说需要Beta用户才可以使用(不确定真伪),所以以https://beta.icloud.com/作为登陆iCloud的地址。
依次选择“账户设置”-“自定义电子邮件域名”-“管理”添加域名,添加域名时在“谁将使用您要添加的域名?”下有两个选项:仅本人和您与家人。如果选择了“仅本人”,则只能你一个人使用该域名的邮箱地址,如果选择了“您与家人”则可以与家人共享,要让家人使用您的自定域名,请确保您有“家人共享”群组。然后,用您的 Apple 设备与家人共享您的 iCloud+ 方案。
以下以选择“仅本人”方案、域名为DragonLi.cn为例:
- 选择仅本人后,在弹出的页面中输入域名“DragonLi.cn”,点击“继续”按钮;
- 添加电子邮件地址。添加邮箱地址,添加时须输入完整的邮箱地址。我在添加2位数ID时,一直提示“添加此电子邮件地址时出现问题。请稍后再试。”;
- 更新您的域名注册者的设置。点击“视图”,按照页面指示添加DNS解析。MX记录:”mx01.mail.icloud.com”和“mx02.mail.icloud.com”;验证域名的TXT记录:”apple-domain=XtlS1ludmCXW7UH2”;SPF TXT记录:”v=spf1 redirect=icloud.com”;DKIM CNAME记录:主机记录为”sig1._domainkey” 记录值为”sig1.dkim.dragonli.cn.at.icloudmailadmin.com.”(注意后面这个”.”)。
- 完成域名设置。点击“完成设置”,在弹出的“请选取默认电子邮件地址”页面中,选中你的iCloud后缀邮箱地址,点击“继续”即完成设置。
邮箱测试
分别以QQ邮箱、Live邮箱和Yandex域名邮箱作为收件人测试。收件很快,无延迟,除Live邮箱外都没有进垃圾箱。
]]>
邮箱特色
- 邮箱后缀为“@e.email”;
- 邮箱容量大小为1GB,可付费升级;
- Webmail系统为RainLoop,多语言支持,包括中文;
- 支持两步验证;
- 支持IMAP和SMTP;
- 其它功能:基于NextCloud的网盘、通讯录、便签、书签等。
邮箱注册
- 在浏览器中打开链接https://e.foundation/e-mail-invite/,输入邮箱接收@e.email邮箱的注册链接。2分钟内未收到的查看一下垃圾箱。
- 打开邮件中的链接,按照页面所示输入昵称、用户名和密码,点击“Go!”即注册完成。用户名长度须在3至20位之间,可以为字母、数字和特殊符号(包括”-“、”.”和”_”)。
邮箱使用
因为Webmail系统为Rainloop,很常见,就不过多介绍了,邮箱的登陆地址为: https://ecloud.global/或https://e.email。
客户端设置
SMTP和IMAP的服务器均为“mail.ecloud.global”,SMTP的端口为587,START TLS,IMAP的端口为993,SSL/TLS。
]]>如果你在使用自己的域名邮箱,证明邮箱真实性的工作就会转移到你自己的头上。本指南旨在为你提供所需的相关信息和实践操作,以保证你域名邮箱的真实性,并减少你受上当受骗的风险。
该指南将介绍域名邮箱安全的三个主要组成部分:用于签名的DKIM、用于发件人验证的SPF和用于更严格执行其他两个部分的DMARC。请确保你对DNS有基本的了解,并有使用域名邮箱的经验。
1. SPF
SPF,全称“Sender Policy Framework”,即“发送方策略框架”,是最基本的电子邮件验证技术之一,是最简单、最常见的保护。通常,服务提供商会提供DNS记录内容,您只需在设置过程中简单地复制、粘贴即可。
在DNS解析中,SPF的记录类型为 TXT。基本格式如下:
"v=spf1 include:spf.httpsmail.com -all"
SPF的核心是一个IP地址列表,被授权从你的域名发送邮件。除此之外,还有其它几种不同的选项:
- include: 执行递归查找包括来自不同主机名的所有IP;
- ip4或ip6: 直接引用ip地址;
- a, mx, ptr, exists等: 不经常使用,暂时忽略;
- all: 用于捕获所有匹配的IP地址。默认情况下,这主要用于封锁所有内容,我们将在下面进行详细解释。
以上面的地址spf.httpsmail.com为例,该网址下的所有A类型的解析记录通过include:选项包含在SPF策略之中。
除了ip地址和包含的主机名之外,还有其它限定符来作为选项的前缀。
每个符号都会向邮件服务器推荐一个不同的策略,默认情况下,如果没有符号,它被视为等同于“+”,即“通过”。(其它限定符可见:https://datatracker.ietf.org/doc/html/rfc7208#section-4.6.2,主要包括4个:+、-、~和?等,好像“~”用得较多,为“soft-failure”,字面意思是“软失败”,接收但是会标记)
在上面的示例中,主要有两个机制选项:
include:spf.httpsmail.com: 包含该网址下的所有ip,没有限定符,所以默认为“+”,即通过,接收邮件;-all: 带有限制符“-”,即拒绝。
SPF是一个非常简单的工具,提供了基本的电子邮件验证(“允许哪些IP可以发送我的电子邮件”)来进行基本的垃圾邮件过滤。即使只是单独设置SPF,也会对你的邮件成功投递有很大帮助。
2. DKIM
DKIM,全称“Domain Keys Identified Mail”,即“域名密钥识别邮件标准”,另一种安全机制,通过使用非对称密钥以加密的方式验证为你域名邮箱发送邮件的服务器是否有权这样做。配置DKIM后,接收你邮件的服务器可以在DNS中查找公钥,并验证邮件是否从你的域合法发送。
DKIM可防止IP易手或大型服务提供商在客户之间共享IP空间。如果你说“谷歌IP可以发送我的电子邮件”,是什么阻止其他人从你的域中欺骗电子邮件并从他们自己的谷歌帐户发送?由于这些IP是共享的,所以它仍将通过SPF检查,但不会通过DKIM。
DKIM有两个主要部分:一个是带有公钥的DNS记录,另一个是添加到每个已发送电子邮件中的header(头部信息),其中包含加密签名和有关如何查找上述DNS记录的详细信息。
DKIM的DNS解析记录就是一个普通的TXT记录类型,但目前主要以CNAME记录类型为主,通用格式为:
<selector>._domainkey.<domain>
“selector”通常由您的电子邮件服务提供商设置,并在您启用DKIM时提供给您。一些提供商,如Fastmail和Microsoft 365,甚至提供多个选择器供您设置。例如,对于谷歌来说,它只是一个“google”:
google._domainkey.example.com
DKIM头部信息被添加在你所发送的每一封邮件中,包含的内容很多,但最主要的是以下两个部分(其它可见https://datatracker.ietf.org/doc/html/rfc6376#section-3.5):
- d=<domain>: 列出邮件发送的域名以备验证;
- s=<selector>: 与DNS中的子域名匹配。
通过这两段元数据,收件人的服务器可以重建包含DKIM密钥的子域并解析它,并根据此密钥以验证DKIM签名和消息是否真实。
DKIM是一个比SPF强得多的检测垃圾邮件的方法,因为它涉及到实际的数学运算,而不仅仅是一个IP列表。即使你的域名邮箱只配置了SPF和DKIM也已经非常不错了,但还可以更进一步。
3. DMARC
DKIM仅在邮件中有头部信息时才适用。这意味着非法消息将不会有头部信息,因此不会发生DKIM验证。这导致DKIM验证是“中性”的,而不是“失败”,因为它被简单地忽略了。
添加DMARC策略使我们能够
强迫对声称来自我们域名的所有电子邮件执行SPF和DKIM检查;
向接收服务器提示如何处理失败的检查;
提供报告地址,以便我们可以从电子邮件提供商处接收有关这些检查的报告。
DMARC记录与其他两个记录的格式相同,而且非常简单。下面是一个非常基本的示例:
v=DMARC1; p=quarantine; adkim=s; aspf=s; rua=mailto: test@dmarc.postmarkapp.com;
- p=quarantine: 为处理未通过身份验证检查的电子邮件所设置的全局策略,可以是none,quarantine或reject,即不采取措施、将验证失败的邮件标记为垃圾邮件和拒收验证失败的邮件。
- adkim=s: 强制执行DKIM检查的策略,可以是r或s,r为relaxed,宽松;s为strict,严格。
- aspf=s: 强制执行SPF检查的策略,选项同adkim。
- rua=mailto: 接收综合报告的邮箱地址,一般会以周为单位。
DMARC是现代电子邮件安全性中最强大的一部分,它的报告可以令人难以置信地洞察哪些垃圾邮件伪装成你。如果您从本指南中得到了什么,我希望您应该花时间和精力制定严格的DMARC政策。
4. 加餐
如果你的域名不想发送邮件,可以通过以下设置来防止垃圾邮件以你的名义发送出去。
SPF设置:
v=spf1 -allDMARC设置记录:
v=DMARC1; p=reject; adkim=s; aspf=s;
本文翻译自:Email Authenticity 101: DKIM, DMARC, and SPF,部分内容有改动,已获得原作者授权。
]]>
原理很简单,就是把发到“@duck.com”的邮件转发到你的其它邮箱,在该过程中DuckDuckGo不会存储你的邮件,但会帮你移除邮件跟踪器以达到保护隐私的目的。
- Get a free, personal @duck.com email address. Emails sent to it will forward to your regular inbox, with creepy email trackers removed.
- Generate unique private email addresses in the DuckDuckGo app and extension so you can’t be tracked by your email address.
- DuckDuckGo never saves your email.
加入邀请名单
- 下载DuckDuckGo APP,支持iOS和安卓,安卓需要使用最新的版本,即5.91.0;
- 打开“Setting” - “Email Protection”, 点击“Join the Private Waitlist”后等待即可(需要自备梯子)。
已经有邀请码直接到此处注册即可:https://duckduckgo.com/email/choose-address
]]>
注册过程很简单,打开https://www.tildamail.com/sign-up,在“Code”处填入你收到的邀请码,然后点击“Verify”进入下一步。用户名最短支持2位数,可以使用字母、数字、“.”和下划线”_”,不需要密码。进入下一步后下载保存好自己的“Private Key”并选中“I’ve backed up my private key in a safe place.”点击“Continue”进入下一步,打开Tildamail的邮箱界面。
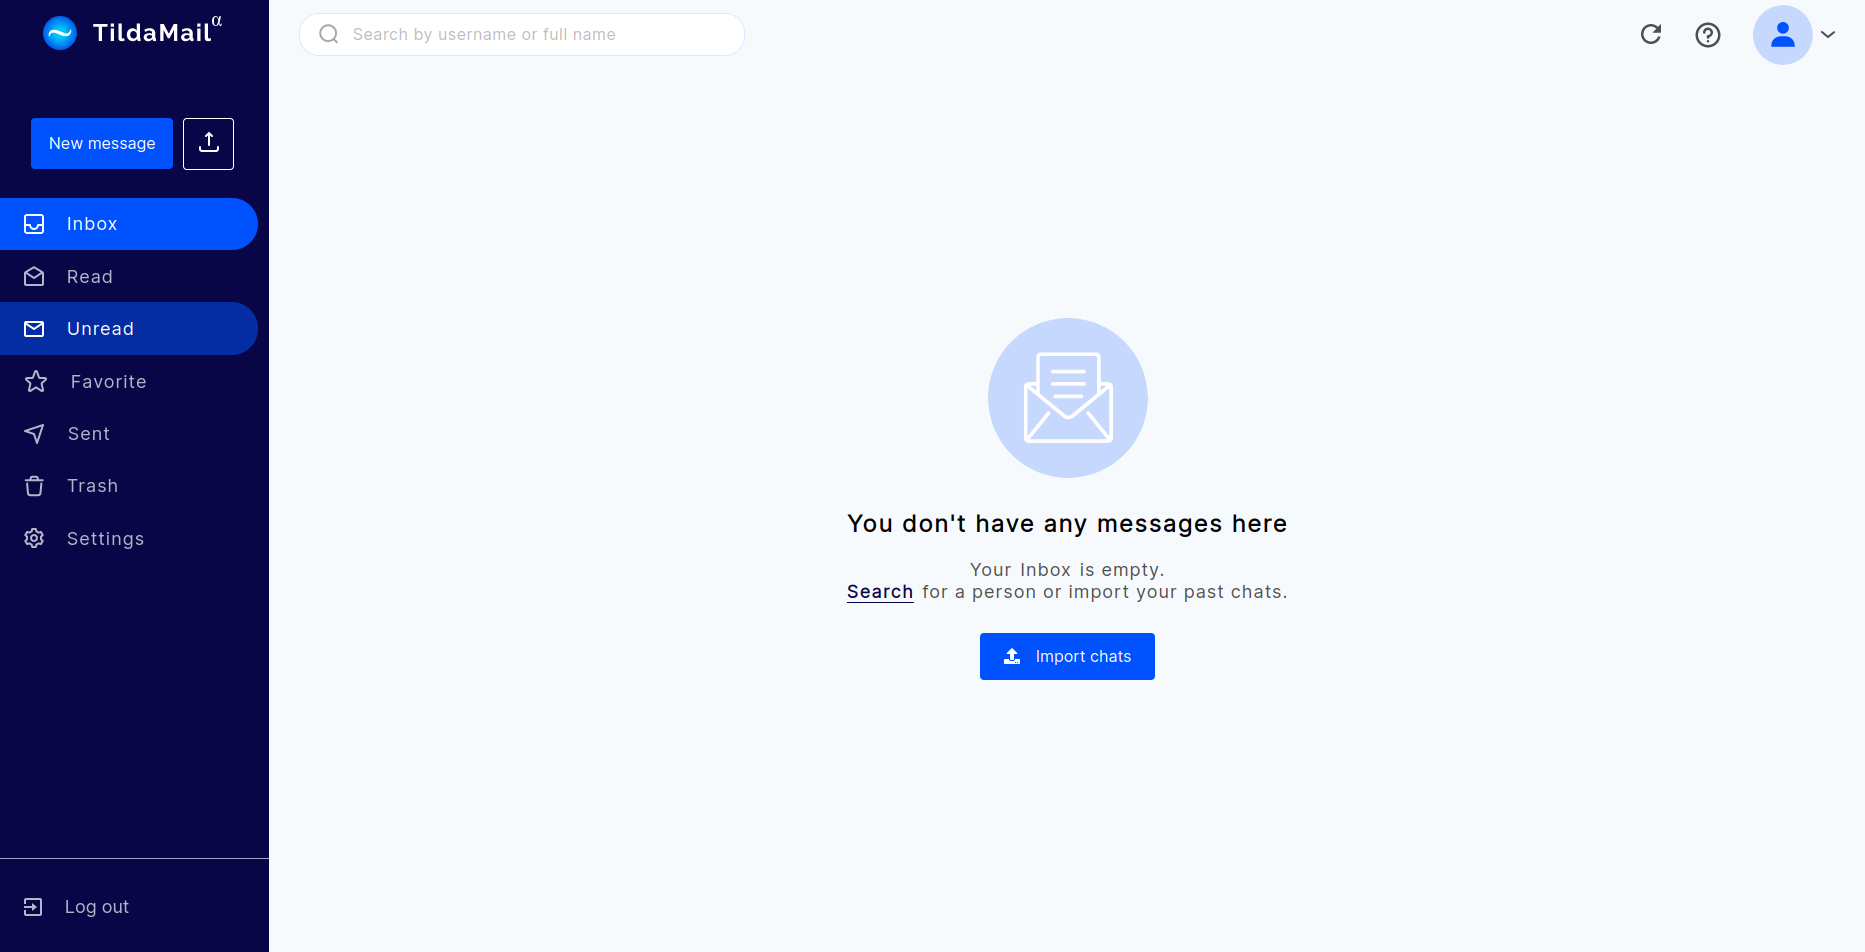
在“Setting”一栏中目前仅有三个设置选项,分别为Profile、Storage和Privacy,Profile主要为自己的个人信息;Storage只有一个“AWS S3 Object URL”,应该是用来存储自己的邮箱数据的;Privacy仅有“Hide your public key”一个选项用来选择是否隐藏自己的公钥。
由于目前仍处于测试阶段,其它方面也没什么好说的,可以看我前期的文章:Tildamail - 去中心化的安全邮箱。
需要注意的两点:
- 登陆不需要常规的密码,需要使用你在注册过程下载的后缀为”.tld”格式的私钥文件。
- 退回再登陆后你的数据会全部消失,未测试在设置中输入“AWS S3 Object URL”地址后退出再登陆是否仍会消失。数据可以手动导出及导入。
想测试邮箱该邮箱的可以给我发邮件,用户名是“sun”。
]]>从其官网来看,Tildamail主要有以下4个主要的特点:
Private 注重隐私
个人拥有、保管自己的数据,自己决定数据存放的位置,拥有对自己隐私的控制权。用户以分布式、端到端的加密方式匿名聊天,无需依赖集中式服务器或权限。保护个人的言论自由、个人数据以及个人的隐私。
Decentralized 去中心化
去中心化,100%的权力下放和审查制度。 Tildamail是去中心化,拥有数据自主权、支持端到端加密的电子邮件系统。Tildamail的服务器永远不会存储个人数据,可以自行选择个人数据的存储位置(例如Amazon S3 云存储,个人电脑,Storj云存储平台,IPFS点对点的分布式文件系统,Sia分布式加密云存储等)。
Secure 安全
Tildamail支持端到端加密,不但可以加密信息还可以加密元数据,不会像Facebook,Signal,微信,Whatsapp等类似程序软件一样将个人数据泄漏给第三方。
Interoperable 可互操作的
Tildamail旨在与普通SMTP电子邮件进行互操作,通过网关可以与外部电子邮件进行通信,是旧网络和新分布式网络之间的桥梁。从这一点的介绍来看,Tildamail很像前期介绍的Delta: 基于Email的端对端加密IM聊天工具。
通过其官网的有限介绍,Tildamail与其它安全类邮箱的主要的不同在于:个人数据以去中心化的方式分布式存储、加密Metadata。
]]>
Linux.dev邮箱由Migadu提供邮件托管支持。
申请资格:
- 真正需要;
- 列于维护人员文件中,包括维护人员和审查人员;
- 在Linux内核开发方面有持续的历史,例如以前以个人的名义提交的git、通过lore.kernel.org访问的邮件列表讨论或类似的内容。(目前不可用)
使用规则和限制:
- 用于Linux内核相关工作;
- 不得用于发送垃圾邮件和违反Code of Conduct规则的行为;
- 邮箱用户名为“名.姓”的形式;
- 不得使用该邮箱订阅高频的邮件列表;
- 需要使用其它邮箱申请该邮箱;
- 不保证该邮箱永远存在。
如何申请:
发送邮件至:helpdesk@kernel.org。
邮件格式如下:
]]>邮件主题:firstname.lastname@linux.dev account request
邮件内容:
Full name: Firstname Lastname
Contact address: 邮箱地址
Reasons for needing this account: 申请理由
- 邮箱容量大小为500MB,可以付费扩容到15GB,价格为10美元每月,目前仅支持信用卜支付;
- 端到端加密;目前的端到端加密仅限于同域的邮件收发;
- Cryptographic handshakes :类似于收件规则,”control the rules of communication. You can choose that someones emails are important to you. If those emails become of no importance after a while use Cryptographic handshakes to mark that in our system.”;
- VIP服务,付费服务,每月20美元,主要有两项:15GB的邮箱容量和发件人自我介绍,如果发件人未经过允许会自发一封邮件给发件人让他介绍一下自己是谁。
暂不支持POP3、IMAP和SMTP协议。发件自带“Sent with Mailio - Pollution Control for Unwanted Email.”的小尾巴。
邮箱注册
- 登陆https://mail.io/register,选择用户名,ID最少3位数,然后点击“Claim”;
- 如果弹出的界面只有一个输入框则代表该用户名已被占用;如果有两个输入框则代表用户名可以使用(我TM花了30分钟总结出来的),然后连续输入两次密码就可以了;
- 点击“Download Emrgency Kit”,然后将下载的文件找个地方保存好。文件解压后包括两个文件,pdf文件是“Password Recovery”,以防你忘记密码;json文件是“SmartKey”,可以直接用于登陆邮箱账户。
Emergency Kit
非常重要,参见官方文档:https://docs.mail.io/smartkey/
]]>更新
2021年8月10日:已支持美国地区用户注册。
准备工作
- 目前仅在瑞士(Switzerland), 法国(France), 比利时(Belgium), 卢森堡(Luxembourg)和 摩纳哥(Monaco)这5个国家提供免费的邮箱服务,注册前需自备梯子,没有以上5个国家IP的可以试一下用Tor浏览器,可以一直切换用户身份,切换到以上5个国家即可;
- 需要使用以上国家的手机接收验证码,需自已查找接码平台。因为一个手机号只能绑定一个用户我就不透露我用的是哪一个接码平台了,建议优先选择国内的接码平台,用百度搜索即可。
邮箱特色
- 邮箱空间大,20GB大容量;
- 无广告,尊重隐私;
- 3GB网络硬盘;
- 支持两步验证;
- 支持POP3、IMAP和SMTP;
- 支持CardDAV和CalDAV;
- 支持用户名后加“+”形式的邮箱别名。
邮箱注册
- 打开注册地址:https://www.infomaniak.com/en/free-email,点击“Create a free email for life”;
- 点击下方的“Create a new account”链接,输入“First name”和“Last name”后进入下一步;
- 输入用户名和密码,用户名必须3位数以上,密码必须8位数以上,须包含大写字母、小写字母和数字;
- 输入手机号码接收验证码即可注册完成。
客户端设置
- IMAP:mail.infomaniak.com 993 SSL / TLS
- POP3:mail.infomaniak.com 995 SSL / TLS
- SMTP:mail.infomaniak.com 465 SSL / TLS

邮箱特色
邮箱在功能上也没有什么太突出的特色,与其它加密邮箱一样,支持发送端到端加密邮件,支持邮件定时发送和邮件自毁,注册过程简单,支持Web、安卓和iOS。
官网列出如下8个,我就不一一翻译了。
- Encrypted messages
Send encrypted end-to-end messages to external email service providers
- Delayed delivery
Select the time and date when the email will be sent
- Signature
Configure the signature to be displayed at the bottom of each email
- Storage integration
All files and media are automatically stored in your SafeSwiss encrypted vault
- Smart groups
Assign people and companies to different groups to distinguish important emails
- Smart Search
Search by people or topics to find emails quickly
- Delete forever
When you remove an email from the trash folder, it’s deleted forever
- Template email
Configure default templates for emails to save time
邮箱注册
注册过程很简单,三步即可,也不需要提供个人的额外信息。
- 打开https://web.safeswiss.com/sign-up,填写用户名和验证码,用户名至少3位数以上;
- 输入密码;
- 填写密保问题及答案。密保答案一定要记住,如果要找回密码的话只能通过密保问题和答案。
邮件收发
这个就过多介绍了跟其它邮箱一样。发出的邮件自带“Get your Free SafeSwiss Account!”小尾巴,在邮件发送时可以选择是否需要设置邮件密码。
注意事项
如果通过“找回密码”功能重置密码,为了安全原因,原有的的邮件和附件、文件等会全部删除。
]]>
邮箱容量大小为5G,附件最大支持50M,每封邮件最多支持发送给25个收件人,其中包含主送、抄送和密送。
邮箱后缀为“@petalmail.com”,用户名必须以字母开头,可以使用字母、数字和下划线,长度需在6-30位之间,注册过程中需要使用手机接收验证码。
邮箱界面如下:

三栏式结构,界面比较简洁干净,功能目前较少,其它功能未知。
]]>
- 关于可添加域名数量
Multiple domains
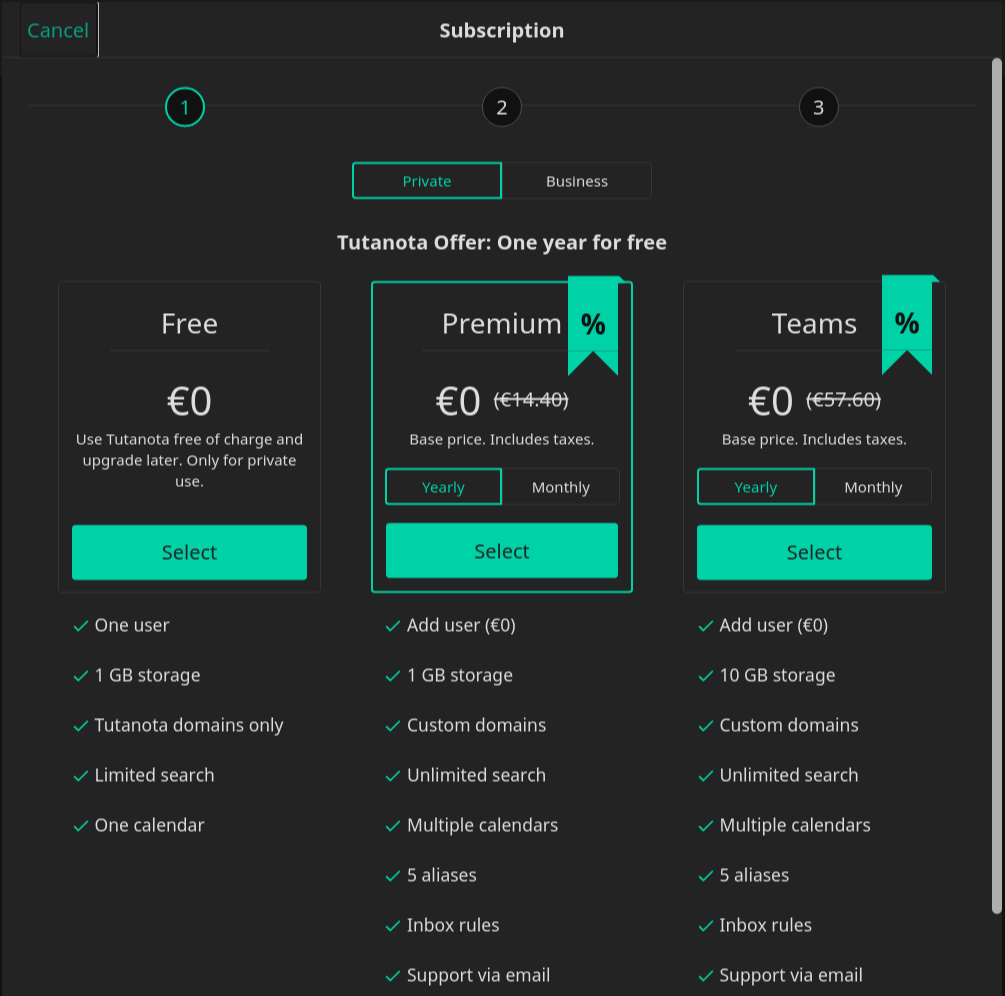
If you have used multiple domains in Tutanota, nothing will change. If you already use one or more domains and you want to add another new domain to your account, you need to book the Business feature first.
个人版Private,包括Premium和Teams套餐都不再支持添加多个域名。
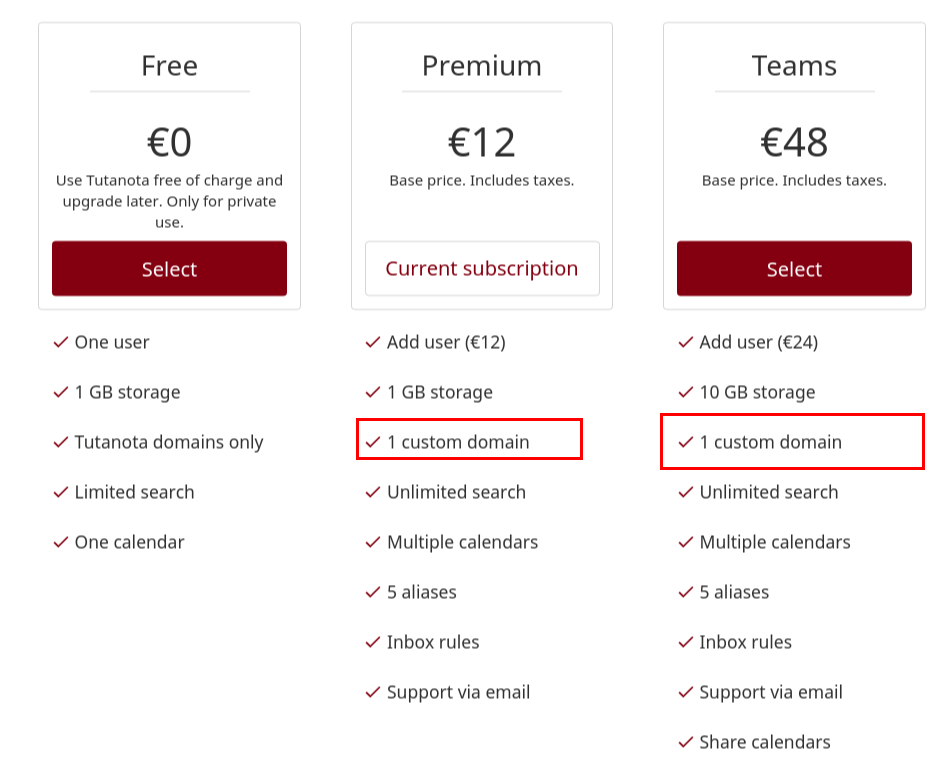
如果你已经添加了多个域名目前暂时不受影响,如果需要添加新域名就得需要升级到Business套餐了。
所以已经添加的域名不要一手滑自己不小心删除了。
- 关于日历邀请功能
Calendar invites
If you have booked a paid Tutanota subscription and want to use calendar invites, you need to book the Business feature.
Private套餐不再支持日历邀请,如需要继续使用须升级到Business套餐。
Private与Business比较
- 价格:Private最基础年付价格为12美元,Business为24美元。
- 域名数量:Private只能添加1个域名,Business可添加多域名。
- 日历事件邀请:Private不再支持
- 外出通知:Out of office notifications,Private不支持。这个功能好像就是“假期自动回复”吧。
]]>
FinMail自2020年11月1日上线,目前已有超过20000位用户,虽然数量并不多,但很多人的全拼已经注册不到了(包括我的),且邮箱仅支持丹麦语、中文和英文。
邮箱特色
WebMail应该是基于Roundcube,支持两步验证,免费用户不支持IMAP/SMTP/POP3需要付费升级才能使用,每月的费用为2美元,在功能方面除邮箱的基本功能外,还支持日历和任务。在邮箱的右侧边栏还会推荐一些其它国家的饭菜(看Finmail的Twitter更像一个美食博主)。
邮箱注册
- 用户名:5位数以上,不得侵犯知识产权,不得使用商标或常用的姓名(可能这就是不能注册全拼的原因)。
- First Name和Last Name:一旦填写完并注册成功后无法修改。进入邮箱”设置” ->”身份”可以看到选项为灰色无法修改,而且还不能新建“身份”。
注册事项
如果@finmail.com网站地址有可疑的滥用/垃圾邮件活动,可在不事先通知的情况下锁定。
]]>
注册登录
点击登录链接https://dash.mailway.app/login,获取Github权限,使用Github账户登录即可。
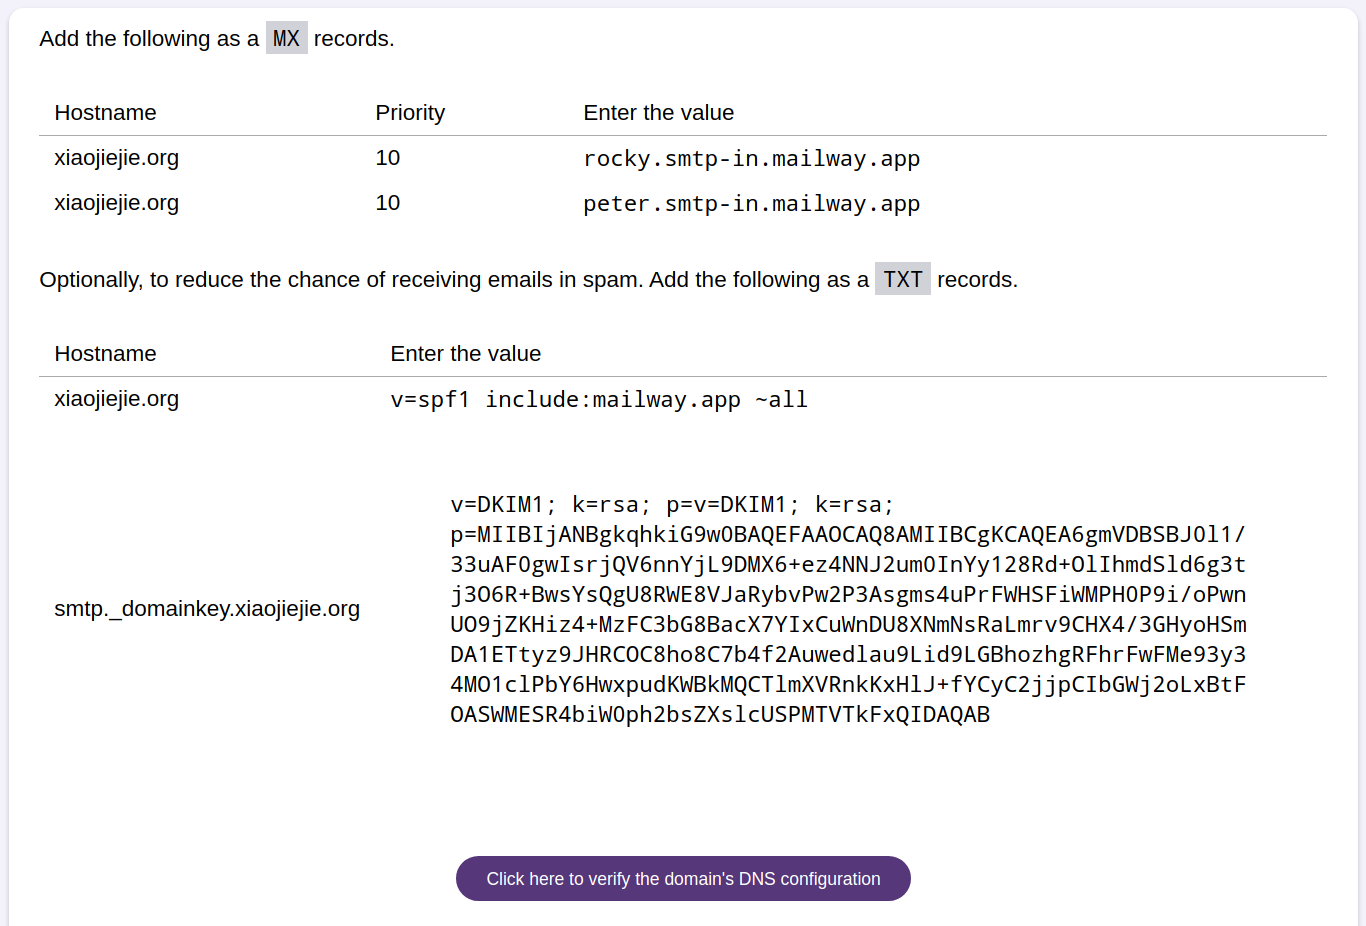
DNS设置
点击左侧菜单“Add new domain”,输入域名后点击“Submit”确认,按照官网提示添加MX以及TXT记录,包括两条MX记录、SPF和DKIM密钥,添加完毕后点击验证。以我的域名“XiaoJieJie.org”为例,见下图。
转发规则
点击左侧菜单的“Rules”自行添加即可。

转发记录
左侧菜单“Logs”可见,如下图:
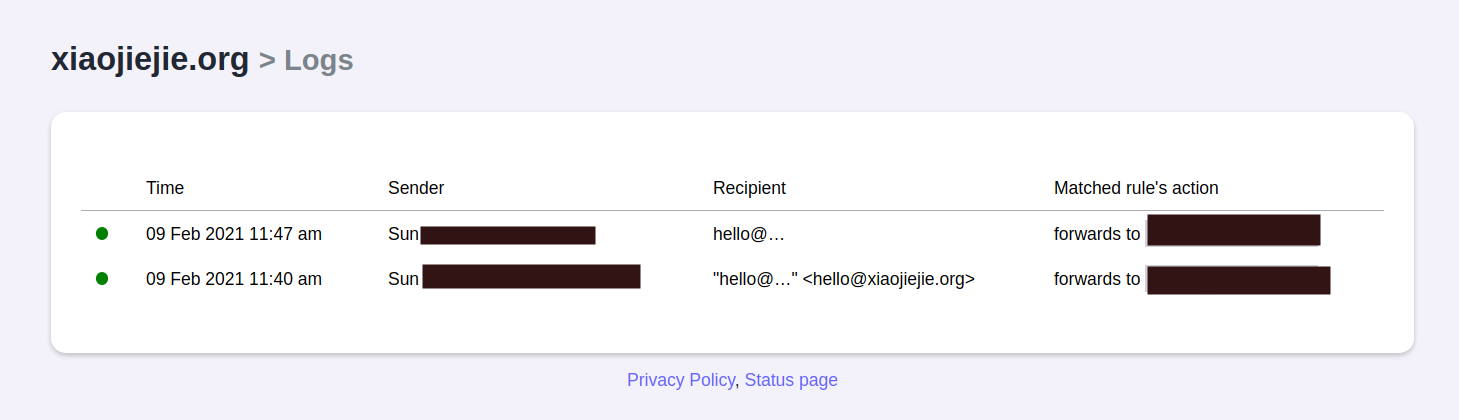
转发测试
如上图所示,邮件的发件人为原发件人的邮箱地址而非Mailway.app地址。
源信息Authentication-Results:(部分信息以###代替)
Authentication-Results: spf=pass (sender IP is ###) smtp.mailfrom=xiaojiejie.org; live.com; dkim=fail (signature did not verify) header.d=###;live.com; dmarc=fail action=quarantine header.from=###;compauth=none reason=450 Received-SPF: Pass (protection.outlook.com: domain of xiaojiejie.org designates ### as permitted sender) receiver=protection.outlook.com; client-ip=###; helo=peter.smtp-in.mailway.app;
dkim=fail (signature did not verify),DKIM未通过验证,可能是因为添加DKIM时间较短导致。
如果想自行搭建,可参考官方文档:
]]>”,邮箱界面默认配色为橙色,邮箱容量5GB,90天内仅可扩容一次,邮箱容量无上限。可注册用户名长度为4-20位,其中4位和5位数用户ID为收费注册。
邮箱功能
在邮箱功能方面,跟完美其它后缀邮箱相同,支持15秒内取消邮件发送、邮件撤回(需满足两个条件:对方未打开该邮件;邮件发送时间不超过15天)、误删恢复(可恢复最近30天删除的邮件,需用手机接收恢复码)以及两步验证(仅支持通过手机接收短信的方式)。
客户端设置
| 服务名 | 服务器地址 | 非加密端口号 | SSL协议端口号 |
|---|---|---|---|
| POP3 | pop.111.com | 110 | 995 |
| IMAP | imap.111.com | 143 | 993 |
| SMTP | smtp.111.com | 25 | 465 |
支持生成专用密码登录第三方邮件客户端的密码。
其它
跟88.com和email.cn一样,就不过多介绍了。
]]>
选择完喜欢的订阅方案后,点击“Select”进入下一步。
选择用户名及邮箱后缀,输入密码,同意协议后进入下一步即可。
注:因个人已是Tutanota订阅用户,自第三步开始及往后步骤未测试。
]]>
Tutanota计划对该法院11月份的判决提出上诉,认为该判决与汉诺威地区法院今年早些时候裁定”Tutanota并不提供电信服务,根据德国法律,Tutanota不应被迫对其电子邮件进行监控”的判决相违背,科隆地区法院的最新判决也可能与欧盟法院2019年作出的Gmail不是电子通信服务的判决相抵触。
Tutanota的联合创始人Matthias Pfau表示,这一判决不会影响其他用户的电子邮件,但可能会为电子邮件安全和隐私设置一个危险的先例。如果其他类似案件在未来数月或数年内浮出水面,这起案件可能会为更具侵入性的监控铺平道路。
同时,Tutanota也在Redit对些进行了回应:
“Tutanota是为数不多的加密整个邮箱的邮件提供商之一。加密的数据不能被我们解密,因为只有用户持有解密的密钥。判决要求Tutanota将犯罪嫌疑人新收、发的未加密邮件在加密之前上交。该判决不会影响任何其他邮箱帐户,也不会影响已经加密的数据或通过端到端加密发送的电子邮件。只有用户有权访问密钥,因此我们无法解密任何数据。这一判决再次表明了端到端加密的重要性。任何未经端到端加密发送的电子邮件必须视为不机密,我们始终向用户解释这一点。虽然我们必须遵守法院的命令,但我们会不遗余力地保护用户的隐私。这就是为什么我们会对这个决定提起上诉。此外,我们目前正准备就类似案件向BGH提出上诉,以获得最高法院的判决。”
原文如下:
Tutanota is one of the few mail providers that encrypts the entire mailbox. The encrypted data can’t be decrypted by us as only the user holds the key for decryption.
This ruling requires Tutanota to hand out newly incoming and outgoing non-encrypted emails of one suspected criminal before these are being encrypted.
The ruling does not affect any other mail account. It also does not affect already encrypted data or emails that are sent with end-to-end encryption. Only the user has access to the key so we are not able to decrypt any data.
This ruling again shows why end-to-end encryption is important. Any email sent without end-to-end encryption must be considered as not confidential and we always explain this to our users.
Edit: While we have to comply with court orders, we go to great lengths to fight for our users’ privacy. That’s why we will file an appeal against the decision. Furthermore, we are currently preparing an appeal to the BGH in a similar case in order to obtain a decision from the highest court.
Reddit相关讨论地址如下:
]]>注意:每个手机号最多可注册三个邮箱账户。
此次Email.cn有两种玩法:第一、注册”@*.email.cn”二级后缀的免费邮箱;第二、注册后缀为”@email.cn”后缀的普通邮箱。
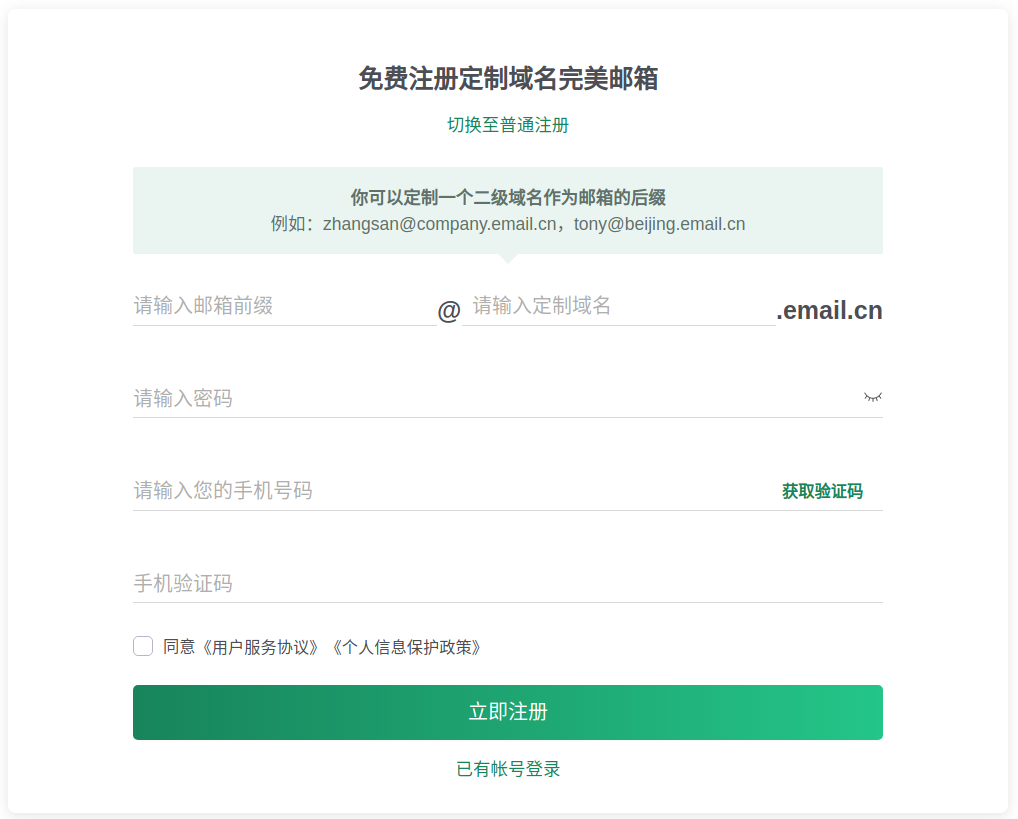
二级后缀
邮箱前缀及二级域名仅支持数字和字母,长度为2-20之间,然后输入密码、手机号、手机验证码即可。
普通后缀
点击”切换至普通注册“即可注册后缀为”Email.cn“的免费邮箱,邮箱账户支持数字、字母以及英文标点”.”,长度需6-20位,且必须以字母开头。
邮箱特色
跟88.com完美邮箱一样,容量及个人网盘大小均为5GB,支持手动扩容(90天内仅可扩容一次),支持IMAP/POP3以及SMTP
客户端配置
| 服务名 | 服务器地址 | 非加密端口号 | SSL协议端口号 |
|---|---|---|---|
| POP3 | pop.email.cn | 110 | 995 |
| IMAP | imap.email.cn | 143 | 993 |
| SMTP | smtp.email.cn | 25 | 465 |
Poistaa will receive all the emails and silently delete the emails. Every single email will be discarded.
简单的说,Poistaa类似一个黑洞,所有发往“@Poistaa.com”的邮件就像进入黑洞一样全部消失。我暂时没有想出来应用场景,到底是图啥。
邮箱特色
免费使用
No need to pay to use Poistaa. Use it at your convenience for free. Since the entire features of this free discard service are available for free, there is no harm giving it a try and explore the features for yourself.
无需注册
Every possible email address @poistaa.com is available for you (and everyone else) to use, without any registration.
邮箱前缀可以自己任意选择、没有任何限制,如john@poistaa.com, sarah@poistaa.com, work@poistaa.com, office@poistaa.com等都可以。
其它
其它方面也没什么好说的,如果自己想弄一个这样的服务也非常简单,弄个域名邮箱然后开启”Catch all“功能再搭建个网页就可以了。
从官网的介绍中可以看出,Poistaa是用Github Pages和免费的域名邮箱Postale搭建的。
]]>web hosting service by Github Pages and email service handled by Postale.
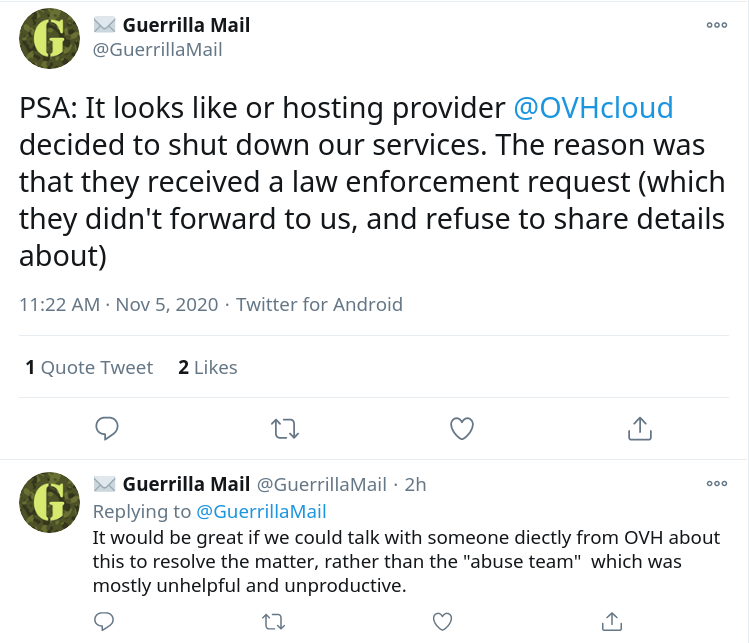
著名的临时邮箱Guerrilla Mail今日发推表示,其主机托管商OVH声称收到了有关部门的执法请求并关闭了Guerrilla的主机服务,目前Guerrilla Mail暂时无法访问。
推特原文:
PSA: It looks like or hosting provider @OVHcloud decided to shut down our services. The reason was that they received a law enforcement request (which they didn’t forward to us, and refuse to share details about).
It would be great if we could talk with someone diectly from OVH about this to resolve the matter, rather than the “abuse team” which was mostly unhelpful and unproductive.
邮箱特色
安全
Discreet Email支持以下协议:SSL/TLS, AES/RSA, OpenPGP, TOTP/2FA & DKIM/SPF。但比较尴尬的是我还没找到在哪设置两步验证。
加密
SSL/TLS以及OpenPGP插件支持。
匿名
注册使用不需要任何个人信息,并每天删除服务器日志。
客户端
目前仅支持安卓客户端。
邮箱注册
打开官网选择“Get Your Private Email Now”或直接点击https://signup.discreet.email/apps/beta?plan=free,然后选择”Free Account“并点击下方的”Create Free Account“按钮进入邮箱注册界面,按要求填写用户名、密码和备用邮箱即可。
用户名需5位数以上,密码需8位数以上且必须包括大写字母、小写字母、数字和特殊符号。
邮箱使用
WebMail为Roundcube,很多邮箱都是这个界面就不过多介绍了。
其它特色
- Built-in native PGP key creation and management
- Built-in native PGP encryption / decryption
- Native support for 70+ languages
- Drag-&-drop message management
- Full support for MIME and HTML messages
- Full support for message attachments
- Support for multiple sender identities
- Full featured address book with groups
- Find-as-you-type address book integration
- Searching capabilities for messages and contacts
- Optional threaded based message listing
- Support for Internationalized Domain Names
- Enhanced spell checking specific to each user
- Full Malware & SPAM protection (inbound & outbound)
- Built-in caching for faster mailbox access
- Advanced Responsive interface for mobile devices & Android App
其它
- 两步验证未找到在哪设置。
- 网站介绍”Support for Internationalized Domain Names“,不知道是不是只有收费版才有。
- 邮箱空间大小也不清楚。
到目前为止,前期注册的免费邮箱还能正常登陆使用,不确定后期是否会取消。
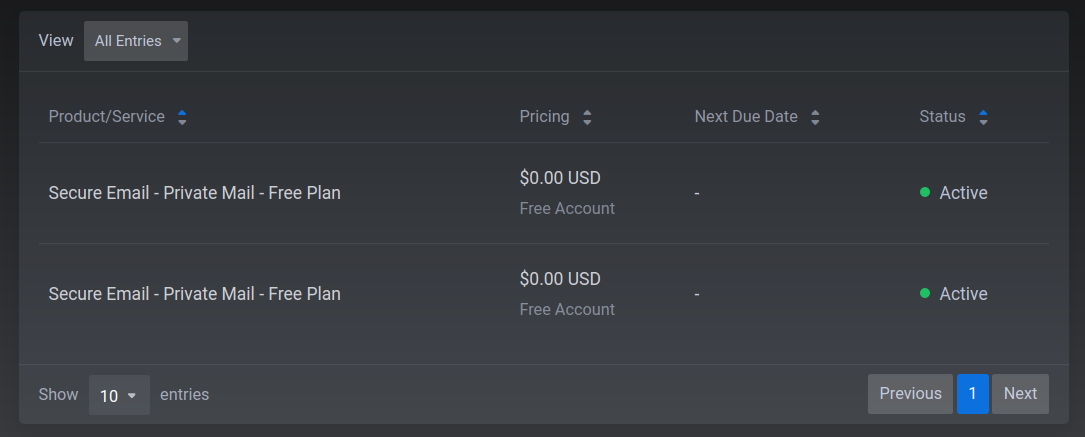 除此之外,在PrivateMail官网的博客中也没有找到关于取消免费邮箱服务的文章,邮箱内也未收到相关通知,因此前期注册的免费版加密邮箱也不建议当作主力邮箱使用。
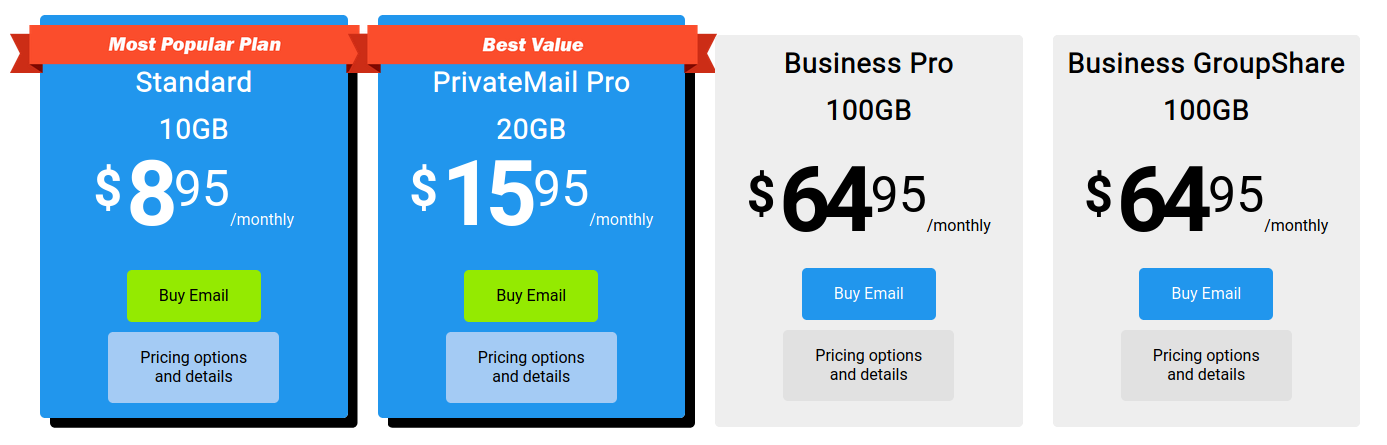
就目前PrivateMail的四个套餐而言,8.95美元每月起的价格相对来说已经算比较贵的了,而且只有Business Pro和Business GroupShare才能使用自己的域名和POP3、IMAP以及SMTP等,价格64.95美元每月起。当然了,如果您不差钱想体验一下较为昂贵的加密邮箱服务,可通过https://privatemail.com/members/aff.php?aff=71该链接注册、购买,输入优惠码“httpsmail”立享“50% off”五折优惠。
8月份,免费的域名邮箱Migadu不能用了,现在免费的PrivateMail也不能注册了,下一个不知又会是谁家。
]]>9月18日,Tutanota团队通过邮件的方式对遭受的DDoS攻击作了简短的说明,除此之外,还介绍了一些新功能及用户使用政策:
日历邀请功能
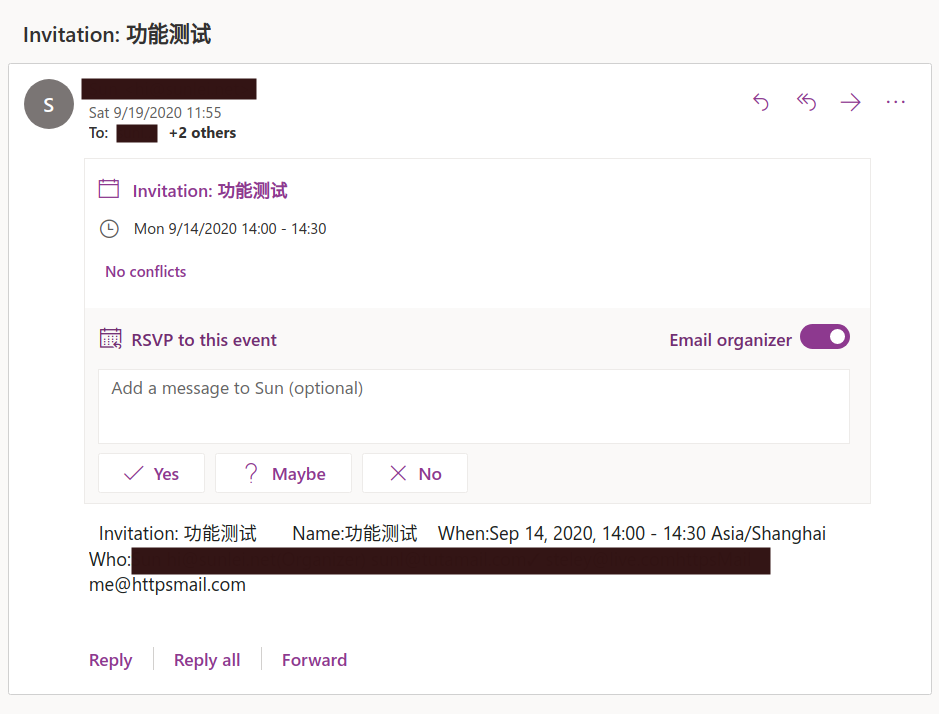
该功能8月份就已经可以正常使用了,邀请对象也可以是非Tutanota邮箱账户。
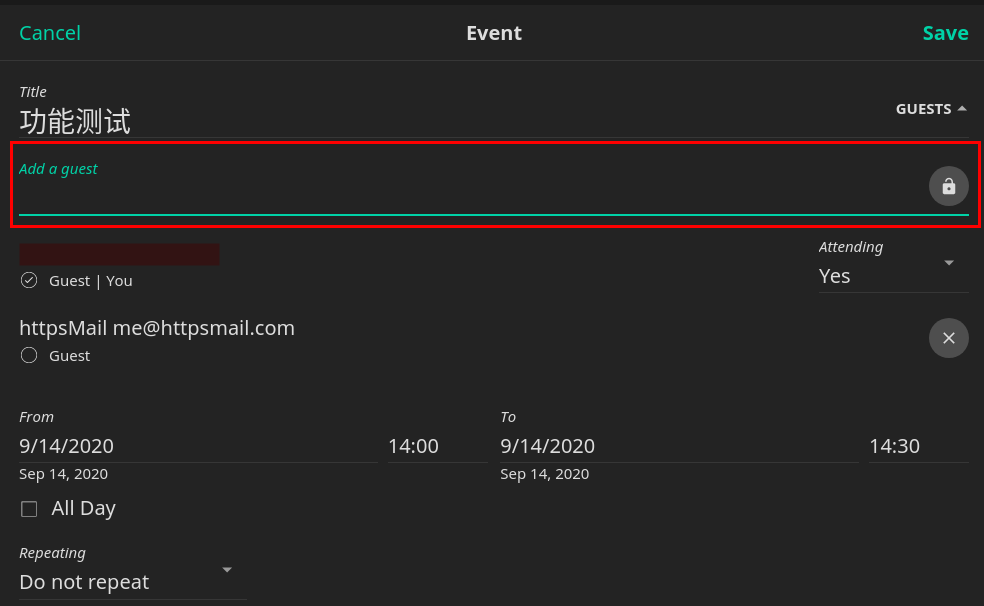
在红框范围内输入邀请对象邮箱地址即可,后边的小锁可以选择是否加密。点击“Save”保存后,就会自动发送邀请邮件到对方邮箱。
不活跃账户删除
邮件原文:
Deletion of unused accounts
As stated in our Terms, we delete free accounts if they have not been used for six months. So far we did not actually proceed with this, but with the immense number of new users coming in, we are now starting to delete free accounts that have not been logged in for the last six months. Paid accounts (even if unused), or free accounts that you regularly use are not affected by this.
开始删除6个月未登录的免费账户,付费用户及经常使用的账户不受影响。
Post-quantum后量子加密?
Post-quantum questionnaire
At Tutanota, we focus on security and privacy. To keep your data safe at all times - also in the future - we have started a research project to add post-quantum secure encryption to Tutanota. If you can spare 10 minutes of your valuable time, we’d be happy to hear your thoughts on post-quantum encryption.
Tutanota团队正在研究“post-quantum”加密。
]]>
邮箱特色
- 支持两步验证
- 支持Pop3、IMAP和SMTP邮件同步
- 邮箱容量大小为2GB
- 附件大小最大为50MB,且数量不得超过10个
- 仅支持土耳其语及英文
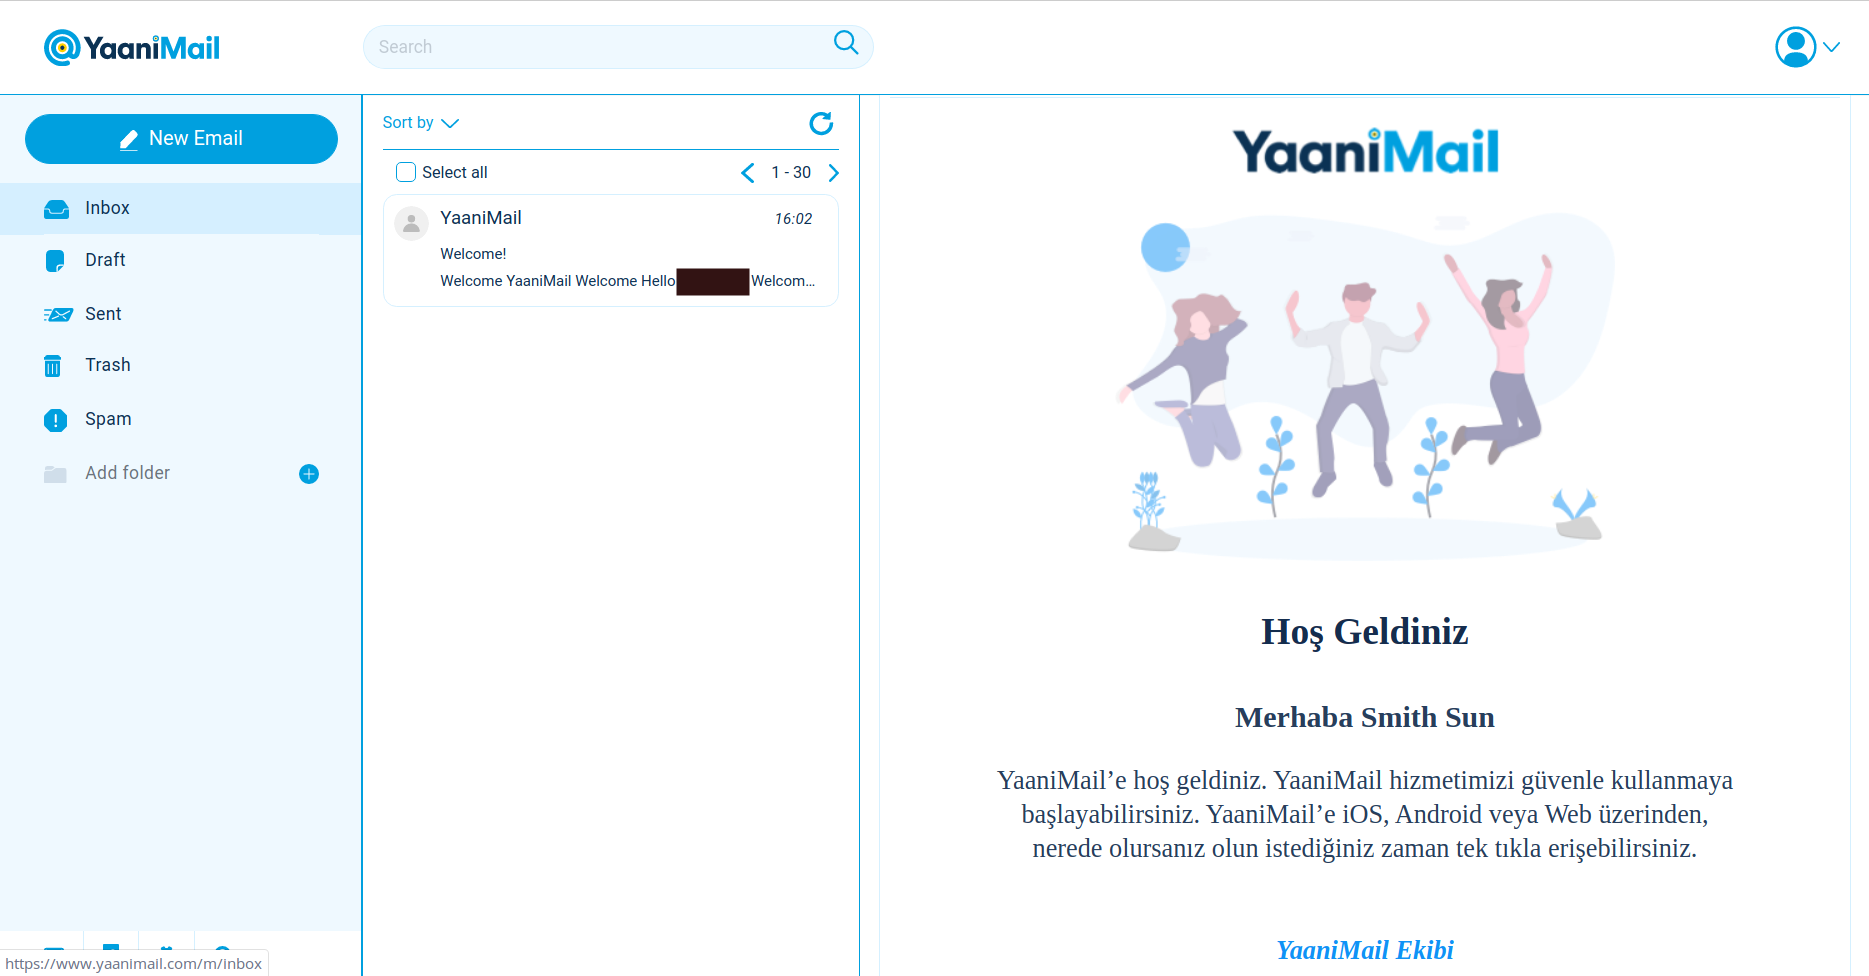
- 支持安卓、苹果客户端以及WebMail
- 邮件发送数量每小时不得超过100封,每天不得超过1000封
- 支持邮箱账户删除
邮箱注册
注: YaaniMail邮箱注册需要验证手机号码,每个手机号码可注册20个邮箱账户。
- 访问YaaniMail官网:https://www.yaanimail.com/home,如果网页界面为土耳其语,下接到网页底部,点击右正角的“English”即可切换为英文。
- 点击网页顶部右上角的“Create an account”打开邮箱注册界面,输入姓名、用户名(4位数以上,字母或数字)、密码(密码必须8位数以上,须包括大写字母和数字,且数字不得连续,如123、234、456等)和出生日期后点击“Continue”进入下一步。
- 输入备用邮箱、选择安全问题并填写安全答案后点击“Verify Your Phone Number”验证手机号码(未测试国内手机号码是否可用)。
- 输入手机号码及验证码,手机号码验证成功就可以登陆使用了。
- 打开备用邮箱收到的YaaniMail邮件,点击邮件内的备用邮箱验证链接验证备用邮箱。
域名邮箱

域名邮箱共三种不同的价格套餐,每月的价格分别为6土耳其里拉、10土耳其里拉和15土耳其里拉(换算汇率:1 土耳其里拉 = 0.9019 人民币)。
客户端设置
- IMAP :imap.yaanimail.com - 端口993 – SSL
- SMTP:smtp.yaanimail.com - 端口587 – TLS
- POP3:pop.yaanimail.com - 端口995 – SSL
Your Invite Code Is Ready!
We have been slowly rolling out invites for users in the queue to make a free OnMail account. Your spot in the queue is ready! Claim your OnMail email address today!
This code will expire in 7 days
唯一需要注意的是邀请码有7天的有效期,过期失效。
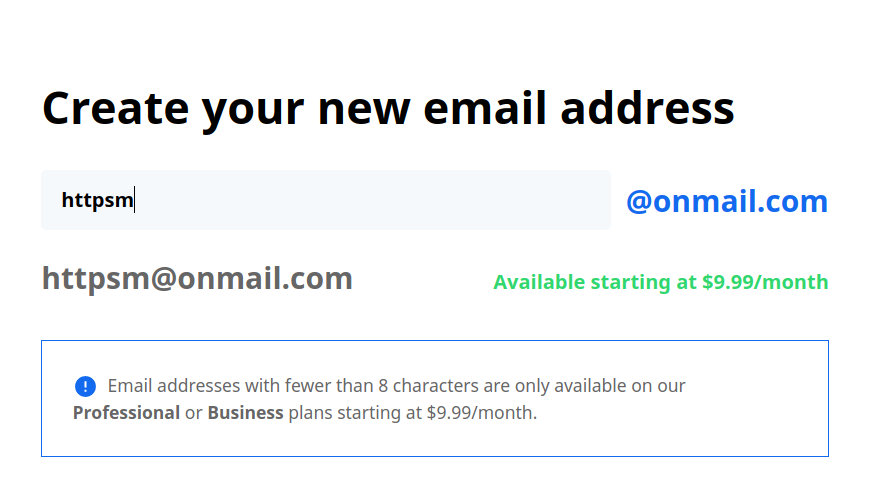
注册过程就不说了,最大的遗憾就是免费邮箱的用户ID长度必须在8位数以上,我姓名的全拼才6位,于是就是全拼的前边加上了个”hi“。
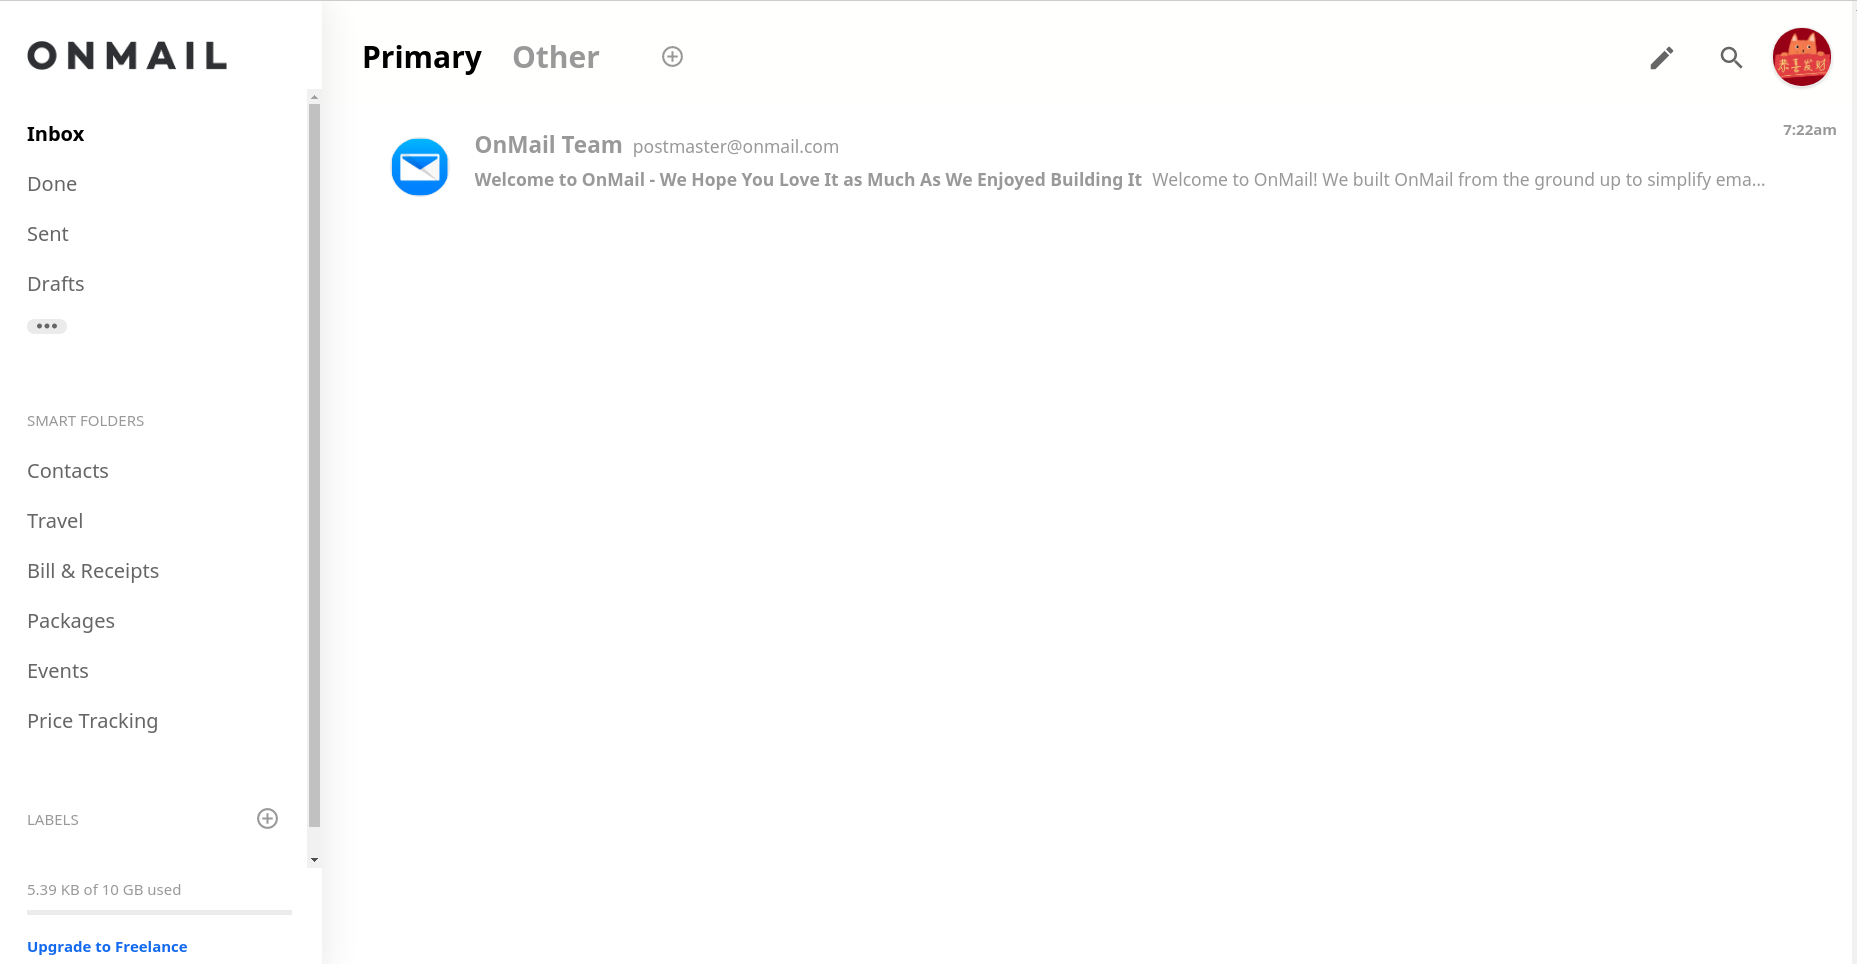
邮箱界面如下:
邮件打开的界面如下:
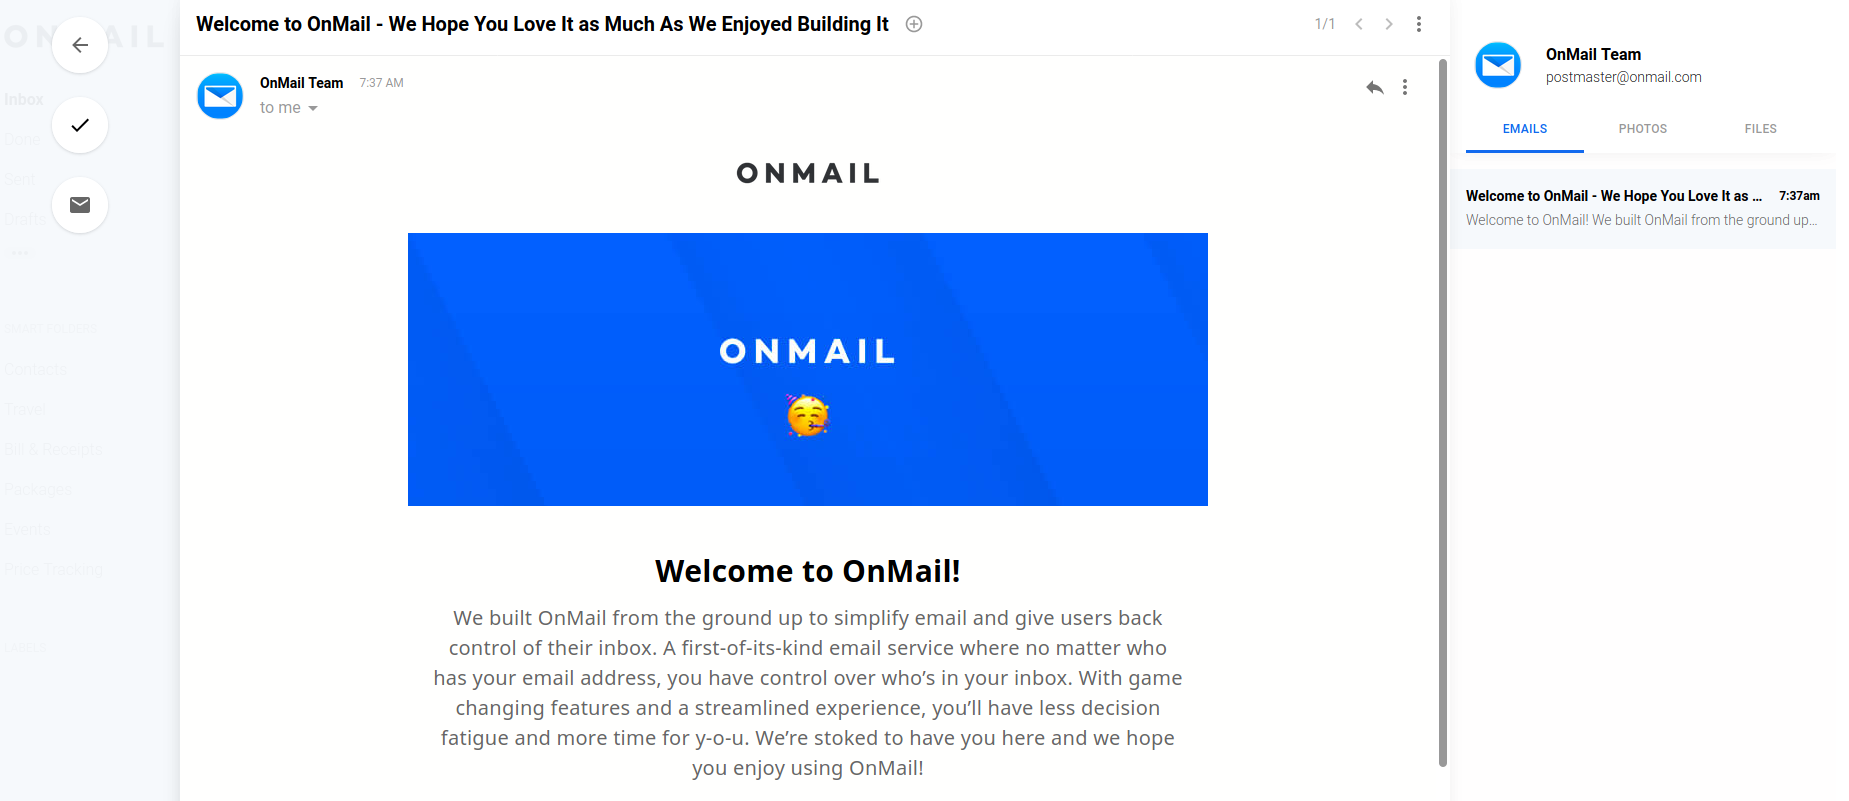
Onmail邮箱的整个风格非常简单,使用方法类似于Google Inbox,除此之外,跟普通的邮箱没什么太大的区别,在设置上也不繁杂。在邮箱的功能方面,支持设置邮箱标签、设置签名、假期自动回复和邮件过滤规则设置等。
比较有意思的是邮箱的联系人无法自己添加,给对方发送邮件后对方的邮箱地址会自动出现在邮箱”Contacts“里(这点有点讨厌);在收到邮件后,必要选择”Block“或”Accept Contact“,否则只能查看邮件无法进行其它操作。

总体来说,Onmail还是比较不错的,邮箱界面简单、干净,10GB的邮箱空间也显示比较大方。
]]>
邮箱特色
- 支持PGP加密以及端到端加密
- 支持两步验证
- 支持IMAP、POP3、SMTP
- 支持别名,暂不清楚别名的数量限制,我目前添加了5个,ID长度包括单字母、双字母、三字母、四字母,数字未尝试。除一些常用词被保留外,其它都能添加成功。
邮箱注册
邮箱注册就不多说了,注册过程非常简单。打开官网,点击右上角的“SIGN UP”或点击https://swismail.com/account/create。
邮箱使用
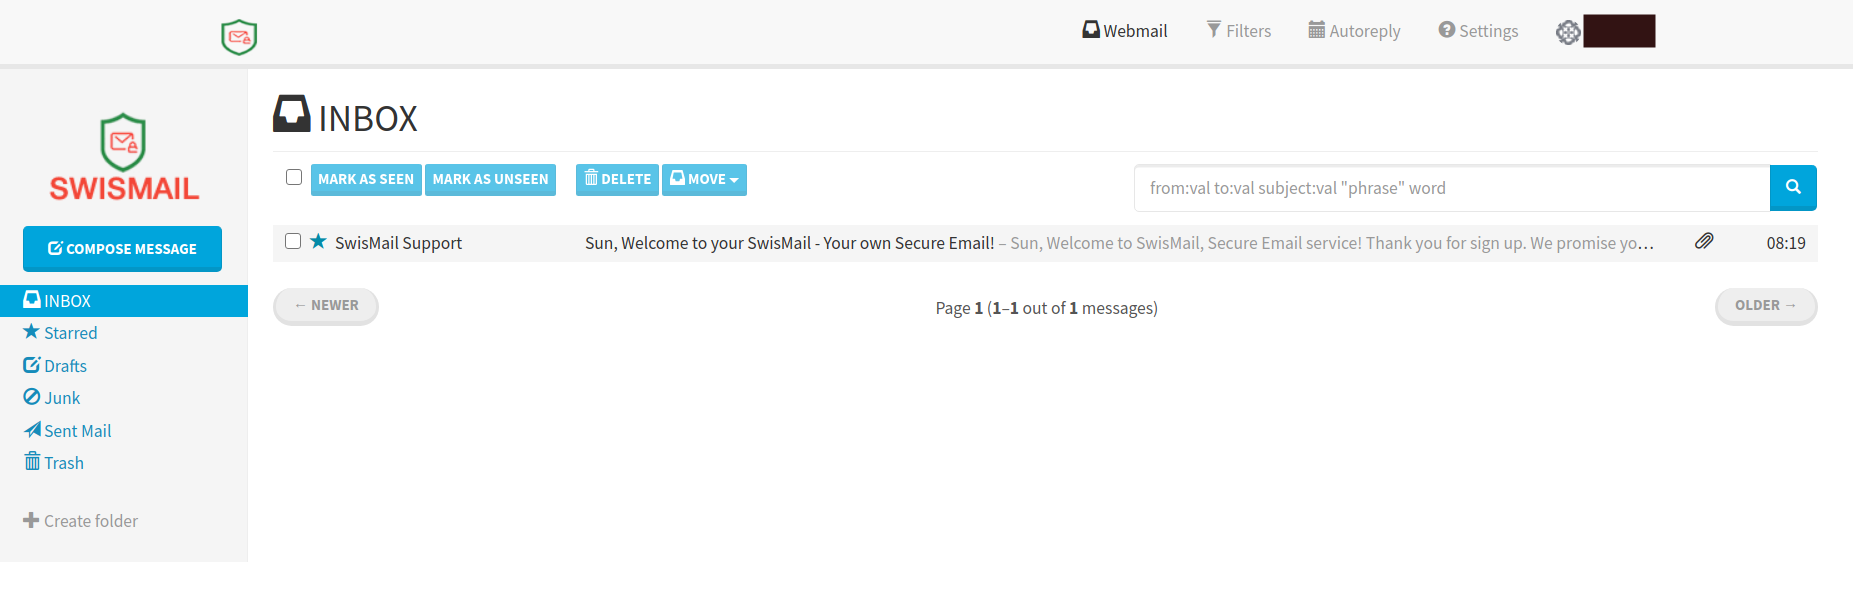
邮箱上方菜单栏依此为Webmail、Filters、Autoreply、Settings和账户设置(包括Account账户、Security安全和Log out退出三个选项)。
- Webmail:点击就会返回到邮箱收件箱界面。
- Filtels:设置邮箱收件过滤规则。
- Autoreply:自动回复,默认是关闭的。
- Setting:IMAP、POP3、SMTP服务器地址以及端口等信息。
- Account:“Overview”查看邮箱的相关信息,如邮箱已使用容量大小、每日收件和转发的数量;“Profile”设置邮箱地址显示的姓名以及设置邮件转发;“Identities”添加、管理邮箱别名。
- Security:“Two factor authentication”,设置两步验证,还支持U2F硬件;”Account Password”,修改密码;“Application specific passwords”,程序应用专用密码,用客户端收发邮件时需要生成应用专用码替代邮箱密码;“GPG Encryption”,GPG加密设置;”Security events”,操作记录。
GPG使用
在”Security“ -> “GPG Encryption”中,选中”Enable encryption“,然后将收件人的公钥粘贴到”GPG Public Key (replaces current key):“下方的输入框并点击”UPDATE ENCRYPTION SETTINGS“就成功导入收件人的GPG公钥了,发送邮箱时输入对方邮件地址会自己加密为GPG信息。
客户端配置
参考”Setting“内IMAP、POP3和SMTP信息,并用”Security“ -> “Application specific passwords”生成的应用程序专用密码替代邮箱密码。
不足之处
- 好像没有通讯录这一功能。
- 它这个GPG加密有点迷,在Swismail发件箱内显示的是GPG加密邮件无法查看邮件内容,但收件人收到的就是普通邮件,不需要用GPG密钥解密。
邀请码申请地址:https://www.onmail.com/onmailQueueSignUp,如果你想帮帮我让我更提前一点也可以点击这个网址:https://www.onmail.com/redeem?type=onmail&code=UTrQgQ69zJ 申请。
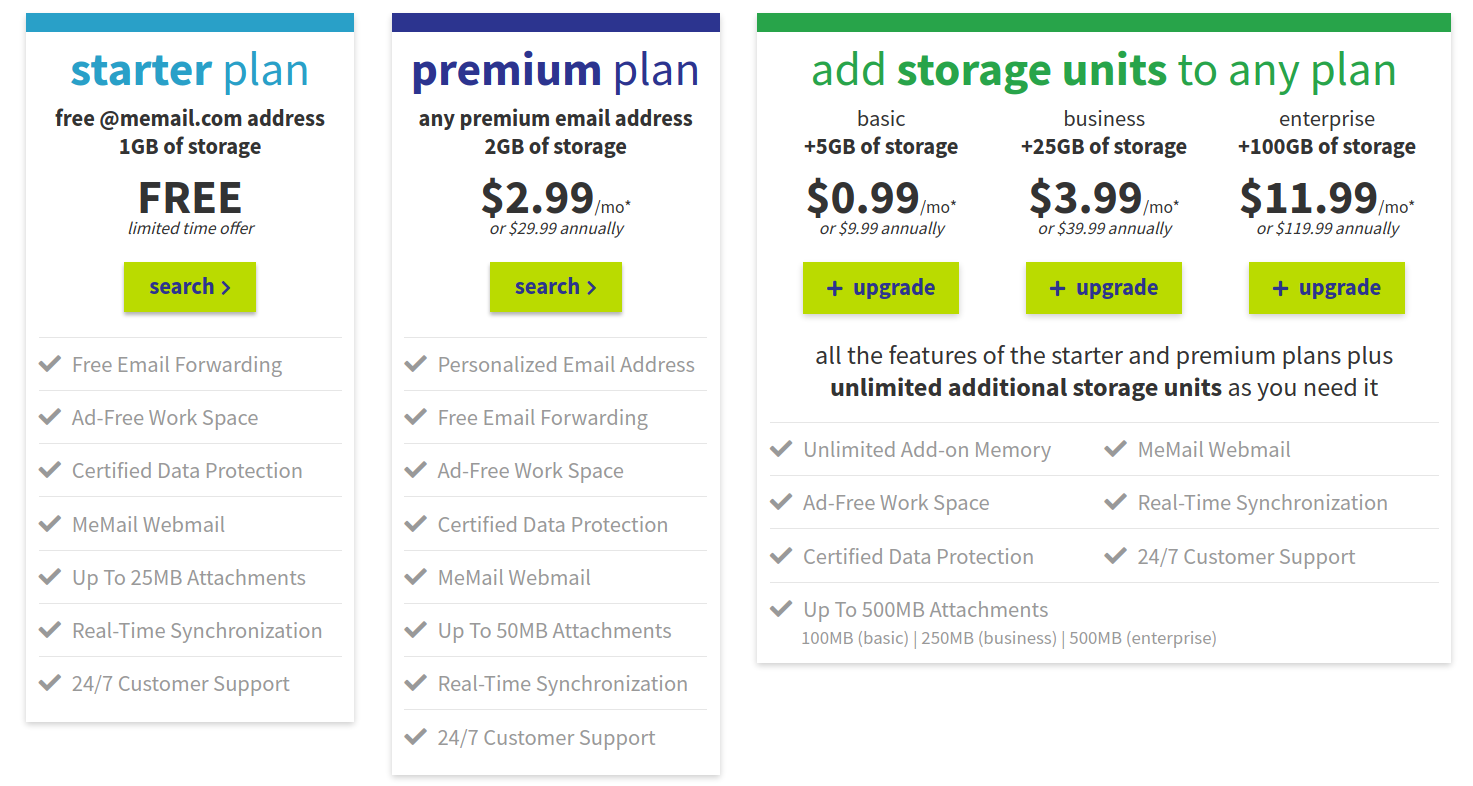
Onmal套餐价格如下:
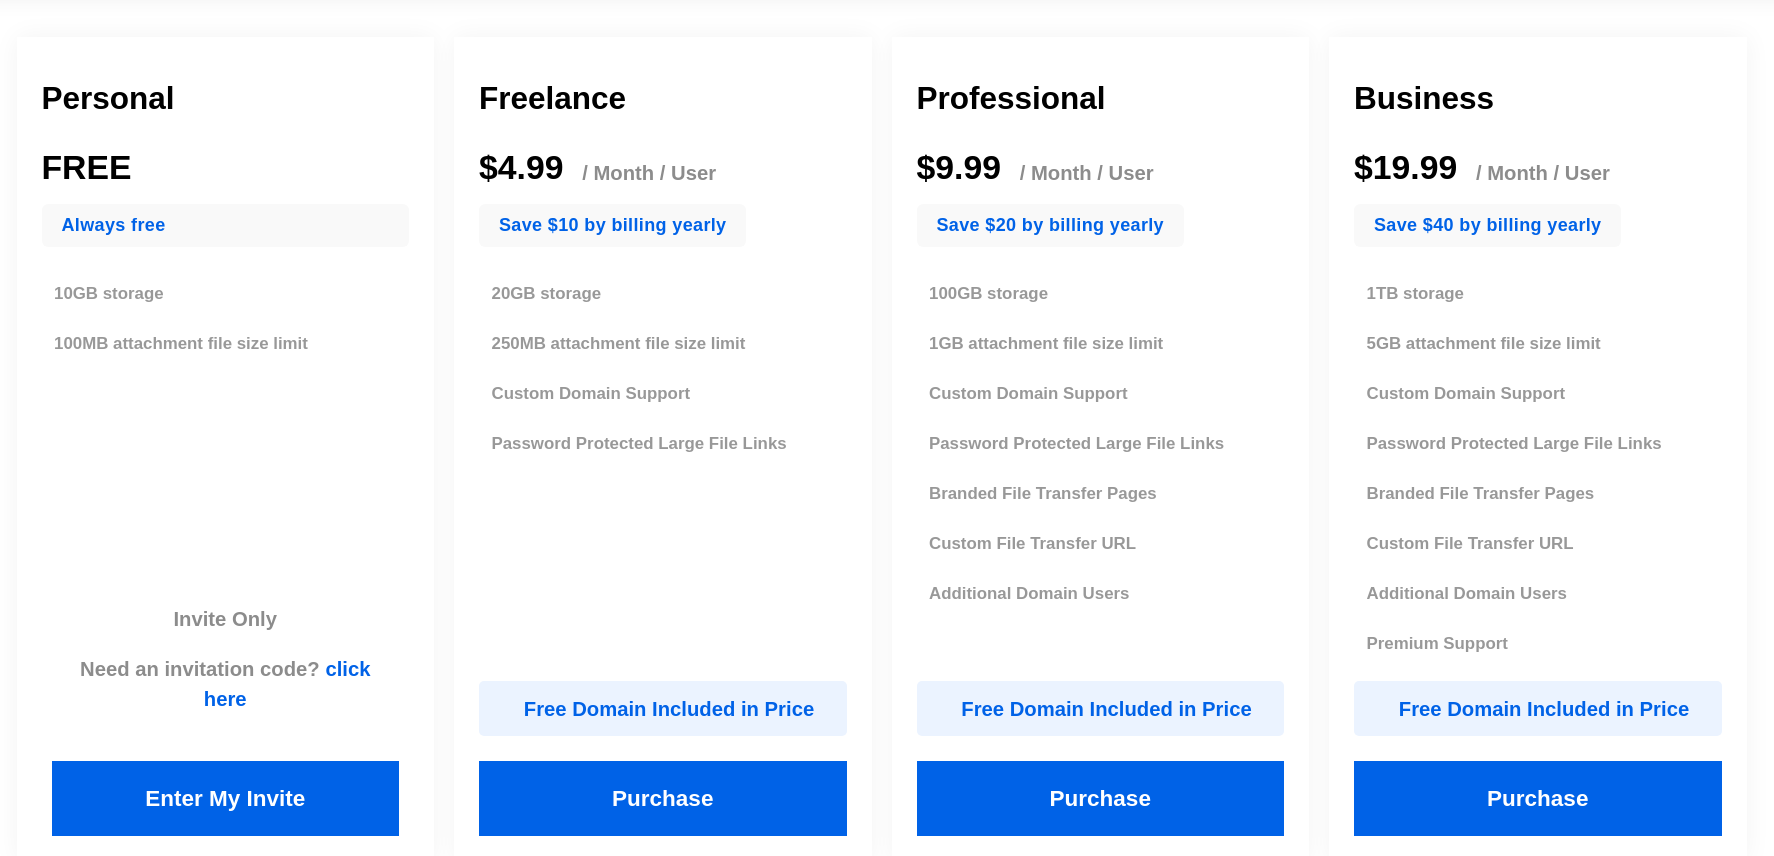
个人版是免费的,邮箱空间大小为10GB,最大支持100MB附件,从空间上还是比较大方的。其它收费版套餐价格都包括注册域名的价格。
邮箱注册
点击右上角的”Sign Up”进入注册程序选择自己喜欢的用户名,邮箱用户ID需8位以上,少于8位的用户ID仅支持“Profeesional”和“Business”套餐,即9.99美元每月和19.99美元。(从这就看出完美的88邮箱还算良心了吧)
选择完用户ID,按要求填写相关个人资料就可以了,注册过程比较简单。注册过程还会有“你的隐私很重要”的提示:
Your privacy is important
Your data makes OnMail work and, when permitted, supports our measurement business, Edison Trends. If you choose to opt-in to sharing data, we will collect information when you sign up and use OnMail, like commercial messages and purchase receipts. The data is de-identified and it’s only use is to create aggregated research insights. We share this research with third parties and prohibit them from using the information for any purpose other than understanding e-commerce trends. You can always opt-out of Trends at any time!
Would you like to opt-in?
大意就是,如果同意Onmail将会收集你的相关信息并与第三方分享,所收集数据仅用来使Onmail变得更好,不允许第三方用于商业目的,个人也可以选择随时退出。
选“No, Thanks”就好了。
邮箱使用
等邀请码下来,我再详细研究吧。但我从他们的Twitter上扒了一张图片下来,可以大概了解一下邮箱界面大体的样子。

25Mail注册
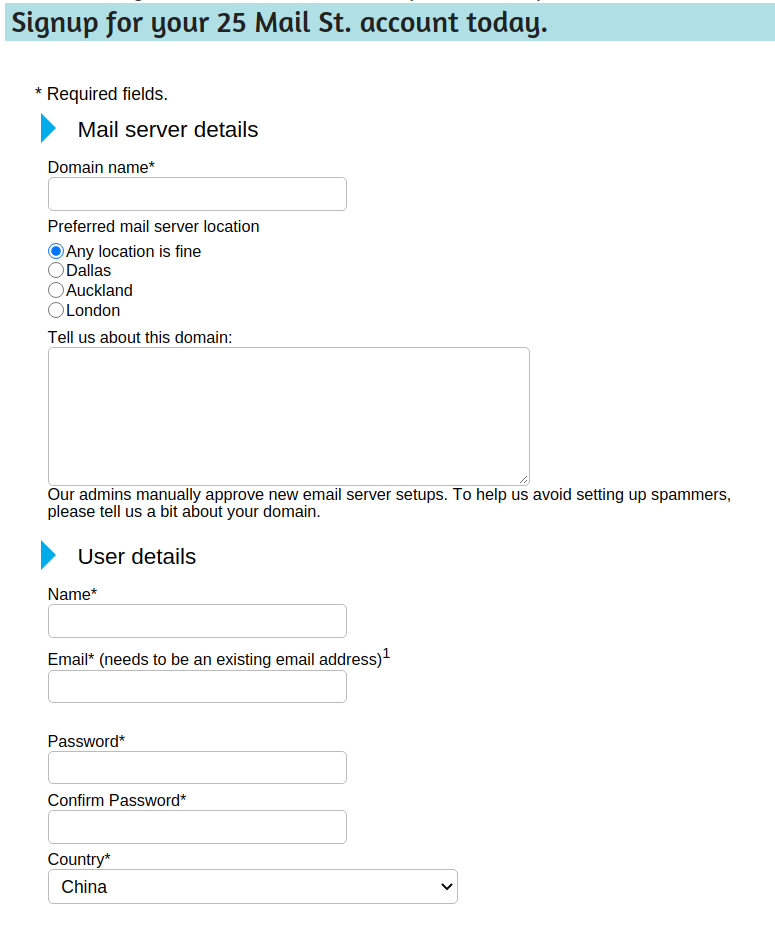
需要填写的东西比较简单。因为免费的域名邮箱是需要人工审核的,最好在“Tell us about this domain:”对你要添加的域名作一个简单的介绍。
账户创建成功后按网站提示激活账户然后等待即可,25Mail后台创建成功后会收到提示邮件。
25Mail设置
管理员后台设置
后台登陆地址:http://mail5.25mail.st/postfixadmin
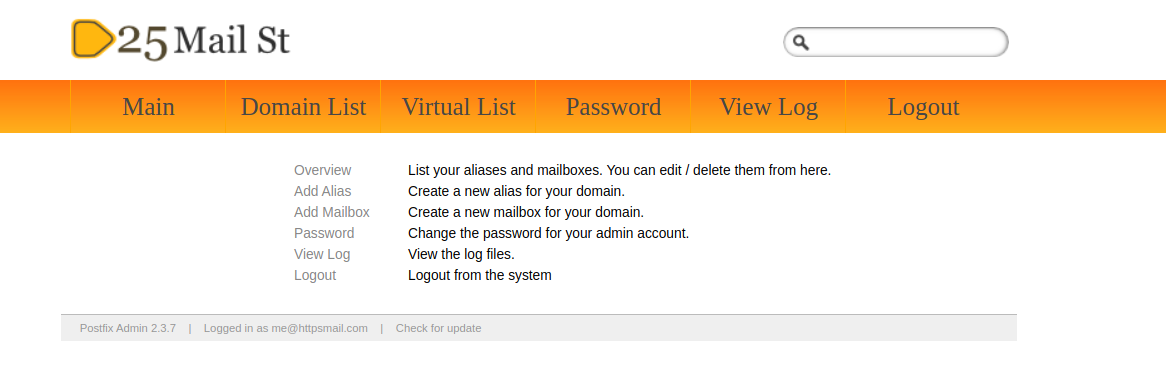
Domain List
主要显示你添加的域名以及在该域名下的邮箱别名和邮箱账户数量。
Virtual List
显示域名邮箱下邮箱别名和邮箱账户的详细信息。二级菜单下可添加邮箱账户、邮箱别名以及域名别名。如使用CatchAll功能,在添加邮箱别名时,将“*@你的域名”绑定到你已激活的邮箱地址即可。
Password
更改密码。
View Log
显示最近的10次操作记录
用户后台设置
登陆地址:http://mail5.25mail.st/postfixadmin/users/login.php

Auto Response
自动回复设置
Change your forward
设置邮件转发
Change Password
更改账户密码
DNS解析设置
根据提示依次添加MX、SPF和DKIM记录。
MX:mail5.25mail.st
SPF:”v=spf1 a mx ~all”
DKIM:25mailst
25Mail使用
WebMail
邮箱登陆地址:http://mail5.25mail.st/roundcube
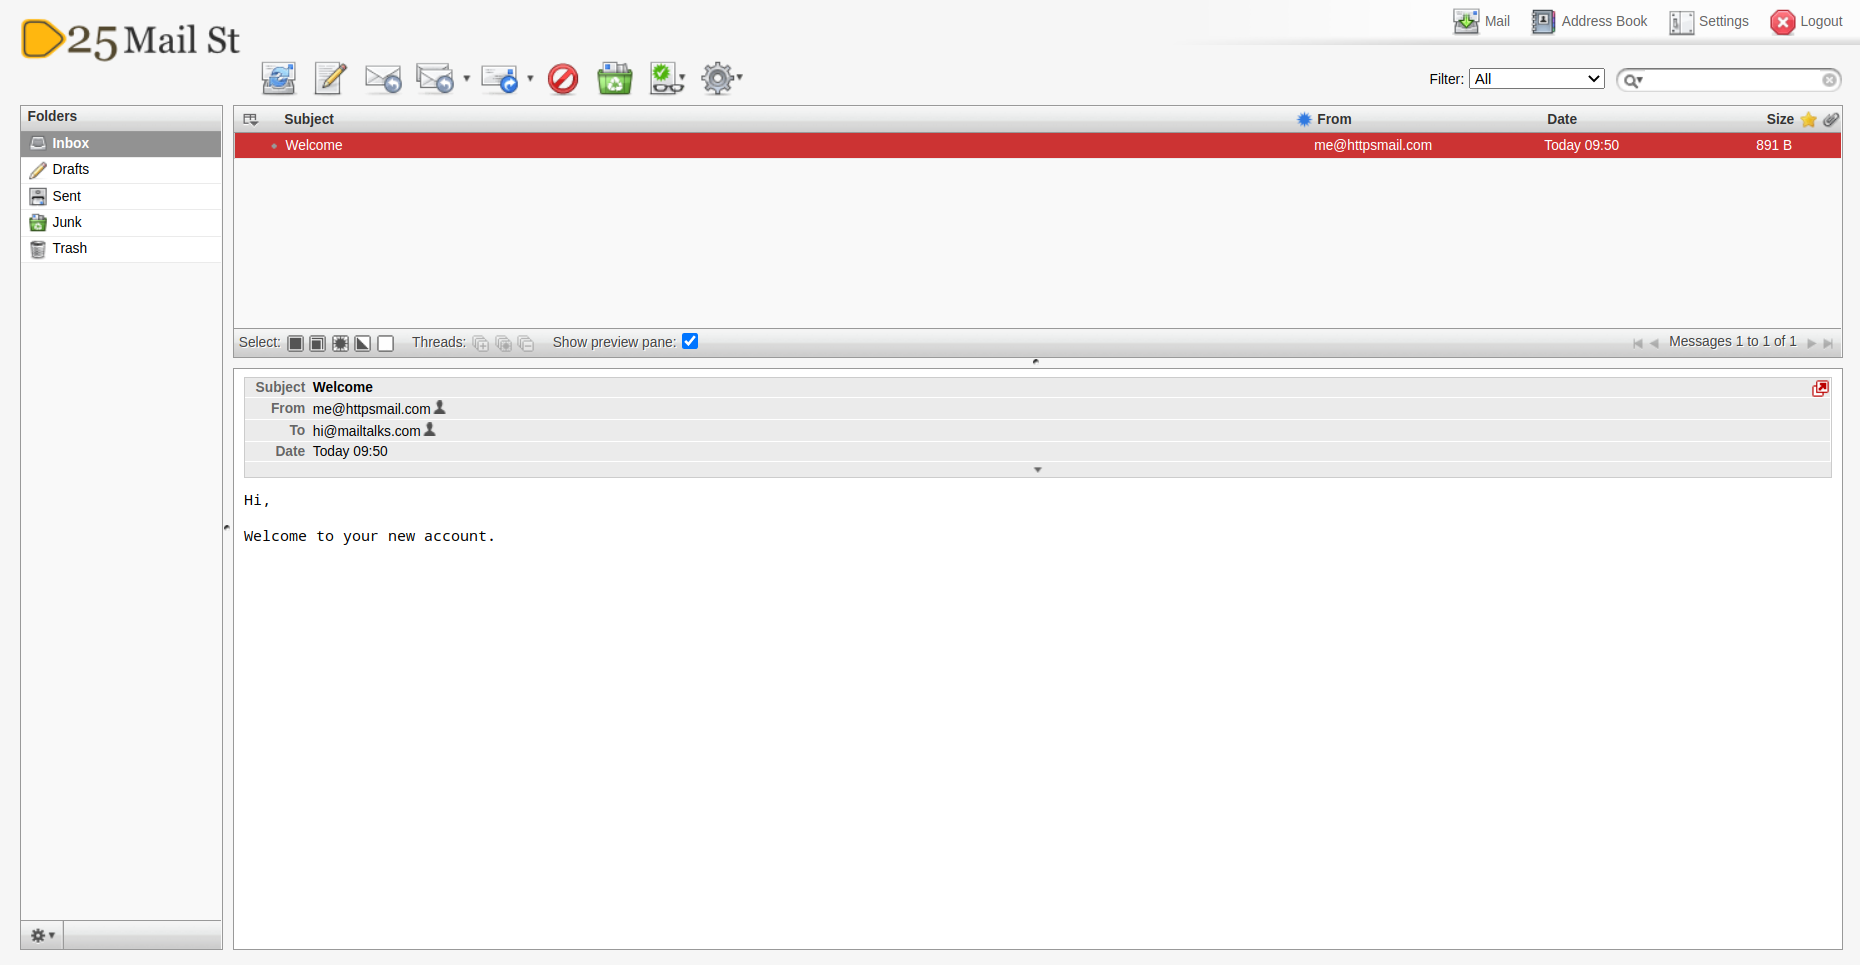
WebMail系统基于Roundcube且版本较老,安全性堪忧。
客户端设置
SMTP
服务器地址:mail5.25mail.st
端口:587, 25 or 2525
加密:STARTTLS
IMAP
服务器地址:mail5.25mail.st
端口及加密链接:143 / STARTTLS,993 / SSL/TLS
POP3
服务器地址:mail5.25mail.st
端口及加密链接:110 / STARTTLS POP3S,995 / SSL/TLS
What happened to the free plan?
We used to offer a free plan for more than 5 years. However, the amount of users we served has significantly grown since. We’re not in Kansas anymore. To ensure a quality service for everyone, we now ask a minimal contribution.
We have added a new plan, Micro, that is accessible to users in even most undeveloped countries. This plan replaces the free plan and it comes with all the features enabled as our other plans.
There is nothing free on the Internet. At the end of the day, someone gets the bill. We do not make our living by digging or selling your data, but rather guarding it. If that is of no value to you, we’re not such a good match.
Micro套餐费用按年收取,每年$19,最大支持添加5个域名,邮箱空间大小为5GB,每日收、发信限制数量分别为200封邮件和20封邮件。
Micro套餐与其它套餐比较:
| 套餐 | Maxi | Standard | Mini | Micro |
|---|---|---|---|---|
| 邮箱地址 | 不限 | 不限 | 不限 | 不限 |
| 域名数量 | 不限 | 不限 | 不限 | 5 |
| 价格 | $99 每月 | $29 每月 | $9 每月 | $19 每年 |
| 收件数量 | 10000 每天 | 3000 每天 | 1000 每天 | 200 每天 |
| 发件数量 | 2000 每天 | 500 每天 | 100 每天 | 20 每天 |
| 邮箱空间 | 500 GB | 100 GB | 30 GB | 5 GB |
与其它收费域名邮箱相比,Migadu价格优势不大,在邮箱空间大小、可添加的邮箱地址数量和域名数量方面有较大优势,但每天的收、发件数量限制会给邮箱的正常使用带来很大的不便,建议优先考虑其它的域名邮箱。
]]>
PlumMail由美国著名的创业孵化器Y Combinator提供资金支持,今年8月份创立(可能是8月8日)。目前正处于Demo阶段,如果对该项目感兴趣可以发邮件到yesplease@plummail.co加入等待名单。
邮箱特色
Pins
可以提取邮件中的时间、地点等关键信息置顶。

Fast Formatting
支持Markdown

Search for Answers
强大的搜索功能,获取信息更快、更集中。

Group Messages
通过邀请的方式将主题信息分解成新的主题,确定参与者。

Notification Controls
默认情况下,邮件通知是关闭的,但可以通过通知控制功能灵活控制。

Thread Conclusions
类似于邮件归档功能,当邮件会话结束后可以标识“已结束”。

官网介绍,PlumMail还有36个具有划时代问题意义的特色功能,有条件的可登陆Youtube观看PlumMail相关介绍:https://www.youtube.com/embed/Yf-82ychDgA。
]]>
跨站脚本攻击(Cross Site Scripting)缩写为CSS,因与层叠样式表(Cascading Style Sheets,CSS)的缩写相同,因此将跨站脚本攻击缩写为XSS。
跨站脚本(XSS)攻击通常指的是通过利用网页开发时留下的漏洞,通过巧妙的方法注入恶意指令代码到网页,使用户加载并执行攻击者恶意制造的网页程序。这些恶意网页程序通常是JavaScript,但实际上也可以包括Java、 VBScript、ActiveX、 Flash 或者甚至是普通的HTML。攻击成功后,攻击者可能得到包括但不限于更高的权限(如执行一些操作)、私密网页内容、会话和cookie等各种内容。
该漏洞源于WEB应用缺少对客户端数据的正确验证。该漏洞主要包含:
1.标识签名输入的HTML编辑器中可能存在跨站点脚本
2.带有恶意svg内容的HTML消息的跨站点脚本
3.带有恶意数学内容的HTML消息跨站点脚本
Roundcube使用Washtml HTML清理程序的自定义版本在电子邮件中显示不受信任的HTML代码。其中一个修改是为svg标记包含一个异常,以正确处理XML命名空间。但是,处理协议中的漏洞会导致清理检查失败。这可以通过JavaScript负载滥用命名空间属性进行攻击。例如通过包含HTML onload事件的恶意电子邮件来利用此漏洞。如果触发,则可能导致存储的XSS攻击。
成功的攻击允许在经过身份验证的受害者会话的上下文中执行任意JavaScript代码,从而基本上模拟了登录的用户。这赋予了攻击者与合法用户相同的权力,包括但不限于:阅读和删除邮件,代表受害者发送电子邮件,访问地址列表,以及进行垃圾邮件运动。攻击者可以从个人信件中获取其他敏感信息,这些信息可能使恶意行为者能够访问外部服务,例如纯文本凭据和确认电子邮件。
Roundcube是一款被广泛使用的开源的Web电子邮件程序,在全球范围内有很多组织和公司都在使用。Roundcube Webmail在Linux中最常用,它提供了基于Web浏览器的可换肤IMAP客户端,并提供多种语言。功能包括MIME支持,通讯簿,文件夹和邮件搜索功能。Roundcube支持各种邮件协议,如IMAPS、POP3S 或者 submission,可以管理多个邮箱账号。
该漏洞已在Roundcube 1.4.8中修复。查看漏洞详细信息 以及升级请访问官网:
https://github.com/roundcube/roundcubemail/releases/tag/1.4.8
]]>而对于匿名可能使用临时性邮箱要好一些,但大部分的临时邮箱并不支持邮件发送,对于频繁的邮件联系可能也不适合。
这7个小技巧来自于CTemplar的博客。
加密邮件
端到端加密电子邮件是保护您的电子邮件免受黑客和窥探的最佳方式。你不需要加密你发出去的每一封邮件,但任何带有敏感或私人信息的东西,比如你的银行账户或信用卡号码,都需要加密。
推荐使用支持端到端加密的邮箱,如ProtonMail、Tutanota等;普通邮箱也可以使用PGP加密邮件。
两步验证
一般情况下,如果你的邮箱密码足够复杂是非常难以破解的,暴力破解需要花费非常长的时间。你可以通过https://www.betterbuys.com/estimating-password-cracking-times/*这个网站测试一下你密码被破解需要花费的时间。除了暴力破解之外,还有可能通过脱库、撞库等方式泄露你的邮箱密码(我有个126的邮箱就是被破的)。
开启两步验证之后,即使邮箱账户密码被破,想成功登陆邮箱还需要一个每隔30秒就会变动的一次性代码,大大增强了邮箱的安全性。
加密邮件附件
跟加密邮件的道理一样。但有的邮箱或加密方式是只支持邮箱正文加密的,不会加密邮件附件。
私人邮箱和工作邮箱分开
很多公司都有自己的企业邮箱,这点问题不大。但私人邮箱最好再细分一下,不同的用途用不同的邮箱,如接收银行账单的、日常交流的、专门用于网上注册的等,尤其是不要再用你的QQ邮箱在网上求种了,一搜你的QQ号什么都出来 了。
让自己无法被追踪
注意隐藏自己真实的IP地址,邮箱的ID不要用自己的真实姓名或跟自己有强相关的代号等(这点要分情况,用于日常交流的最好用自己的真实姓名,除便于记忆之外还能增加彼此之间的信任感)。
立即删除电子邮件
除了删除掉收件箱或发件箱的文件外,还需要删除垃圾箱内的邮件。但有些的邮箱服务提供商还是会在自己的服务器存储一段时间才会删除,CTemplar支持即时删除。(只针对私人的私密邮件,工作类邮件不要随便删除,要学会存档)
匿名的支付方法
目前大多数的收费邮箱都支持信用卡、Paypal以及支付宝、微信等支付方式,对匿名有需求的可以优先选择比特币或门罗币等支付方式。
参考文章
The Best 7 Free Email Security Tips for Keeping Your Account Anonymous
]]>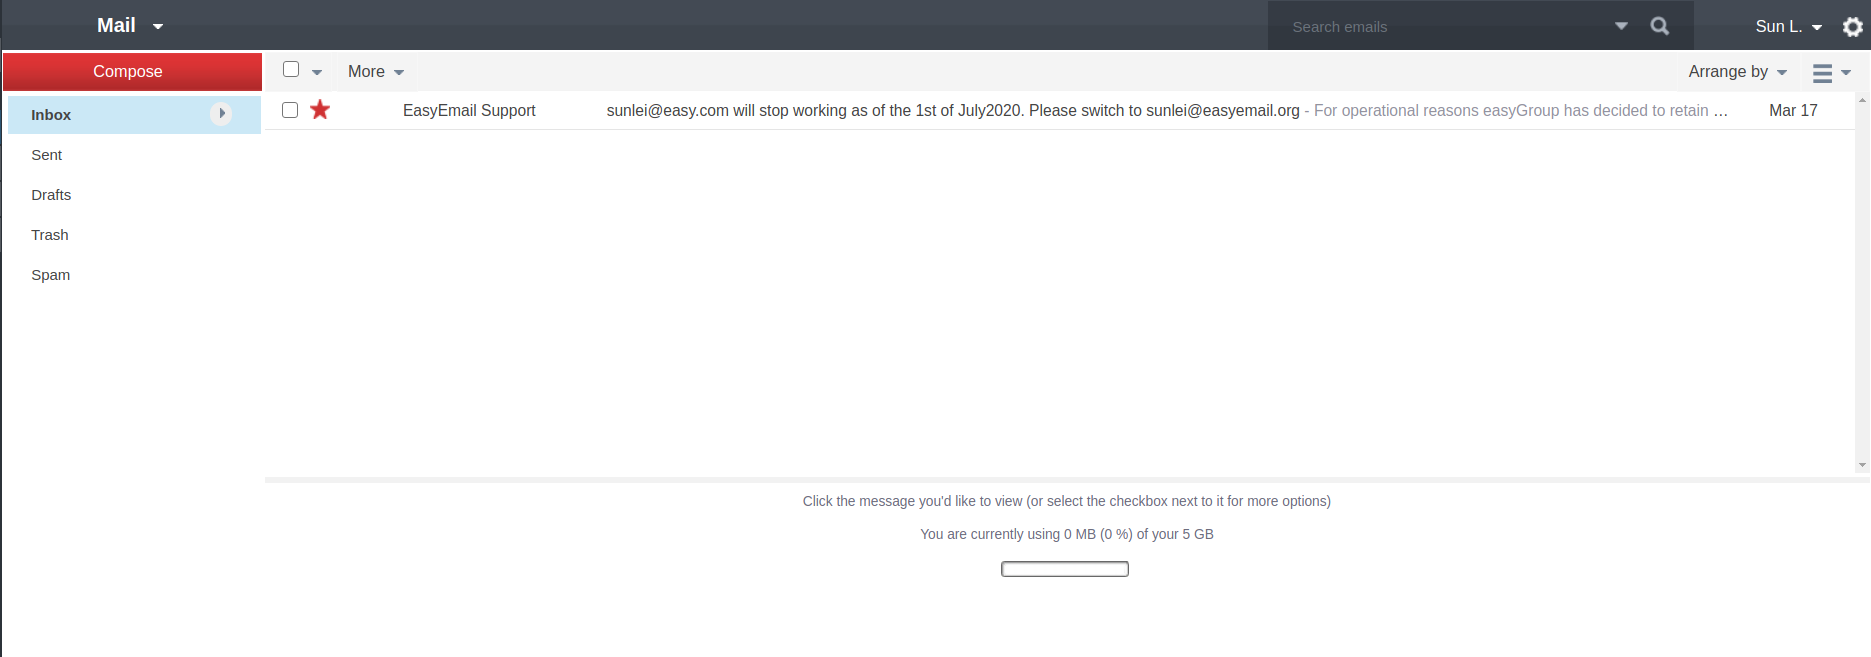
5GB邮箱空间,邮箱界面也挺简单。
今天登陆邮箱发现邮箱收件箱内躺着一封邮件:
**YOURNAME@EASY.COM WILL STOP WORKING AS OF THE 1ST OF JULY2020. PLEASE SWITCH TO YOURNAME@EASYEMAIL.ORG**
For operational reasons easyGroup has decided to retain the email address format “yourname@easy.com” for corporate users only from 1st July 2020 onwards.
In order to help users transition to another easy branded web-based email address, easyGroup will make yourname@easyemail.org email addresses available to all its current users of easy.com.
For a period of time both email addresses will be fully functional using the same log in/password details as before.
But from 1st June 2020 the @easy.com email addresses will not be able to send out emails but will continue in receive mode until 30th June 2020.
And from 1st July 2020 the current @easy.com address will stop working entirely but it will be business as usual for yourname@easyemail.org
大体意思是:
后缀为“@easy.com”的邮箱地址自2020年7月1日仅供easyGroup内部员工使用,非集团员工的邮箱地址将自动转为“@easyemail.org”后缀,邮箱ID和邮箱账户密码不变。自6月1日开始“@easy.com”的邮箱地址只能收不能发,7月30日后停止接收邮件。
我试了一下,好像确实不能发邮件了。
]]>
邮箱特色
- WebMail基于Outlook。目前为止,Outlook是我最喜欢的WebMail邮箱界面。
- 无广告。
- SSL/TLS支持,邮件每天都会备份。
- 支持MS Exchange ActiveSync同步,邮件收、发及时。
- 支持POP3、IMAP和SMTP
优惠码
前期送了我一个优惠码我一直没用使用,暂不清楚能用几次,如果想体验收费的高级邮箱账户的话可以试试。
优惠码:launch6zidUu
Use the promo code launch6zidUu at checkout and you’ll receive the following for FREE:
— 1 Premium Plan of your choice (for 1 year)
— 1 MeMail.com Starter Plan of your choice
邮箱注册
打开官网https://www.memail.com/httpsmail(链接带个人Aff),注册界面如下图所示:
- 输入你想要的邮箱ID,邮箱ID长度需5位以上,5位以下默认为收费的高级账户。
- 输入你想要的邮箱后缀,免费的只能使用“MeMail.com”。
- 点击邮箱地址前“购物车”图标,将邮箱地址加入购物车。
- 点击右侧的“购物车”图标进入结算。然后注册账户(非个人邮箱账户)确认即可。
注册成功后就会显示你注册的邮箱地址以及邮箱密码,邮箱登陆地址为:https://webmail.memail.com/
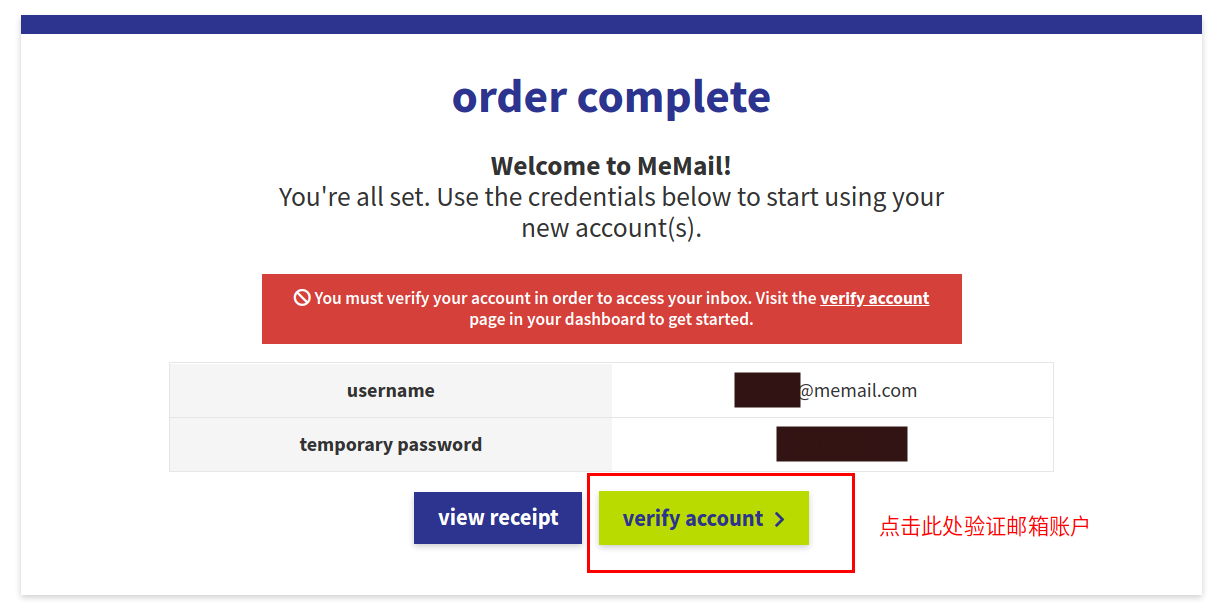
最后点击红色方框中的”verfy account”验证账户,验证方式有两种:手机验证和邮箱验证,选择一种即可,个人建议选择使用邮箱验证。
邮箱使用
参考Outlook.com邮箱使用方法
客户端设置
POP
服务器:pop.memail.com
端口:995
加密方式:SSL
IMAP
服务器:imap.memail.com
端口:993
加密方式:SSL
SMTP
服务器:smtp.memail.com
端口:587
加密方式:TLS
邮箱注册
注册程序比较简单,打开注册地址:https://www.88.com/user/#/register,输入用户名、密码以及手机号即可。
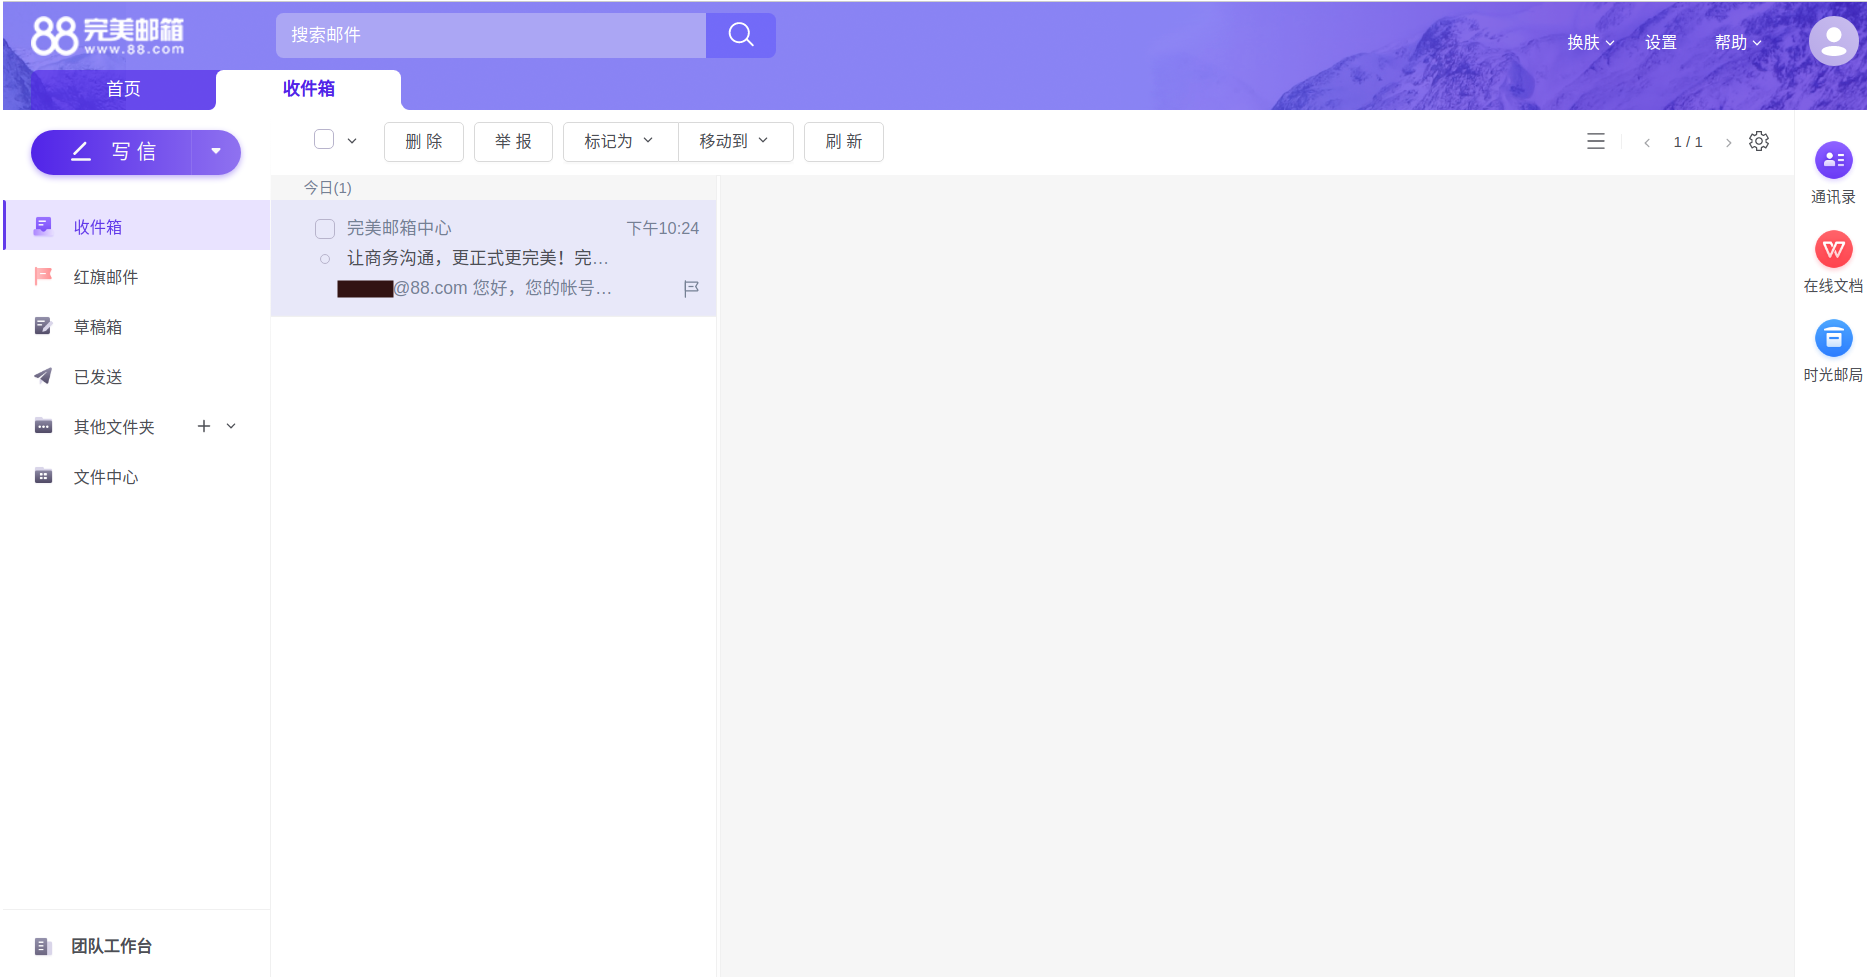
邮箱界面
邮箱界面非常简洁,可自行设置为两栏或三栏式。
邮箱功能
在邮箱功能方面,支持15秒内取消邮件发送、邮件撤回(需满足两个条件:对方未打开该邮件;邮件发送时间不超过15天)、误删恢复(可恢复最近30天删除的邮件,需用手机接收恢复码)以及两步验证(仅支持通过手机接收短信的方式)。
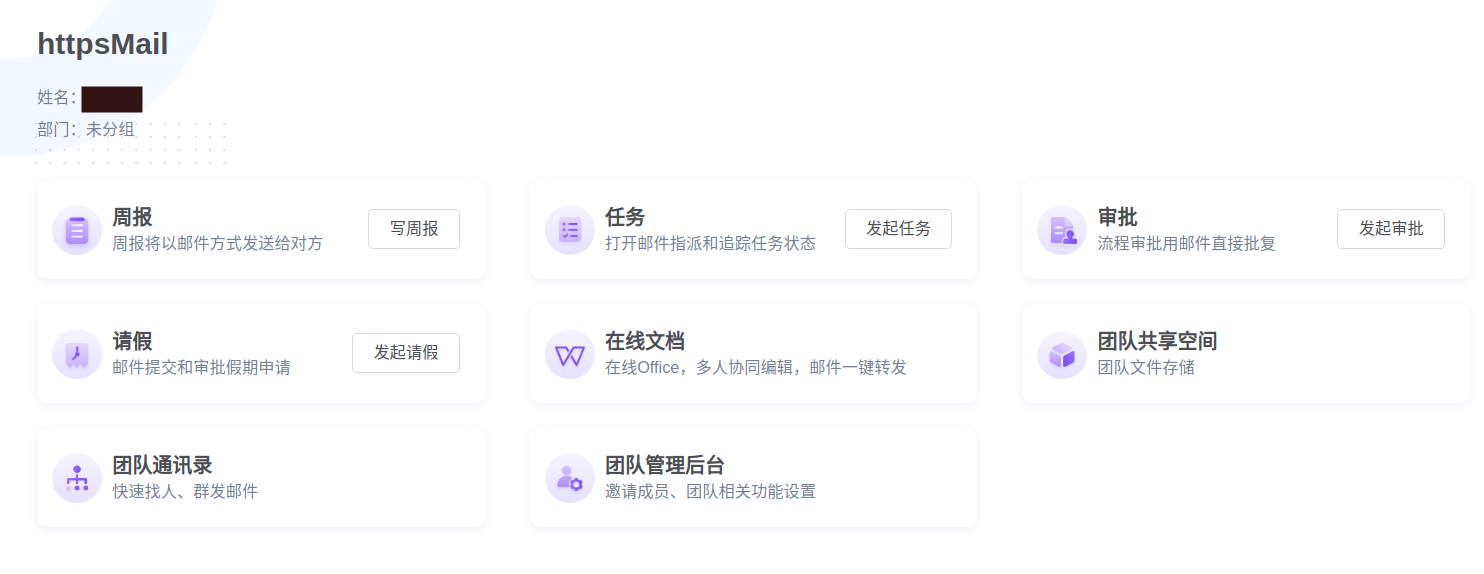
除此之外,88邮箱还团队工作台功能,包括写周报、请假、发起任务、审批以及多人协同编辑Office文件等,这应该就是88邮箱自称“个人免费商务邮箱”的原因。
客户端设置
| 服务名 | 服务器地址 | 非加密端口号 | SSL协议端口号 |
|---|---|---|---|
| POP3 | pop.88.com | 110 | 995 |
| IMAP | imap.88.com | 143 | 993 |
| SMTP | smtp.88.com | 25 | 465 |
可在设置的平台设置客户端POP/IMAP/SMTP专用密码。
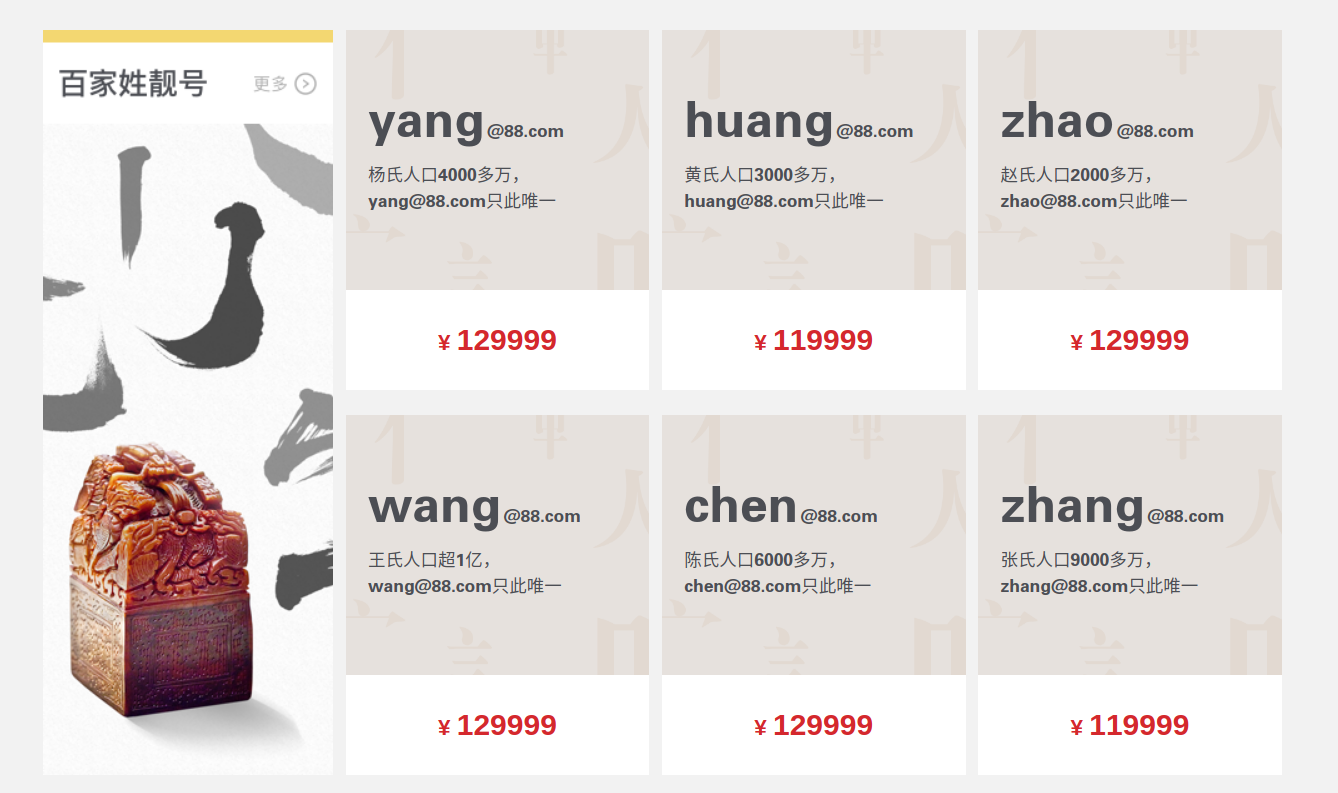
靓号购买
如对用户名有更高的需要也可以登陆其靓号商城购买,但价格不菲。
短位靓号

百家姓靓号
终身邮箱套餐详细配置如下:
- Custom Email Signature 自定义邮箱签名
- x5 Email Identity 5个邮箱发件人身份信息,不确定是不是邮箱别名
- 10GB Email Storage 10GB邮箱容量
- 10GB Cloud Storage 10GM网盘容量
- OpenPGP Email Encryption OpenPGP邮件加密、解密支持
- AES256 File Encryption AES256文件加密
- Android/iOS App 安卓、iOS客户端
- Contacts/Calander/Sync 联系人、日历同步
- Priority Support 售后服务优先支持
终身账户套餐与每月8.95美元的标准版套餐类似,最大的区别就是终身版支持5个(Email Identity),而标准版则是5个邮箱别名(Email Aliases)。
与免费版相比:
| 免费版 | 终身版 | |
|---|---|---|
| 价格 | 0 | 199美元 |
| 邮箱签名 | 自带”Sent with PrivateMail”小尾巴 | 可自定义 |
| 发件人身份 | 也可以添加 | 5 |
| 邮箱容量 | 100MB | 10GM |
| 网盘容量 | 100MB | 10GB |
| OpenPGP | 支持 | 支持 |
| AES256文件加密 | 支持 | 支持 |
| 客户端 | 仅网页 | 安卓、iOS |
| 联系人、日历同步 | 不支持 | 支持 |
| 服务支持 | 优先 |
注册免费版PrivateMail可参考前期文章:https://www.httpsmail.com/private-mail.html
优惠码:PMLifetime50,五折优惠(get 50% off all PM billing plans and addons)
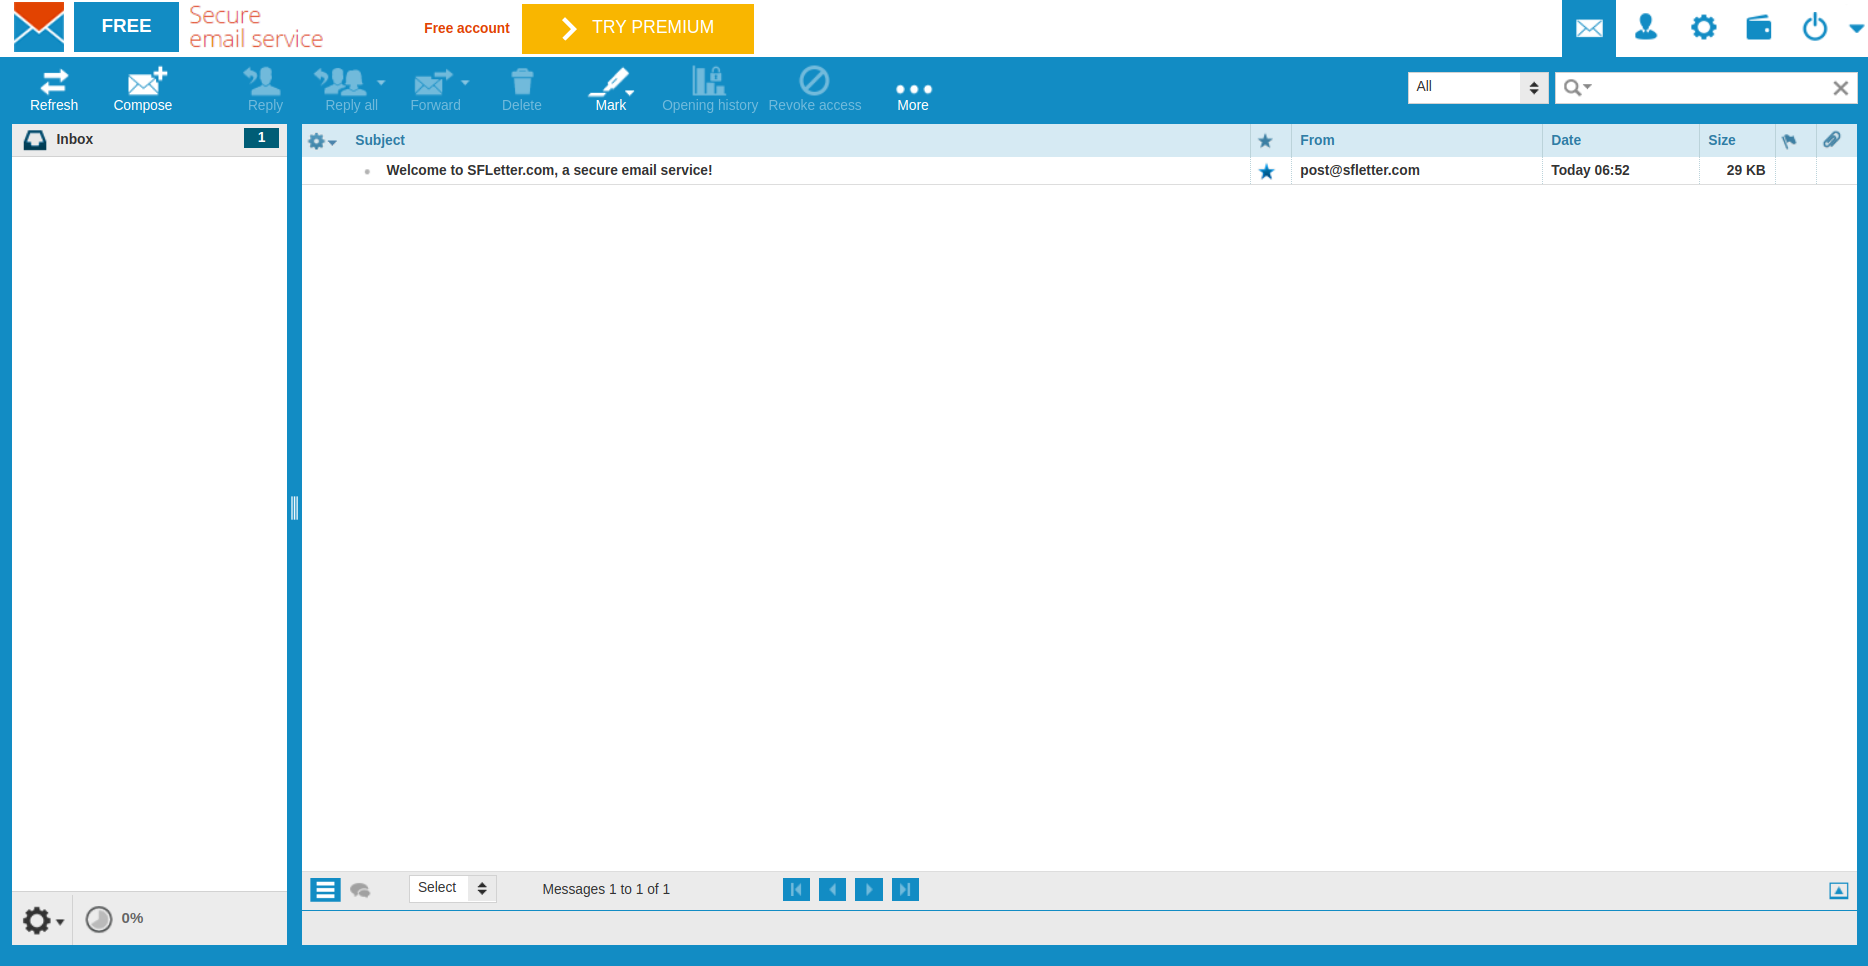
]]>其工作原理跟PGP加密、解密几乎一样,大体是这样的:对方收到的加密邮件,邮箱正文为打开查看附件的方法,附件才是真正的“邮件内容”,附件类似PGP的.asec文件,也是加密的但格式为.pcdoc。
邮箱特色
在其官方的FAQ第二个问题“What is the difference between SFLetter.com and other mail services with encryption options”里提及到,“The main difference is that the SFLetter.com service restricts the use of the received message: protected emails cannot be forwarded or captured by Print Screen; attachments cannot be opened and printed on another device”。即,能够保护邮件不被转发或截屏;邮件附件不能在其它设备上打开或打印。
在其官网产品比较中也列出Basic款(免费版)邮箱的特点(在网页端好像很多功能都不能正常使用,或者说具体怎么用我也没弄明白):
Email messages and attachments can be accessed only on the device where they were opened for the first time
邮件和附件只能在第一次被打开的设备上访问
Opening of secure emails and attachments on another device is prohibited
在其它设备上打开安全邮件和附件是禁止的
Printing is prohibited
禁止打印
Use of Print Screen and other screen grabbers is prohibited
禁止截屏
Email tracking by opening time and receiver’s IP address
邮件追踪可以获取收件人的打开时间和IP地址
除此之外,免费版还包括:
Email box size is limited to 500MB
邮箱容量大小为500MB
Total number of recipients for one message should not be more than five
同一封邮件的收件人不得超过5个
The number of outgoing emails per hour - not more than 10
每小时发件量不得超过10封
Protection of not more than two attachments for one email message
如开启附件保护功能,则附件不得超过2个
Protection of PDF and JPEG files only
附件保护仅支持PDF和JPEG文件
The size of an attachment is limited to 5MB
单个附件大小不得超过5MB
邮箱注册
- 打开注册地址:https://sfletter.com/?_lng=en&_action=index
- 填写First Name、Last Name、 用户名(最短为6位数,最长为30位)、备用邮箱,然后同意用户协议和隐私策略,点击“SIGN UP”就注册成功了
- 在备用邮箱中打开收到的SFLetter注册成功的邮件,里面包含邮箱的注册密码
SFLetter的邮箱界面应该就是用的Roundcube。
邮件接收
收邮件跟其它邮箱没什么区别。
邮件发送
免费版是默认保护邮件正文的,但可以选择是否保护附件。对方收到邮件,打开后如下图:
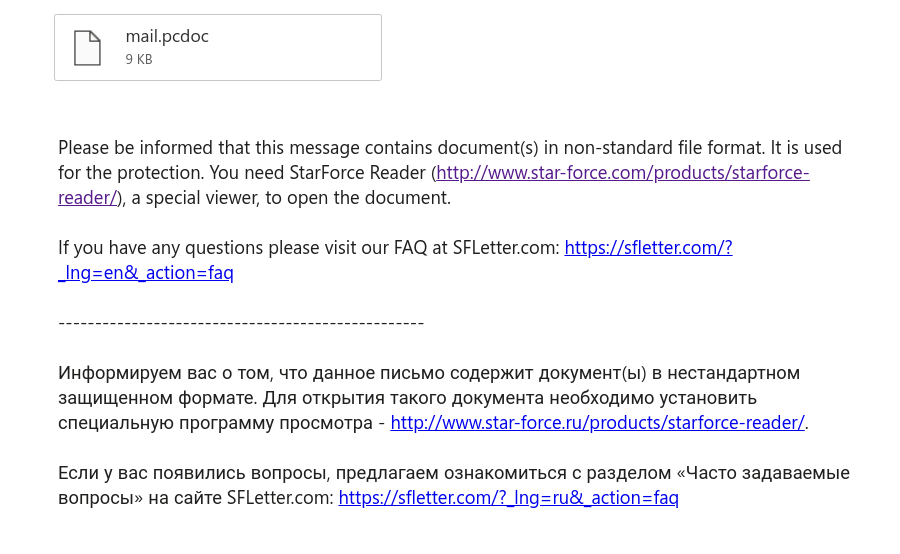
邮件正文为英文和俄文的说明,加密的附件为你所发送的邮件,需要使用SFLetter提供的StarForce Reader客户端才能打开查看。
用其它软件打开会是一段乱码,如下图:
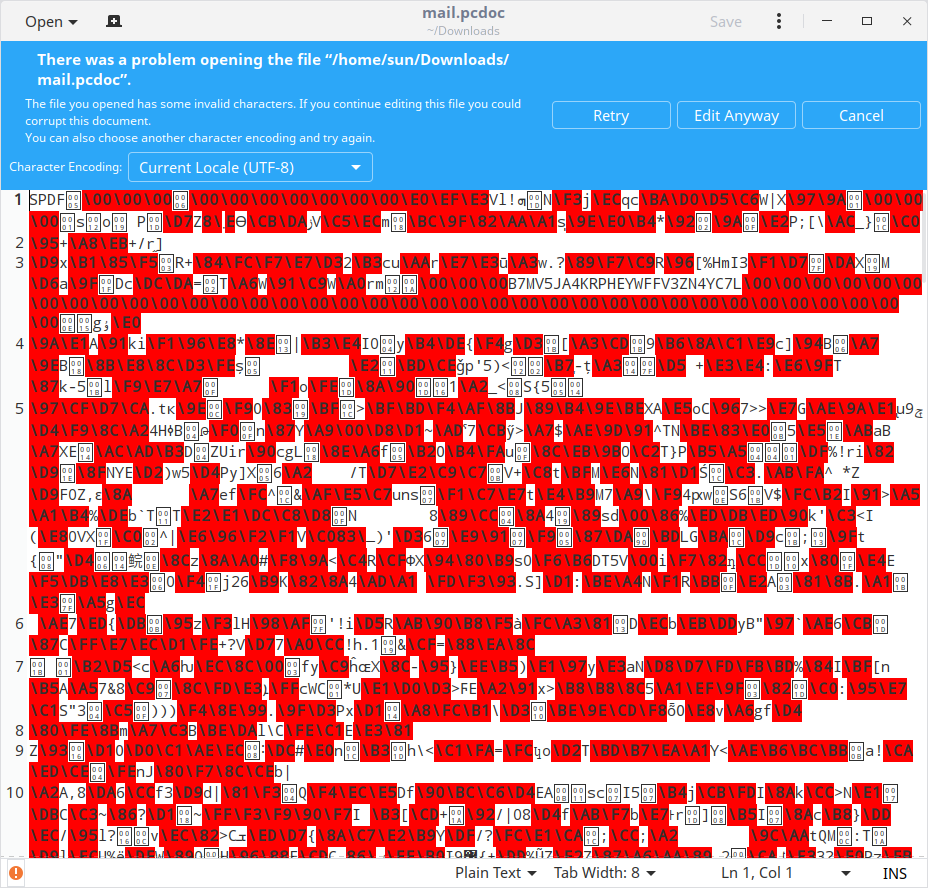
我个人感觉邮箱的后缀还可以,收邮箱跟其它邮箱也没什么区别,但发送邮件需要对方下载软件才能查看不方便,总之没什么卵用。
]]>The wait is over. Your early-access invite to HEY is here. We’d love for you to check it out.
Refresher: HEY is the brand new email service from the makers of Basecamp.
Since HEY is invite-only for now, you’ll need a secret code to sign up. Your personal invite code is **
To sign up: Visit HEY.com, look around, get a taste for how it works, check out the feature tour, then, when you’re ready, click the “Try it free” button. Next, click the “Have an invite code?” button. Enter invite code ** on the next screen and you’re in.
Share it: Your invite code works three times, so once you’ve created your account, feel free to share it with two friends or family. Just make sure you use your code yourself first. Once it’s used three times, it won’t work again.
Have at it. HEY’s different, so get ready for something new. Get started at HEY.com.
Thanks from everyone on the HEY team.
邮箱注册
注册过程非常简单,只需三步:第一、输入自己的姓名;第二、选择自己的邮箱用户名;第三、输入备份邮箱和邮箱密码。邮箱用户名需大于4位数,当然也可以花钱购买2位或3位数邮箱ID,2位数邮箱ID每年999美元,3位数邮箱ID每年349美元。

Imbox
进入邮箱后,邮箱界面有种让人耳目一新的感觉(词穷,不知道该怎么形容了),不同于其它邮箱的二栏或三栏界面。Hey邮箱的所有邮件全部显示在“Imbox”里,未查看的新邮件在上,已查看的邮件或已发送的邮件在下。除未读的新邮件外,其它邮件的排列顺序以查看邮件的先后时间顺序倒序排列。

邮件选项
回复、转发、移动等邮件选项一直固定在屏幕的下方,并随滚动条移动。

发送邮件
点击右侧的“Write”就可以打开发送邮件的界面,没什么新鲜的,目前只能发送纯文本邮件,无法发送Html格式邮件。

邮箱设置
点击右上角用户名,打开邮箱设置菜单。功能包括草稿箱、联系人、两步验证设置、邮件转发、下载邮箱数据,账户设置等功能。目前Hey只支持信用卡支付。

邮箱菜单
点击邮箱界面上方正中间的Logo打开邮箱菜单,搜索功能确实做得不错。

快捷键
点击右下角小键盘图标打开邮箱快捷键列表。

其它
因价格太贵,购买使用的可能性非常低,其它功能就不一一介绍了,总的来说,确实是一款相当不错的邮箱。
]]>New webmail interface
-——————–We are excited to tell you about the new interface our webmail will be switching to on July 30th. This new design is cleaner, has a more modern look and most importantly, it supports tablets and mobile phones, a feature requested by many of you for a very long time.
While we love the benefits of the new design, it also means that the experience using it will change and that’s something that can always be a little harsh. We don’t want to be bringing you problems, afterall you are busy creating a better world!
So if you want to get used to it sooner, you can try the new design before its switched on by following the instructions here
https://riseup.net/en/email/webmail/elastic and report any problems at https://support.riseup.net.
Elastic就是Roundcube4.0的新邮箱界面,干净、简洁,如下图:
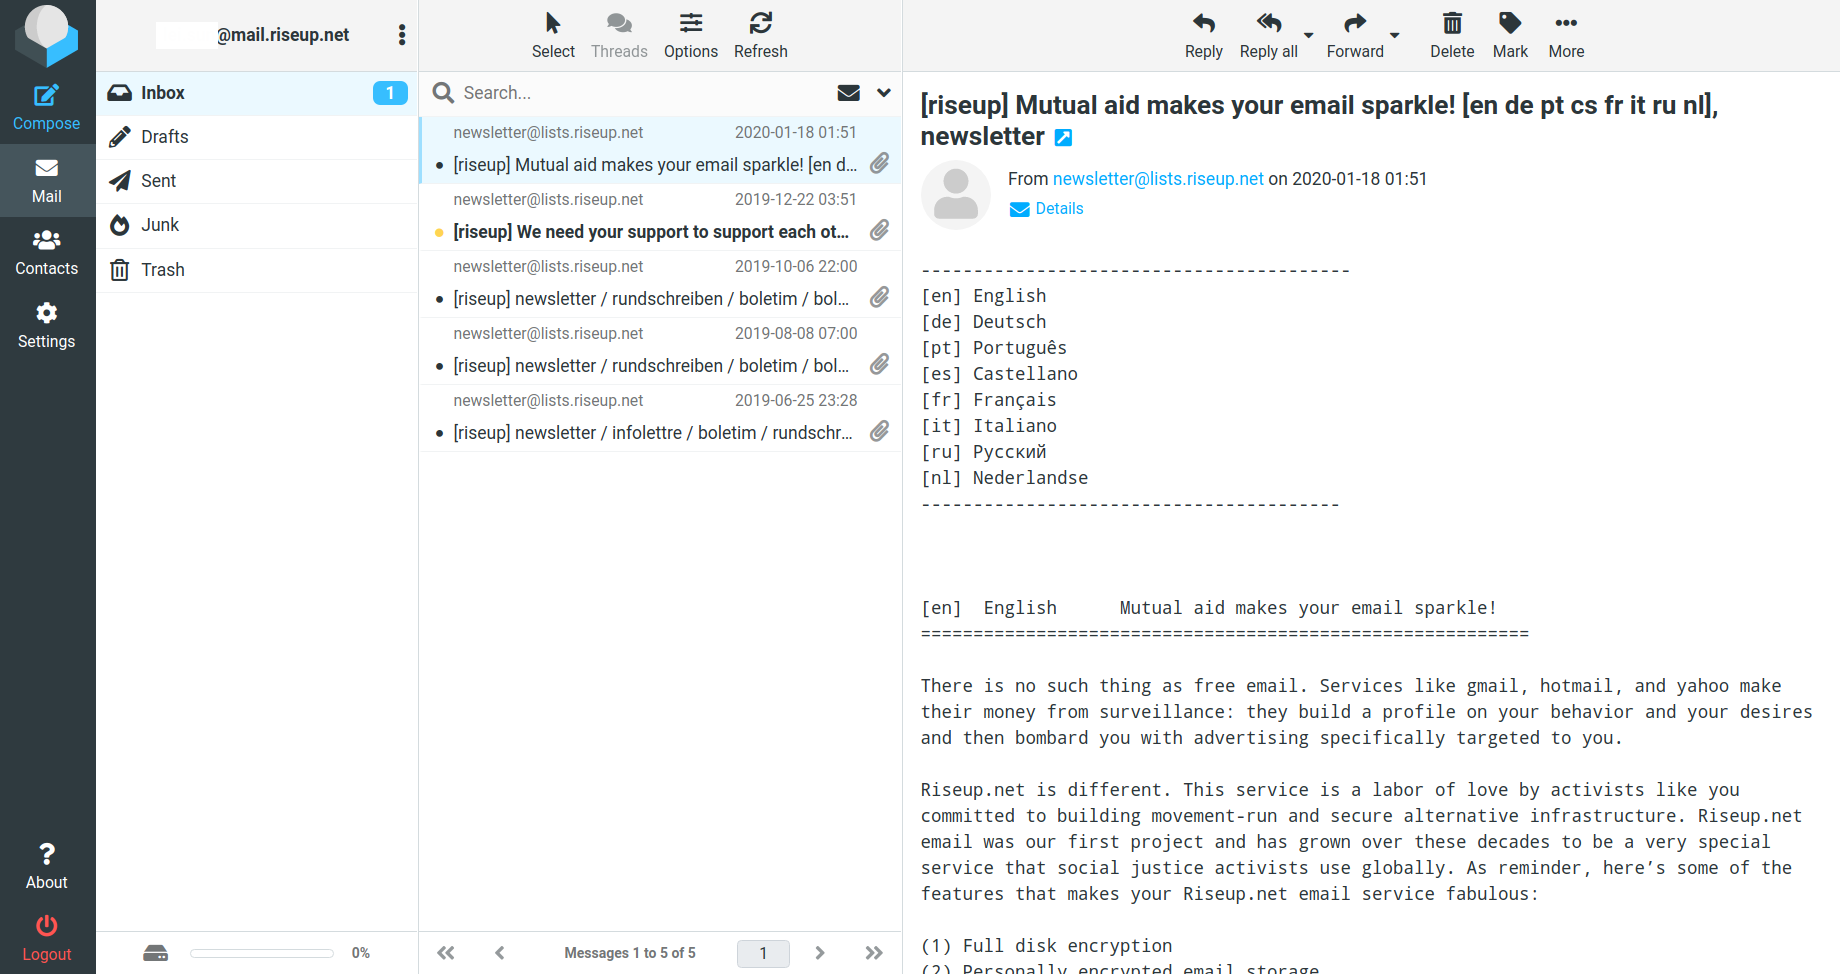
如果想提前体验,可依次点击“Preferences” –> “User Interface”,在“Interface skin”中选择“ink”主题,点击保存后就切换到新的邮箱界面了。除有些图标无法正确加载外,暂未发现其它问题。
有条件的也可以登陆https://riseup.net/en/donate进行捐赠。
]]>Servers stabilizing, solidarity rising
-—————————————-During the last few weeks, you may have noticed our services have sometimes been slow, or not working as expected. There has been an accelerated increase in demand for our tools as physical distancing drives us to connect and collaborate more and more online. We will always work as fast as we can to stabilize things, but there is a lot of work to do!
Thanks to the many people who have contributed to keep us going. We are impressed with how much support you have provided for the riseup VPN. Look for an update about what we’re doing to improve our VPN services in a future newsletter.
We still need your financial support to meet the increasing demand for our communication tools as people rise up around the world. https://riseup.net/en/donate Please contribute if you can when you take a break from being in the streets!
近日,Basecamp联合创始人之一 Jason Fried在Twitter上公布,Hey.com将于6月15日上线,个人版(Personal Plan)当日上线,企业版(Business Plan)将于今年晚些时候上线,同时,Jason Fried在回复网友的Tweets时,提到会有家庭版(Family Plan)。
个人版将会获得一个后缀为@hey.com的邮箱地址,暂不支持使用自己的域名。个人版价格分为3档,1档为99美元每年,其余2档将于上线时公布,有14天的免费试用期。

其它关于Hey.com信息暂时很少,客户端至少支持Web、Windows、Mac、iOS和Android,翻了一下Twitter只找到一张可能是Hey.com的邮箱界面。

通过Jason Fried所发的Tweets,Hey上线后可能并不是任何人都可以注册体验,前期申请邀请码的前40000用户才能优先注册体验。好在还有时间,如果想优先体验的话可以发送邮件到 iwant@hey.com获取邀请,我在3月份发过邮件但未收到回复不知道有没有成功。
- 有些东西三言两语就能说明白,不适合长篇大论写一篇文章,而且博客在时效性上也无法跟QQ等即时聊天软件相比。
- httpsMail这个网站并没有添加评论功能,平常的交流大多靠邮箱。有的邮箱是国外的、有的邮箱是国内的还有很多是用自建的,我收到的交流邮件大多数都是在垃圾箱里,相信我发出的邮件可能也进入了你的垃圾箱,而且还有聊着聊着域名到期了的。
- 个人知识水平有限,获取信息的途径也比较窄,建立一个QQ群也能够更好的向各位学习。
加群可直接扫描下方的二维码
群号:1061394402

]]>
4月份在NamePro上看到过一个调查排名,域名注册商Epik倍受赞誉,位列榜首,而且.org域名的注册价格跟其它域名注册商的价格相比比较便宜(6.99美元,其它的域名注册商大约都在60元人民币以上),就陆续注册了几个.org域名。大约4月15日,登陆Epik时提示需要输入两步验证码,连续输入两次都提示验证码不正确,于是就选用了备用方案“使用手机接收验证码”并成功登录,但在16日再次登录的时候却提示:
You have exceeded the maximum number of failed attempts for 2-factor authentication. Please contact Epik support to resolve this issue.
于是,我找到了Epik的联系邮箱,开始了漫长的邮件交流之旅。。。
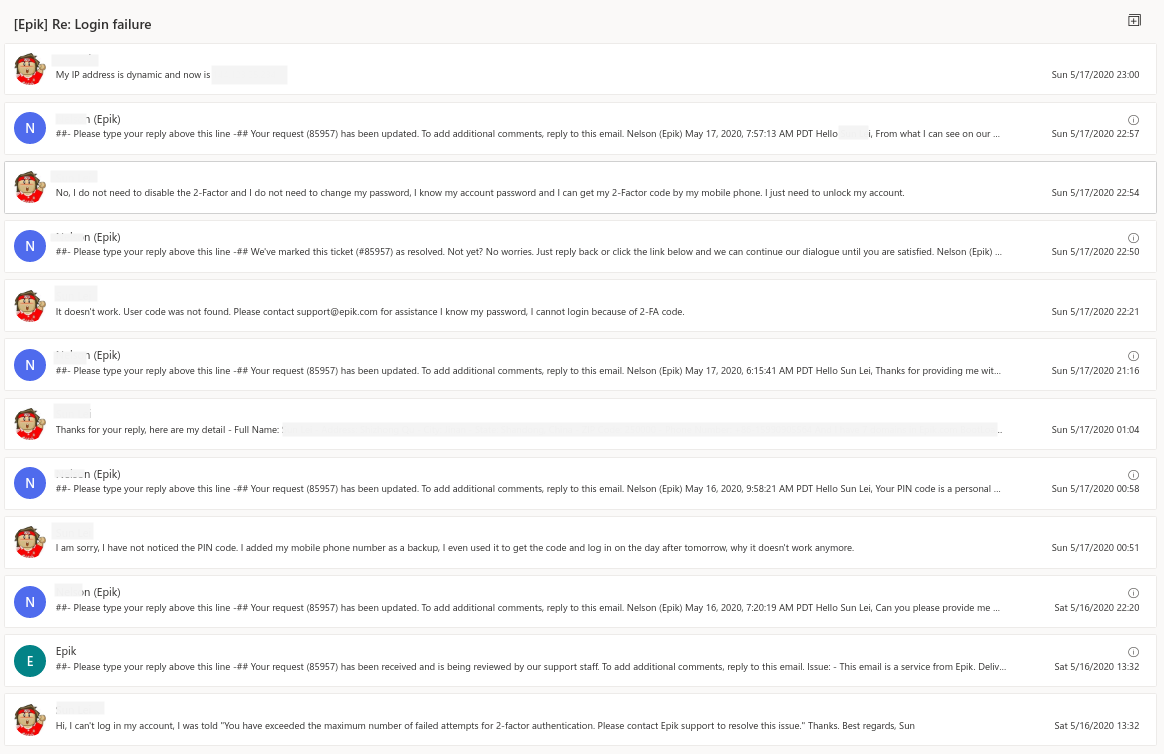
从5月16日13点一直旅到5月17日晚上23点,期间邮件收、发共计13封。先是要求提供PIN码,我没记住;又让我提供个人详细信息,包括姓名、住址、邮编、手机号码、注册的域名等;接着发送了一封密码重置的邮件让我修改密码,但修改时却提示 User code was not found.Please contact support@epik.com for assistance,然后我自己申请密码修改竟成功了;又接着让我视频验证,提交身份证或护照的照片,被我拒绝了;然后又让我提供IP地址,查看IP是否被Blocked,查看之后告诉我IP正常没有被Blocked;然后就没有然后了,问题还是没有解决。
我不死心的又一次打开Epik的官网试着再次登录,依然提示无法登陆,但却在提示中提及有个Live Chat,我才发现在网站的右下角有一个大大的、蓝色的、写着“Chat”的按钮,于是就点进去跟客服开始交流,不知是巧合还是故意安排也有可能Epik就这一个客服,还是跟我邮件交流的那个人。。。
然后就通过一系列操作帮我解决了,并跟我道歉说没有注意到是因为两步验证码超过错误次数导致的该问题,但我在第一封邮件就是写了呀。。。
Hi,
I can’t log in my account, I was told “You have exceeded the maximum number of failed attempts for 2-factor authentication. Please contact Epik support to resolve this issue.” Thanks.
Best regards,
Sun
问题也只是暂时解决了,在正常的浏览器模式下使用两步验证APP生成的验证码还是提示错误,但在浏览器隐身模式下使用却没有任何问题,有可能是Cookies的问题,但至少能正常登陆了。同时也能看到在输入两步验证码时有了只能错误两次的提示。
总之,虽然在使用过程中有一点不愉快,但是Epik的服务和价格还是不错的,如果你想试试Epik的,可以通过下面的推广链接注册:
https://www.epik.com/?affid=gi3wo5ca8
如果你的账户被注册商删除或锁了,但账户中还有自己注册的域名的话,可以通过ICANN申诉,只填写姓名、邮箱和域名就可以了,网址是https://forms.icann.org/en/resources/compliance/complaints/transfer/form。
]]>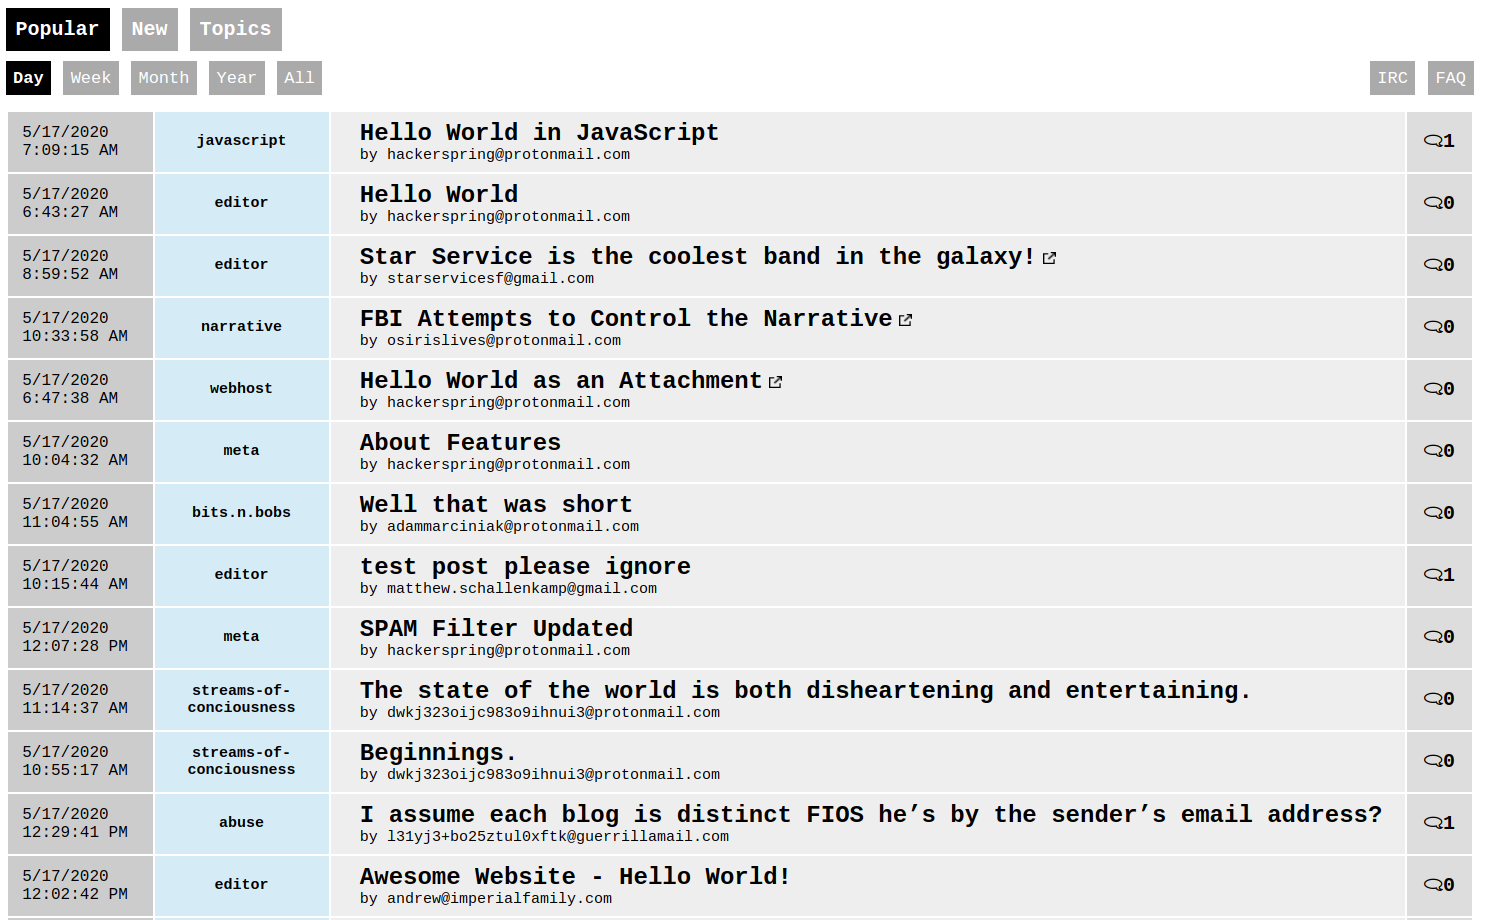
最基本的用法:邮件发送到“*@hackerspring.com”即可, *代表主题名称或子论坛,邮件标题就是你帖子的标题,邮件正文就是你帖子的正文。如发送邮件到httpsmail@hackerspring.com,就会收到一封“Your E-mail was received”邮件发送成功的邮件,打开Hacker Spring网站,点击“New”就看到自己新建的帖子,如下图:

点击帖子下方的“Leave a comment”就可以直接回帖了,当然也是通过邮件发送的方式。目前网站已经创建的主题或子论坛不多,主题创建及发贴没有任何限制。
其它用法
删除帖子
找到你发送的那封邮件,点击回复,在邮件正文中填写
$DELETEME
就可以顺利删除了,删除成功后也会收到一封邮件主题为“Your E-mail was received [Re: *]”的邮件提示你“Your E-mail was deleted.”
添加附件、链接等
How do I work with a Javascript or CSS file?
Include the JavaScript or CSS file as an attachment. Then, in the body of your e-mail, use special commands to include.
To include a Javascript:
$SCRIPT(filename.js)
To include a CSS:
$CSS(filename.css)
If you’re including a CSS or JavaScript file in your html files, just use normal HTML.
How do I make my attached index.html the first page that shows up instead of an email?
To redirect to an HTML File put this in the body of your email:
$REDIRECT(index.html)
You can also do forum style link-sharing by simply doing:
$REDIRECT(https://hackerspring.com)
Don’t forget to strip the text formatting, but we try to do it for you if you forget.
How do I link to an attachment HTML file?
To link to an HTML File:
$LINK(filename.html)
Or with link text:
$LINK(filename.html)[Anchor Text]
This is strictly just for linking to attachments. Use your e-mail provider’s link function to link to external websites.
套餐内容
邮箱空间:2GB
域名数量:可支持添加20个域名和40个子域名
邮箱账户:500个
年付价格:5美元
其它功能:支持Catch-All、POP3、IMAP、SMTP
购买方式
登录“来买呀” https://laimaiya.com/ 官网,注册“来买呀”账户。如果觉得注册麻烦,可在下单时填写自己的邮箱地址,自动注册来买呀账户。
通过链接https://laimaiya.com/product/mail-2gb打开“MXRoute $5 年付自助开通”详情页面,点击“现在开通“,网页会提示““MXRoute $5 年付自助开通” 已被添加到您的购物车”,然后点击右侧的“查看购物车”。
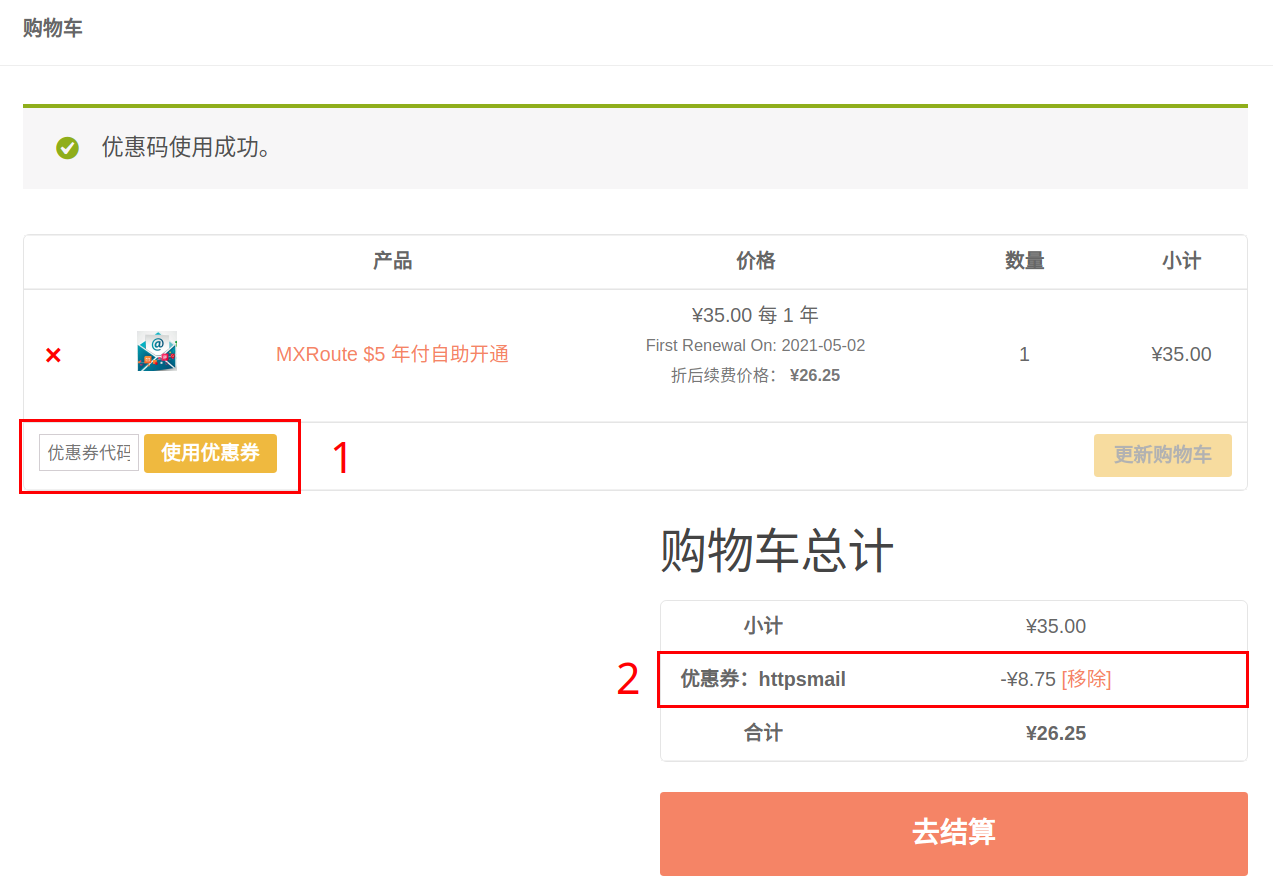
在下图“1”处输入优惠券代码“httpsmail”并点击“使用优惠券”,在“2”处则会显示“-8.75”(7.5折优惠),点击”去结算“进入结算页面。
在结算页面,输入名字和邮箱地址即可,支持支付宝和微信支付。
开通时注意事项
- 结账时需要执行较多API, 因此会稍慢,请耐心等候,不要刷新页面
- 购买后您会看到一个“下载”链接,请无视即可;用户名和密码会正常发送到您的邮箱
- 购买后您将收到卡密形式的后台用户名和密码,卡密格式为:用户名:密码
- 请务必填写您正常使用的邮箱,否则将无法收到用户名和密码
- 若您未收到邮件,请检查邮箱的垃圾箱
后台管理
打开链接https://mailadmin.mailonrush.com/,支持英语和法语,暂不支持中文(邮箱支持中文)。输入邮箱接收到的用户名和密码,登录后默认显示套餐的相关信息,如邮箱空间大小、邮箱账户数量等。点击右上角用户名可打开下拉菜单更改账户密码。
Account Manager
- Domain Setup:域名管理,添加、删除、设置默认域名等。
- Sub-Domains Setup:子域名或二级域名管理。
- DKIM Keys:DNS管理
- SSL Certificates:SSL证书管理,可以上传自己已有的SSL证书也可以使用免费的”Let’s Encrypt“证书。
E-mail Manager
- E-mail Accounts:邮箱账户管理
- Forwarders:邮箱转发
- Autoresponders:自动回复
- Vacation Massages:设置假期时期自动回复
- SpamAssassin Setup:自动识别垃圾信息,默认关闭
- SPAM Filters:自己设置收件规则
- E-mail Routing:添加、修改MX DNS记录
Advanced Features
- Catch-All Email:设置Catch-All
- Security Questions:设置安全问题
- Two-Step Authentication:两步验证
- Domain Pointers:绑定自己的域名
WebMail
两套WebMail,Roundcube和Crossbox,支持中文。
Suport & Help
帮助中心,用于寻求帮助和提交工单等
邮箱设置
所有设置以域名Zhong.Mobi为例。
添加域名:管理后台”Account Manager“ -> “Domain Setup” -> “ADD NEW”。
- Domain:zhong.mobi
- Bandwidth:默认
- Disk Usage:默认
- Options:默认
DNS配置:在域名注册商添加解析记录
CNAME:将“webmail.zhong.mobi”和“mailadmin.zhong.mobi”分别解析到“lucy.mxrouting.net”。其中webmail.zhong.mobi为网页邮箱登陆地址,默认为Roundcube界面;mailadmin.zhong.mobi为后台管理地址。
MX:将”zhong.mobi”解析到“lucy.mxrouting.net”,优先级为10;将”zhong.mobi”解析到“lucy-relay.mxrouting.net”,优先级为20。
SPF:添加TXT记录,将“zhong.mobi”解析到“v=spf1 include:mxlogin.com -all”。
DKIM:管理后台”Account Manager” -> “DKIM keys”,复制DKIM值,添加TXT解析记录,将” x._domainkey”解析到已经复制的DKIM。
“v=DKIM1; k=rsa; p=MIIBIjANBgkqhkiG9w0BAQEFAAOCAQ8AMIIBCgKCAQEAuQEziwQmAHI4bdNNck2HOfhETEqfeLRgT3vck6gGzQuMs3OZgjpTgz3jwR/aOuyvdX/7tyyewf4RoRWBibFTxmfVsYxACN7vQYeMjnIzBDShkVpxfNvc7NMYZznRB3p9zct5bAljaa70mGEwsVl1XPFQTFsf+jiI3gH2uVDjpb+C314ubqom0+DMSIWeBha3zzS/KF1gET+upXsJEW2B0ZBN6GKLKGIdW8UKam08IyLK63MQbrW0IMOVt9xftTgD3vduxCqXKjpNexwYgH2Vkpb409hHLFWyeaipgBspfgTlW6lvWzNYtA0YO7n87DUkb/IJEVHxKULMBRI3xm+m3QIDAQAB”
添加SSL证书:”Account Manager” -> “SSL Certificates” -> “Free & automatic certificate from Let’s Encrypt”
- Common Name:默认
- Key Size:默认
- Certificate Type:默认
- 选中“webmail.zhong.mobi”和”mailadmin.zhong.mobi“的域名(未添加CNAME解析的域名不要选,无权限添加SSL证书),点击”SAVE“会自动跳转到”Paste a pre-generated certificate and key“选项,再次点击”SAVE”保存即可。
- 左下脚“Force SSL with https redirect”,强制使用https,可选中保存。
新建邮箱账号:”E-mail“ -> “E-mail Accounts” -> “CREATE ACCOUNT”。
- Username:hi
- Password:密码
- E-mail Quota:默认,可根据自己需求自行设置邮箱空间大小
- Send Limit:默认,发信数量默认为7200封
点击”CREATE ACCOUNT“会弹出下图页面,包含用户名、密码、POP/IMAP和SMTP地址、端口信息。
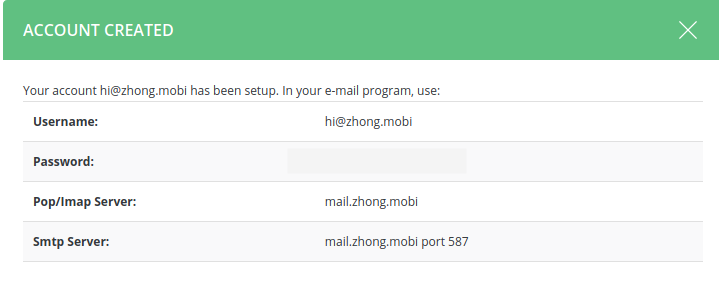
但是如果按图中的信息设置客户端是无法正常使用的,需要将“mail.zhong.mobi”解析到管理后台DNS记录中IP地址。
Catch-All设置:”Advanced Feature“ -> “Catch-All E-mail”,选中第三项”Address“,,输入创建的邮箱账户”hi@zhong.mobi“,点击保存。
客户端设置
- SMTP:lucy.mxrouting.net, 端口25, 465 (SSL), 587 (TLS);POP/IMAP:lucy.mxrouting.net
- 如果已将“mail.zhong.mobi”解析到IP地址,则POP/IMAP和SMTP地址为”mail.zhong.mobi”
注意事项
- 禁止发送垃圾邮件!No SPAMMING! MXRoute检测到发送垃圾邮件之后将直接清退该用户且不退款。
- DNS解析可以按照管理后台的DNS记录自行选择配置。
非本市現職高中職以下教職員不提供申請,請洽您所屬地區教育網路中心辦理。
本服務包含教育局MAIL2000信箱與臺北市校園無線WIFI兩部分,須審核後才會開通功能。
僅提供給臺北市學校高中職以下現職教職員使用,不提供一般民眾學生申請。教職員退休後仍可繼續使用。
現有已通過審核之一般民眾或學生帳號使用期限至2020年12/31為止。申請帳號時若使用假資料,將停權處分。
非教師權限或者未通過教師權限審核之帳號,若半年內未更新密碼或者未曾從網頁登入,將予停權處分。停權可申告復權,請來電客服。若停權後半年仍未使用,則將刪除帳號。
請透過個人資料管理內的相關證件影像檔上傳足以識別的證件照片,如學校識別證正面、聘書等。
或者填寫身分變更申請表,並MAIL至本單位申請。
简体中文版:
非本市现职高中职以下教职员不提供申请,请洽您所属地区教育网路中心办理。
本服务包含教育局MAIL2000信箱与台北市校园无线WIFI两部分,须审核后才会开通功能。
仅提供给台北市学校高中职以下现职教职员使用,不提供一般民众学生申请。教职员退休后仍可继续使用。
现有已通过审核之一般民众或学生帐号使用期限至2020年12/31为止。申请帐号时若使用假资料,将停权处分。
非教师权限或者未通过教师权限审核之帐号,若半年内未更新密码或者未曾从网页登入,将予停权处分。停权可申告复权,请来电客服。若停权后半年仍未使用,则将删除帐号。
请透过个人资料管理内的相关证件影像档上传足以识别的证件照片,如学校识别证正面、聘书等。
或者填写身分变更申请表,并MAIL至本单位申请。
用前期注册的邮箱账户登录提示“查无此账号”。
]]>
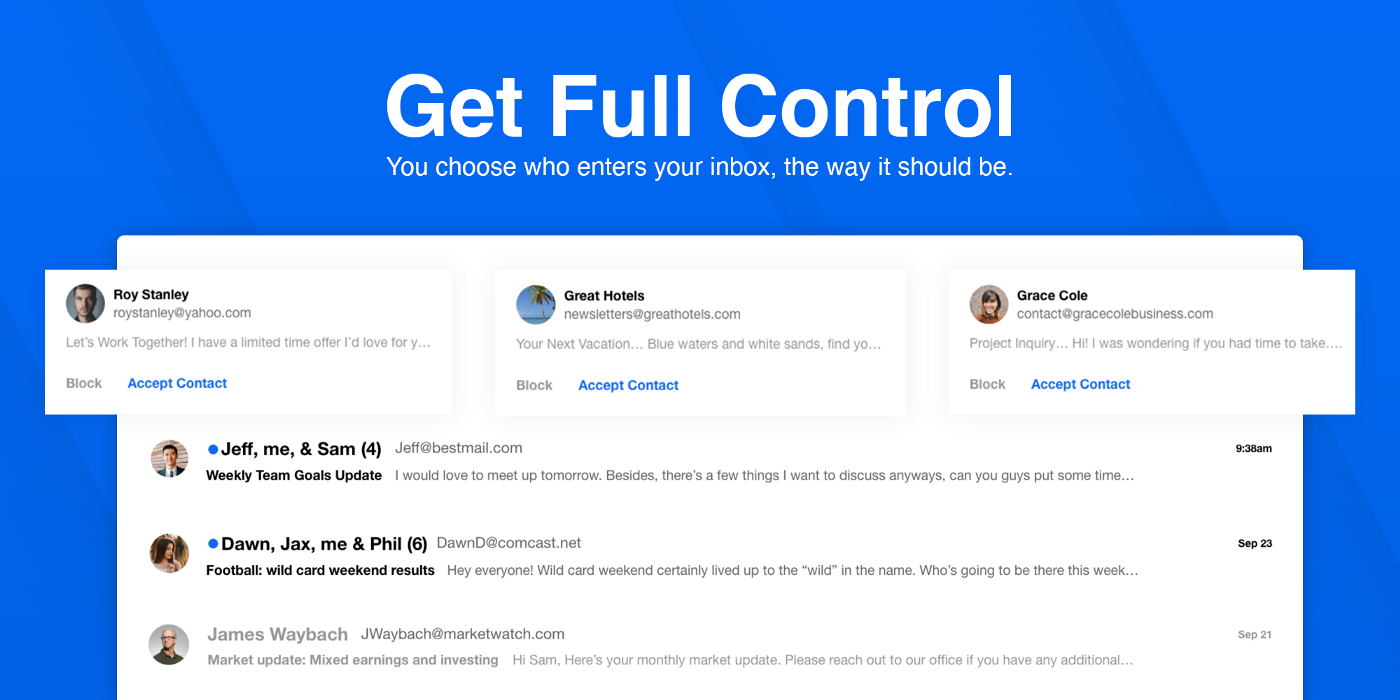
OnMail的最大特点是其独有的“first-of-its-kind Permission-Control”,直译的话就是“史无前例的权限控制”。对该特点的介绍我就不翻译了,见原文即可,具体如何还要等OnMail推出之后再做评测。
You get to decide who comes in, and who gets your attention. We stop spam before it enters your inbox so your inbox stays clean. As with our Edison Mail apps, we block all read receipts without degrading your email experience, and you won’t see a targeted ad lurking in your inbox.
其次,OnMail的搜索功能也有较大创新,可以根据邮件的附件类型、人名以及时间等进行搜索。
OnMail’s Search capabilities are built from the ground up to work with email. You’re able to search email the way you do naturally instead of trying to remember exact keywords.

邀请注册链接:https://www.onmail.com/redeem?type=onmail&code=vL7Ns1iMXL
小知识
OnMail官方的介绍中提到了国外几个著名邮箱服务商的电子邮箱服务的推出日期:
- AOL Mail于1993年推出
- Hotmail于1996年推出,后被微软收购
- Yahoo Mail于1997年推出
- Gmail于2004年推出,当时是邀请制注册,因为对这种方式很反感,所以当时就没注册,以至于现在都没注册到自己喜欢的用户名。
Wölkli邮箱后缀为@wail.ch ,200MB邮箱容量,20MB最大附件支持,无广告,支持两步验证,支持OpenPGP邮件加密、解密。免费版不支持IMAP/SMTP,只能通过基于RainLoop的Webmail方式收发邮件,网页版支持中文。
Wölkli邮箱付费方案如下:
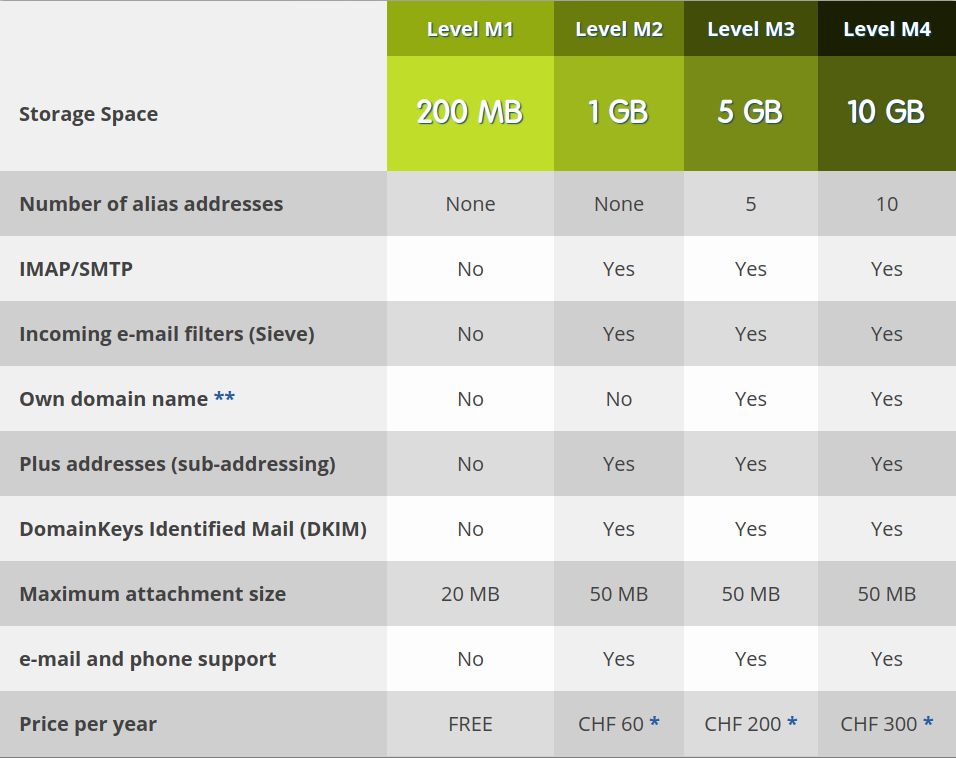
CHF为瑞士法郎,1瑞士法郎约等于7.36人民币,另需加7.7%的增值税。
注册地址为https://woelklimail.com/en/signup,选择“M1: 200MB, no support, FREE”,简单填写姓、名、邮箱用户名、密码就注册完成了。其中,邮箱用户名长度不得低于6位,密码长度不得低于12位且必须包括大写字母、小写字母、数字以及特殊符号。
免费版登陆地址为https://free.wail.ch/,登陆成功后,点击右上角小人头可以展开下拉菜单,选择“Setting”设置邮箱选项。
- General:选择邮箱界面的语言,支持中文;
- Security:开启两步验证;
- OpenPGP:生成、导入OpenPGP密钥。
付费方案有两种:
- Premium
价格不便宜,5美元每月,支持绑定无限个域名及别名,25个邮箱账户,每个邮箱账户邮箱容量为2GB。
- Premium Plus
同样支持支持绑定无限个域名及别名,邮箱容量为3GB比Premium多1GB,用户数量可选择100个和1000个,对应的价格分别为20美元每月和200美元每月。
除付费方案外,免费方案依然提供,官网目前宣称“forever”,不知道以后会不会变。
4月1日凌晨收到官方邮件:
]]>Hey there,
This is just to let you know postale.io now has low cost premium plans! Check it out if you need more mailboxes for 2048.xyz.
Starts at $5/month for unlimited email aliases and 25 full mailboxes, ability to manage all domains from a single account, and priority support.
If you don’t need more, well that doesn’t change anything for you. :)
Let us know if you have any question and have a lovely day,
--
Emma from postale.ios
DNS设置支持SPF、DKIM和DMARC,极大地降低了邮件进入收件人垃圾箱的机率,也可添加CNAME记录,使用自己域名地址访问并登陆邮箱。
以下的申请和相关设置以我自己的域名“2048.xyz”为例。
邮箱注册
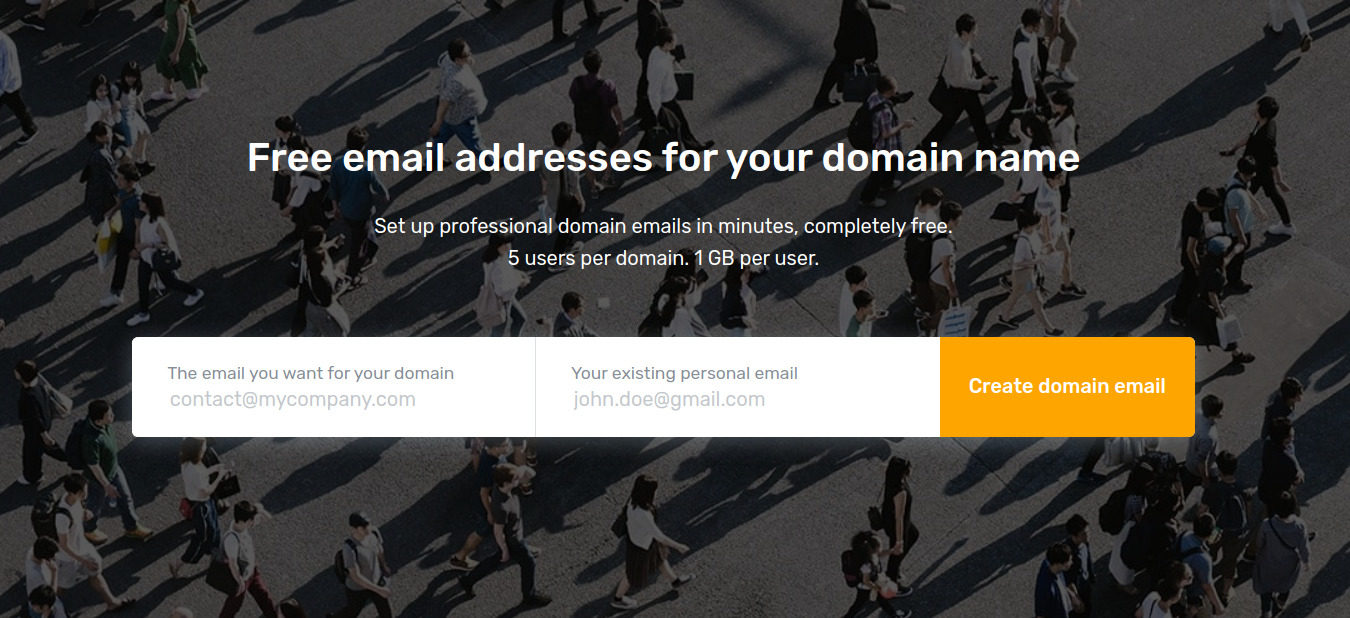
Postale的注册非常简单。在“The email you want for your domain”内输入你想使用的域名邮箱地址,如“hi@2048.xyz”,在“Your existing personal email”内输入你现在使用的邮箱地址,点击“Create domain email”即创建成功,同时你的邮箱也会收到一封创建成功的邮件,邮件中包含你的登陆密码。
DNS配置
创建域名成功后,按网站的指示在域名解析那依此添加MX、SPF、DKIM和DMARC记录。添加完后点击“Check my MX record”,如果没有问题就可以登陆使用了。
邮箱使用与设置
邮箱设置
邮箱登陆地址为:https://postale.io/webmail。初次登陆,邮箱界面语言为日语,依次点击左侧”Settings” -> “Preferences” -> “User Interface” -> “Language”选择你想要的语言就可以了。因Roundcube邮箱系统较为常见,其它的设置就不细说了。
后台管理
后台的登陆地址为:https://postale.io/admin/,也可以从邮箱的左下角“Admin”进入。
- Email accounts:创建邮箱账户和邮箱别名。
- Domain 2048.xyz:显示域名邮箱创建的相关信息,Domain bin (catch-all)为设置Catchall选项。
- My account:设置当前邮箱账户的相关信息。
- Webmail:回到邮箱界面。
客户端设置
SMTP
HOST mail.postale.io PORT 587 for TLS or 465 for SSL SSL/TLS Yes, with authentication required USERNAME *john.doe@yourdomain.com*
IMAP或POP3
HOST mail.postale.io PORT 993 for IMAP or 995 for POP3 SSL/TLS Yes USERNAME *john.doe@yourdomain.com*
其它
如对@2048.xyz这个后缀邮箱地址感兴趣,可给我发邮件,除了”hi”其它前缀都可以。
]]>3月3日,CTemplar在Twitter和官网上发布消息,限制免费邮箱账户创建,注册免费版邮箱账户需要提供邀请码。
博客文章原文如下:
Recently our growth has required that we restrict new account creation. We are currently doing this by limiting free accounts creation allowed by invite only. We may disable all new account creation, free & paid.
If you have a paid account you can send out 3 invite codes per week (Details in FAQ). You can also contact our support team via email or social media and we usually have some available.
If your looking for a free email service without an invite code you could try using a services like Disroot.org, Protonmail.com or Tutanota.com. Why am I recommending email services that we compete against? Because your privacy is being abused and stopping that abuse is the top priority. Which secure email service you use to protect yourself from abuse is secondary.
Kind regards to you all,
Godfrey de Saint Omer
CTemplar Founder & Owner
每位收费版用户每周可创建3个邀请码,每个邀请码有效时间为24个小时,一周后所有邀请码将自动删除。同时其官网也列出了可以获得邀请码的三种方式:
- 向你认识的使用收费邮箱的用户索要;
- 发送邮箱至:invite-codes@ctemplar.com,向CTemplar官方索要;
- 通过Facebook、Twitter、LinkedIn以及Reddit等社交媒体联系官方。
除此之外,你也可以接受官方的建议,使用Disroot.org、Protonmail.com或Tutanota.com等免费邮箱。
收费邮箱的注册目前暂不受限制,但价格与其它邮箱提供商相比,相对较高。
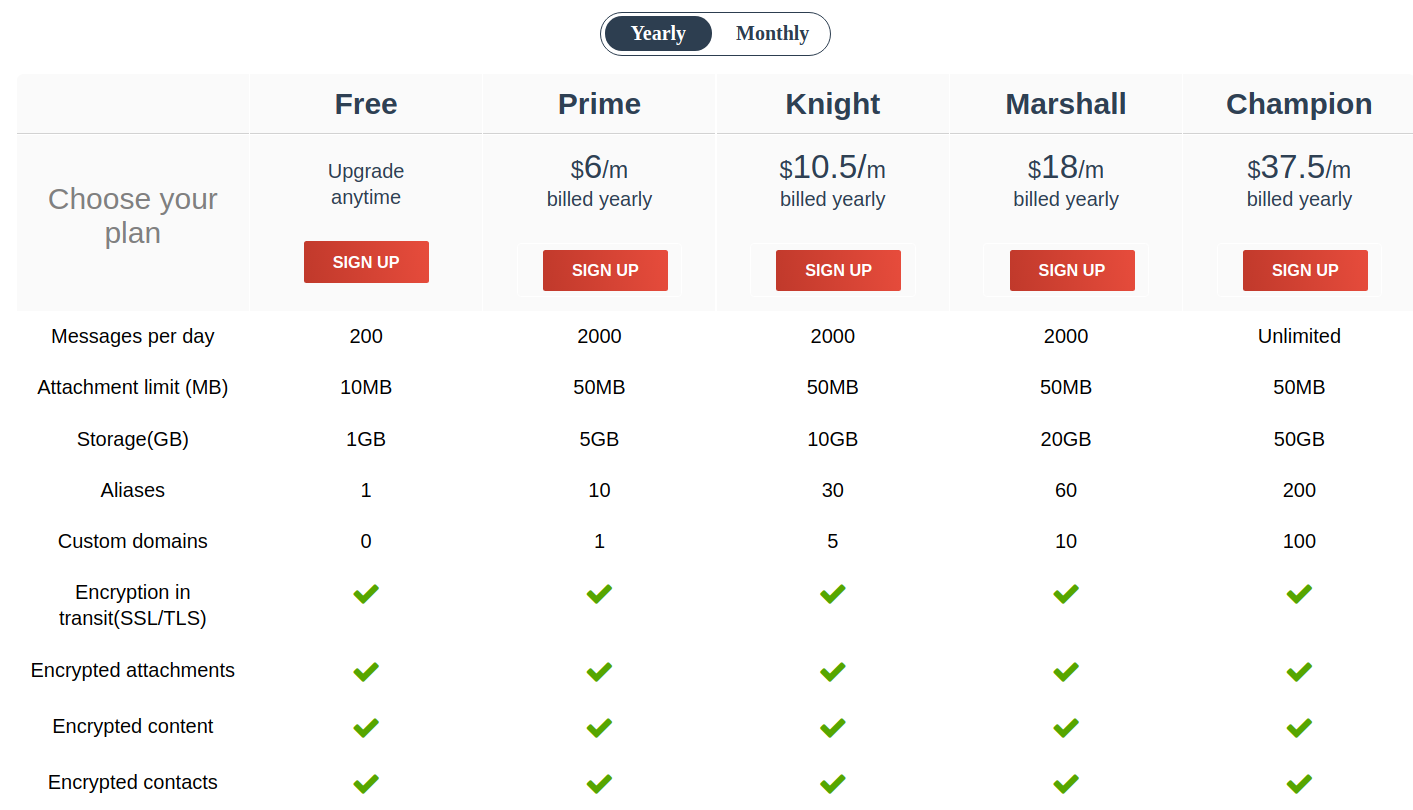
系统环境
- VPS:Amazon Lightsail
- 操作系统:Ubuntu 18.04
- 服务器:Apache 2.4.29
- PHP版本:7.2.24
- 数据库:Mysql Ver 14.14 Distrib 5.7.29
软件下载
下载Roundcube
登陆https://roundcube.net/download/,下载Roundcube1.4.3 Complete版本。也可以直接在服务器运行
1
wget -c https://github.com/roundcube/roundcubemail/releases/download/1.4.3/roundcubemail-1.4.3-complete.tar.gz
解压Roundcube压缩文件
1
tar xvf roundcubemail-1.4.3-complete.tar.gz
将文件夹移动到
/var/www/1
sudo mv roundcubemail-1.4.3 /var/www/roundcube
改Roundcube文件夹拥有者为
www-data1
sudo chown -R www-data: roundcube/
Apache设置
DNS设置
添加“A”记录,将“mail”主机记录对应到VPS ip地址,仅供参考。
进入Apache存放网站配置文件的文件夹
1
cd /etc/apache2/sites-available/
创建config文件
1
sudo cp 000-default.conf mail.conf
编辑配置文件
1
sudo nano mail.conf
以httpsmail为例:
ServerAdmin me@httpsmail.com
ServerName mail.httpsmail.com
DocumentRoot /var/www/roundcube启用配置文件
1
sudo a2ensite mail.conf
重启服务器
1
sudo systemctl restart apache2.service
或
重载服务器
1
sudo systemctl reload apache2.service
安装PHP及扩展
安装PHP
1
sudo apt install php-fpm
PHP扩展,可参考官方wiki: https://github.com/roundcube/roundcubemail/wiki/Install-Requirements。在后期安装Roundcube时也会有提示,缺哪个就安哪个即可。
- PHP version 5.4.1 or greater with
- PCRE (Perl-Compatible Regular Expressions)
- DOM
- JSON
- XML
- Mbstring
- OpenSSL
- Session support
- Socket support
- PHP Data Objects (PDO) with driver for either MySQL, PostgreSQL, SQL Server or SQLite
- Iconv (optional)
- FileInfo (optional)
- Zip (optional)
- Pspell (optional)
- PEAR packages distributed with Roundcube or external:
- Mail_Mime 1.10.0 or newer
- Net_SMTP 1.7.1 or newer
- Net_Socket 1.2.1 or newer
- Net_IDNA2 0.1.1 or newer
- Auth_SASL 1.1.0 or newer
- Net_Sieve 1.4.0 or newer (for managesieve plugin)
- Crypt_GPG 1.6.1 or newer (for enigma plugin)
- Net_LDAP2 2.2.0 or newer (for LDAP address books)
- kolab/Net_LDAP3 1.0.6 or newer (for LDAP address books)
- PHP version 5.4.1 or greater with
重启PHP
1
sudo systemctl restart php7.2-fpm.service
Mysql数据创建
安装PHP数据库扩展
1
sudo apt install php-mysql
数据库安装
1
sudo mysql_secure_installation
登陆数据库
1
sudo mysql -u root -p
创建Database
1
CREATE DATABASE roundcubemail;
创建用户、密码及权限
1
GRANT ALL PRIVILEGES ON roundcubemail.* TO roundcube@localhost IDENTIFIED BY '密码';
刷新
1
FLUSH PRIVILEGES;
安装、配置Roundcube
访问“Mail域名/installer”,如http://mail.httpsmail.com/installer,按步骤一步一步安装、配置即可。
STEP 1
主要检测运行环境、相关软件、扩展和设置是否正确。“Checking available databases”一栏“MySQL: OK”即可,其它数据库显示“NOT AVAILABLE”不影响安装使用。除此之外,必须确保所有项目状态为OK。
时区设置
1
sudo nano /etc/php/7.2/apache2/php.ini
将
date.timezone改为date.timezone = Asia/Shanghai。STEP 2
- General configuration:按实际情况填写,也可以默认
- Logging & Debugging:同上
- Database setup:数据库按上文Mysql数据创建第5步创建的信息填写,如果没自己更改的话,只填密码即可,其它的默认。
- IMAP Settings:以Riseup为例
- default_host:ssl://mail.riseup.net
- default_port:993
- username_domain:riseup.net(添加域名后,登陆就不需要输入邮箱后缀了)
- 其它:默认
- SMTP Settings:以Riseup为例
- smtp_server:ssl://mail.riseup.net
- smtp_port:465
- 其它:可默认
- Display settings & user prefs:可默认
- Plugins:Roundcube插件,按需添加。”enigma“插件是用于邮件PGP加密解密的。
STEP 3 测试
确保所有项目状态为”OK“,若”Check DB config“处”DB Schema: NOT OK“,点击下面的
Initialize database按钮初始化数据库即可。
登陆邮箱
访问邮箱地址,输入用户名和密码就可以使用了。
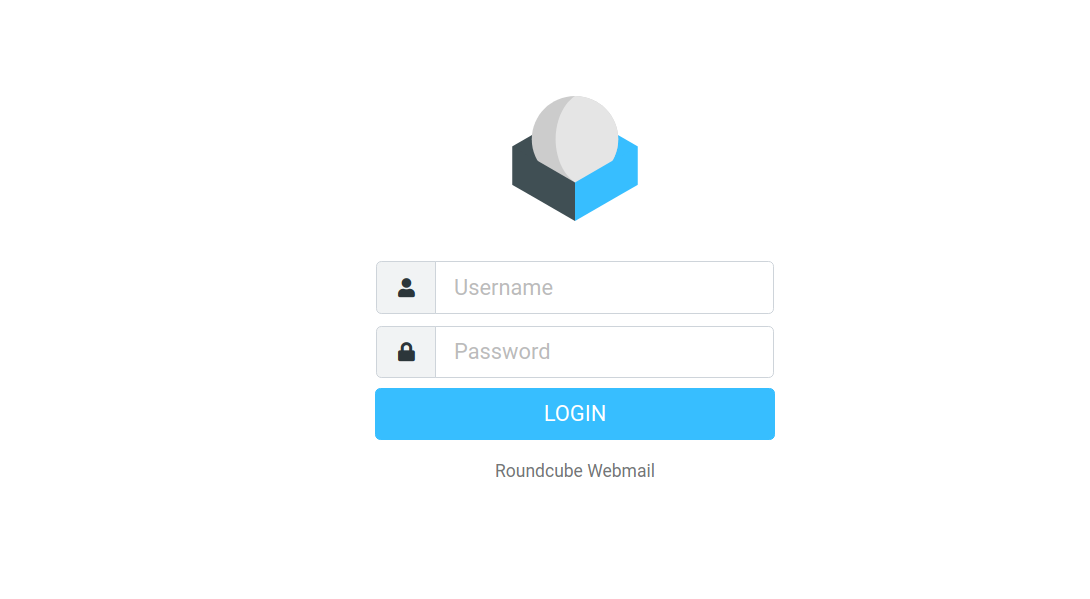
邮箱界面

关于邮件推送大家比较关注的就是免费额度以及稳定性。阿里的邮件推送每日200封免费邮件,超出之后单价为 2 元 / 1000 封,按照实际使用量计费,计算公式为: 按量计费的费用 = 邮件发送量 / 1000 X 2.00元,费用精确到小数点后 2 位,即最低账单金额为 0.01 元,邮件推送的计费周期为小时。
每个用户都有一个自己的信誉等级,等级不同日额度和月额度的数量也不同。经过有限测试,稳定性以及及时性都非常不错。
如额度太少不够用的话可以购买阿里的资源包:
| 数量 | 价格 |
|---|---|
| 5万封 | ¥90.00/半年 |
| 50万封 | ¥840.00/半年 |
| 100万封 | ¥1590/半年 |
| 500万封 | ¥7750/半年 |
具体信息可登陆https://www.aliyun.com/product/directmail/查看。
邮件设置
登陆邮件推送控制台:https://dm.console.aliyun.com/
发信域名
右上角点出“新建域名”,输入域名(建议用二级域名,如send.httpsmail.com等),点出确认后,你的域名就出现在域名管理列表里了,状态为黄色的“待验证”,打开右侧“配置”在DNS中添加相关的TXT、SPF、MX、CNAME记录。然后返回点击“验证”,验证设置是否通过。
每个帐户发信域名可以添加5个, 域名验证通过后需要一直保持SPF、MX的正确配置,否则将无法发送邮件。如果需要使用数据跟踪功能,需先在工信部系统进行域名备案。
发信地址
点击右上角的“新建发信地址”,选择“发信域名”,“账号”就是@前的用户名,生成的发信地址就是你SMTP的用户名,回信地址可不填写,如填写须验证回信地址,“发信类型”按自己的需实际情况填写,触发类邮件指注册激活、密码找回等;批量邮件指营销推广、订阅期刊等。不同类型邮件的发送限制不同,请根据邮件类型选择。
发信地址创建完毕后设置SMTP密码,密码设置完毕2分钟后邮件推送功能就可以正常使用了。
SMTP设置
SMTP服务器:smtpdm.aliyun.com
SMTP服务端口号:25或80或465(SSL加密),如选择使用SSL加密端口,有些需要把SMTP服务器地址改为ssl://smtpdm.aliyun.com(Discuz的邮件设置)
SMTP用户名:新建的发信地址
SMTP密码:SMTP密码
数据查看
登陆邮件推送控制台可查看发信数据及发送详情。
其它设置
如IP防护、模板管理、收件人列表等可登陆控制台自行查看设置。
]]>IM客户端跨平台支持Linux、macOS、Windows、iOS和Android等主流平台,支持中文。邮箱需要支持imap和smtp协议,因聊天信息的传送基于传统的Email协议,信息传递的即时性取决于你邮箱的提供商,可能没有传统的IM即时聊天软件即时。在实际体验中,除发送图片等大文件外即时性良好,暂未出现延迟现象。
- Delta桌面客户端界面
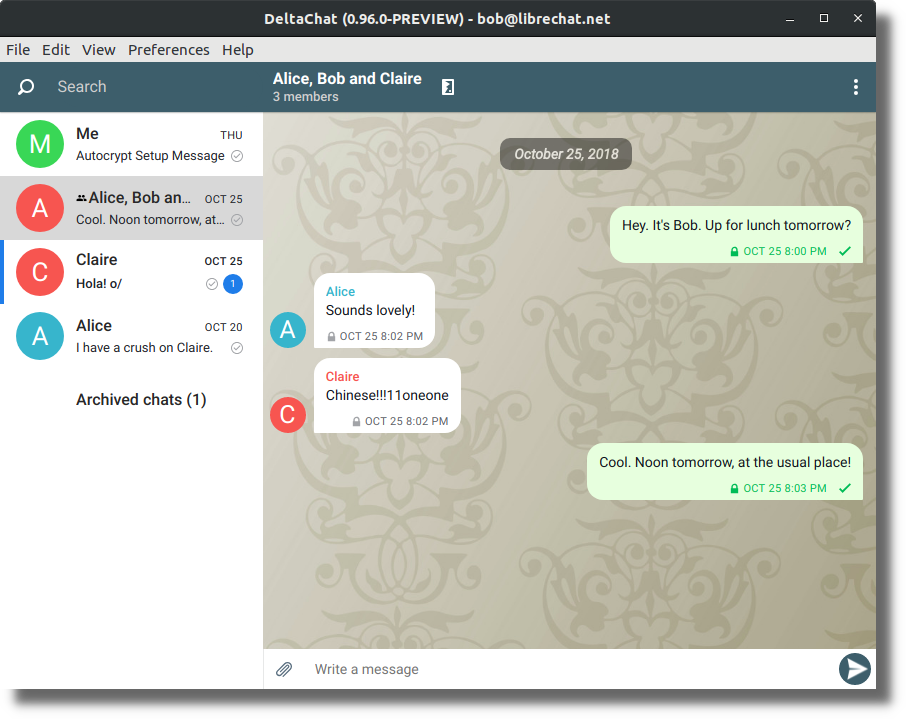
- Delta移动客户端界面
Delta软件界面跟Telegram相似,除发送文字信息外,Delta还支持发送表情、图片、视频 以及其它文件。同时,跟传统的IM聊天工具一样,Delta也支持创建群组,多人聊天。
关于加密
Delta默认使用Autocrypt进行端对端加密,也可以在“Setting”-“Autocrypt”中关闭。在实际使用中,如果在你发送的信息左下角有一个小锁的标志就代表是加密信息(仅桌面客户端有效,移动端未发现小锁标志)。
- 未使用加密时,邮件在邮箱内为普通邮件
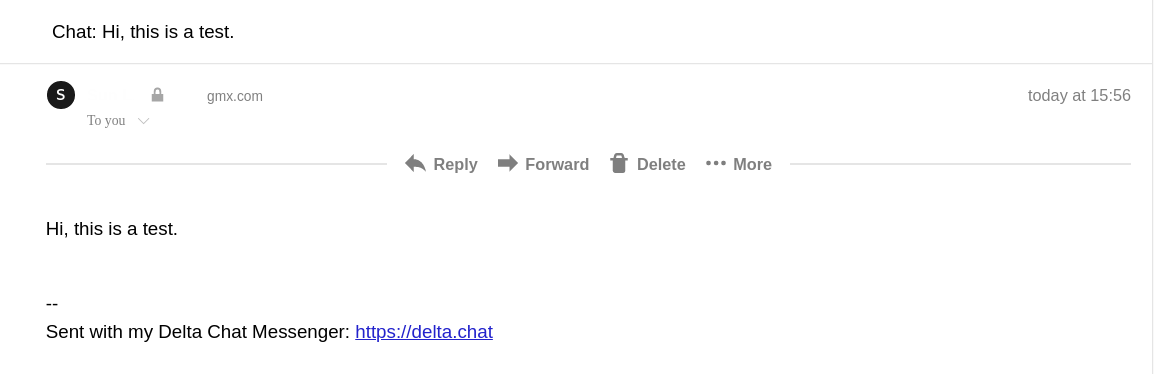
- 使用加密后,邮件在邮箱内为加密邮件
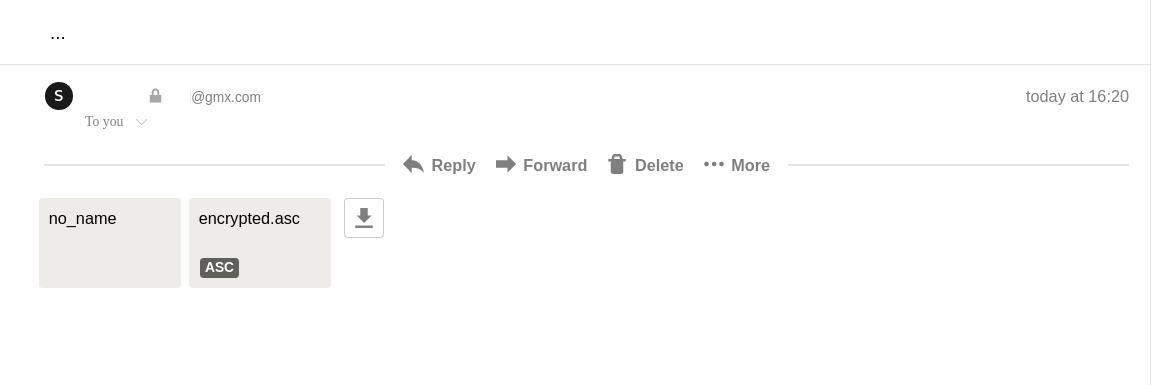
同时,桌面客户端支持导入、导出PGP密钥,移动端暂未发现。
测试环境
- 客户端:Linux, iPad
- 邮箱:Gmx.com, Yandex域名邮箱
- 我的Delta Chat邮箱地址为me@httpsmail.com
Moart.com支持30种不同的语言(中文应该是机翻),打开网站后可自选邮箱地址,也可随机创建,不支持发送附件。
可选后缀:
- moakt.cc
- disbox.net
- tmpmail.org
- tmpmail.net
- tmails.net
- disbox.org
- moakt.co
- moakt.ws
- tmail.ws
- bareed.ws
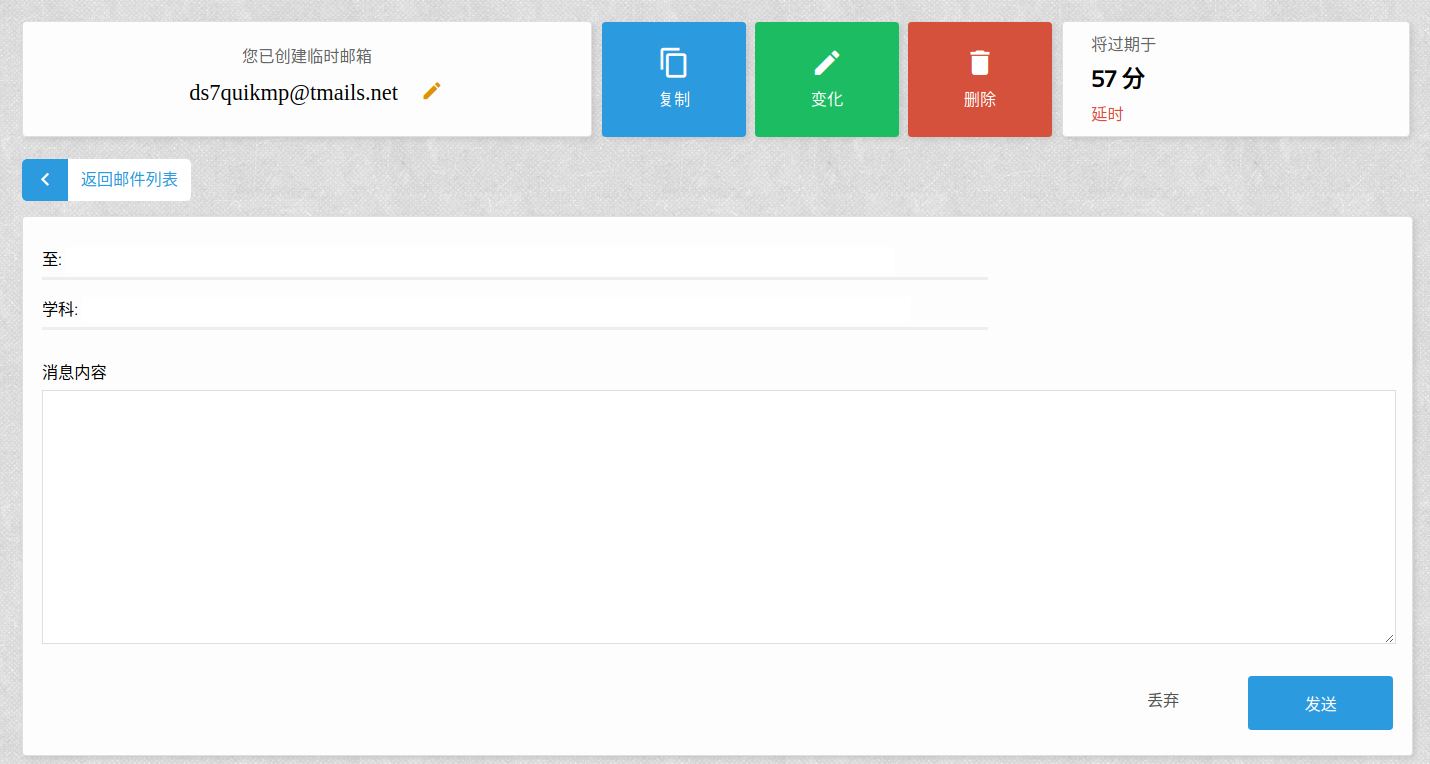
发送邮件页面:
- 至:填写收件人地址
- 学科:邮件主题Subject
- 消息内容:邮件正文
通过Moart.com创建的临时邮箱有效期为1个小时,但可以自行延长邮箱使用时间,且所有通过临时邮箱收发的邮件都通过SSL连接来发送,,以此来确保用户的个人隐私不受侵害,,同时保护用户来邮件的安全性。
]]>
从邮箱的界面来看,GuerrillaMail和CS.Email都是用的相同的邮件系统,基于开源的Go-Guerrilla,唯一不同的就是CS.Email域名更好记。除此之外,CS.Email还支持通过TOR网络访问,地址为csemailmoemkvyne.onion(Guerrilla我记得也可以通过暗网访问)。
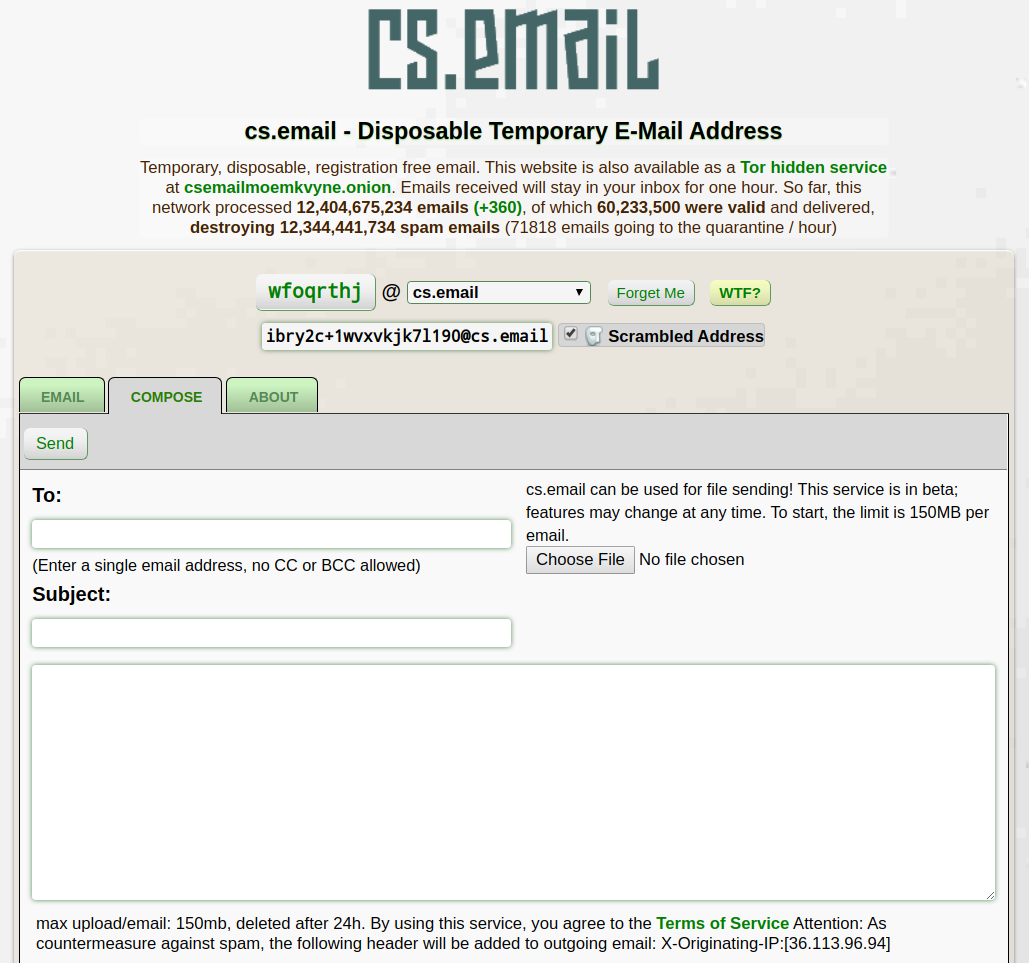
因使用的邮箱系统相同,使用方法也相同,可参考前期的文章:
]]>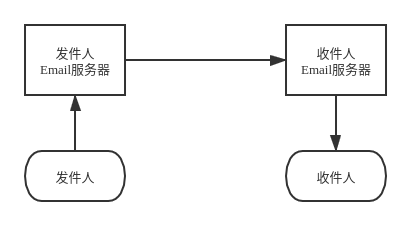
理论上,中间的环节或节点越少,邮件的安全性就越好。那么在其它因素相同的情况下,邮件在同一邮箱后缀内收、 发(即发件人Email服务器与收件人Email服务器相同)安全性要高。相应的,在发件人一端对邮件进行对称或非对称加密也能增加邮件在传递过程中的安全性。如Protonmail用户对non-ProtonMail发送加密邮件就是采用对称加密的方式,收件人只收到一封含有网页链接的通知邮件,收件人点击连接、输入密码后才能查看邮件内容,既通过对称加密加强了邮件在传递过程的安全性,又保证了邮件在同一邮箱服务器内传递减少了传递环节。
BooleBox的免费加密邮箱就采用的此种方式,但与Protonmail不同的是:
- 邮箱空间大,10GB,还兼有网盘功能;
- 不提供邮箱地址,注册时填写的邮箱地址用于接收通知邮件。
注册方法比较简单,选免费的那款就可以了,邮箱的界面也很简单,点击右上角的“New”就可以发送邮件了。
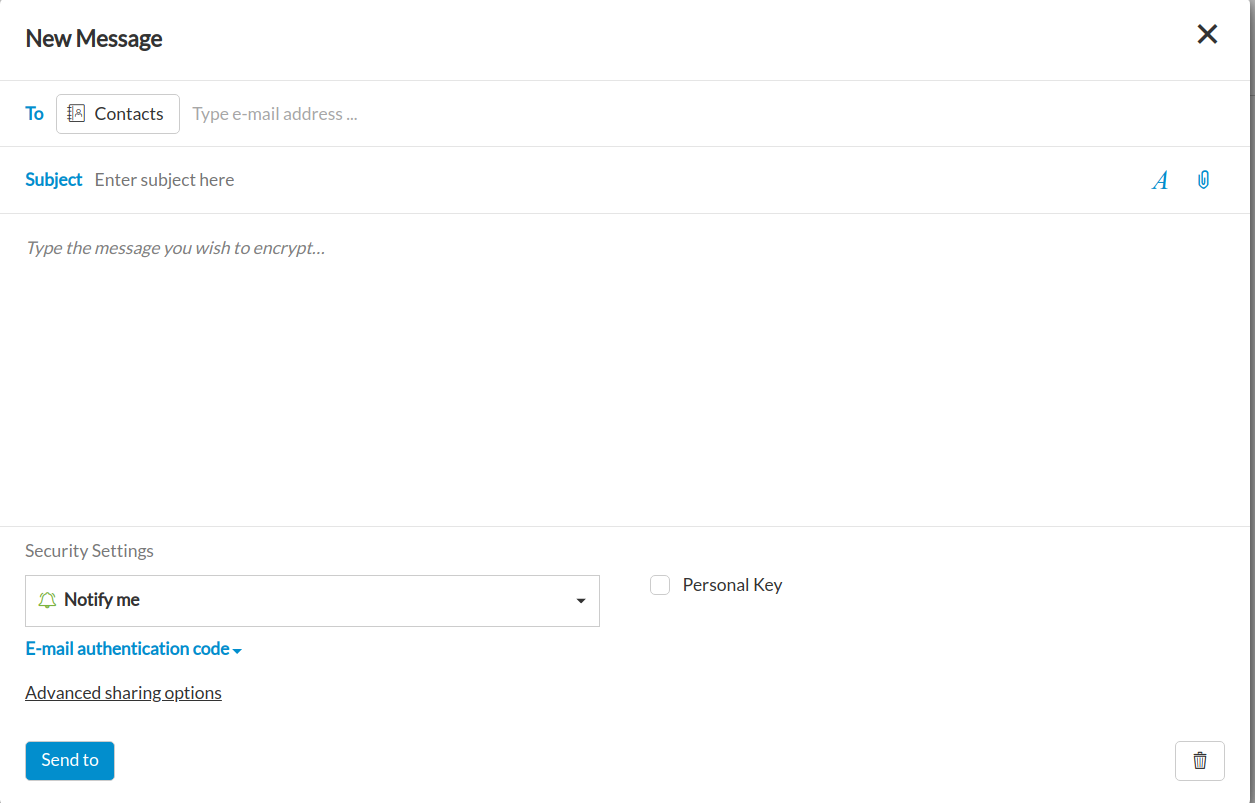
- To:收件人邮箱地址
- Subject:邮件主题,下面填写邮件正文
- Personal Key:自己填写邮件密码,可选
E-mail authentication code:
Registration required
只有注册boolebox用户才能打开邮件
E-mail authentication code
通过E-mail获取邮件加密密码,当你收到邮件后,点击链接会自动收到邮件密码
SMS authentication code
通过短信获取邮件密码
Free access
不需要密码
- Advanced sharing options:设置邮件过期时间
- 点击“Send to”就可以发送了
收件人在打开邮件链接后,发件人也会即时收到邮件通知。
]]>其官网自2017年6月以来一直未更新,直到今年10月底才发表了一篇“Discontinuing of service”的博文,宣布将关闭邮箱服务:
- 2020年1月31日,关闭邮箱服务;
- 2020年3月31日,删除所有数据。
原文如下:
]]>Good day everybody, I’m sad to announce, that we will discontinue support of SCRYPTmail. It was a tough decision to make, as many of us enjoy this service for the last 5 years. But unfortunately it was never able reach potential I was hoping for, it’s time for me to move on and count this project as good experience that hopefully benefited some part of our life.
Here is how it will goes:
- No new registration could be made, due immediately
- All active trial accounts will be extended free of charge. (Logged in within last month)
- Dec 1,2019 email attachments will be discontinued. No file could be uploaded or downloaded after that date
- Jan 31,2020 Email service will be shut down.
- March 31, 2020 all databases will be deleted.
Please feel free to reach me at shutdown@scryptmail.com
Thank you all for giving me this opportunity to serve you this 5 wonderful years.
同国际版相同,永久免费版域名邮箱仅支持绑定一个域名,5个免费用户,每个用户邮箱容量为5GB,25MB附件,仅限Web端访问。国际版虽然也仅支持Web端访问,但在实际使用中是可以通过Exchange方式使用客户端的,中国版暂未尝试。在安全性方面,全程https访问,支持两步验证。
邮箱注册
- 打开网址:https://workplace.zoho.com.cn/orgsignup.do,输入自己的域名点击添加。
- 在打开的页面中,输入有关信息,同意服务条款和隐私政策后,点击“继续”。
- 按提示验证自己的域名,然后添加相关的解析,包括MX、SPF、DKIM、CNAME等,设置完毕后就可以登陆使用了。
注意事项
SPF和DKIM非常重要,一定要设置正确。如果觉得有必要可以自行添加DMARC记录,如下所示(将Mail替换为你自己的邮箱,且不包括引号“”):
| 主机记录 | 记录类型 | 记录值 |
| :——- | ——– | —————————————————— |
| _dmarc | TXT | v=DMARC1; p=none; rua=mailto:“mail”; ruf=mailto:“mail” |除此之外也可使用https://dmarc.postmarkapp.com/,添加自己的邮箱和域名自动生成DMARC记录。
组织设置(Org Setting):进入邮箱打开控制面板可见
- Catch All功能:当某一邮箱地址不存在时,所收到的邮件会自动转发到你设定的邮箱地址。
- DomainKeys:可以了解一下。
Mail Lite 轻量版
- 按用户数量购买,每用户每年50元人民币。
- 支持多域名绑定。
- 支持邮件转发、邮件召回。
- IMAP/POP客户端支持。
邮箱界面
从邮箱的界面来看,很可能是基于Rainloop,共提供Default、Deep forest、Funny、TorGuard Dark和TorGuard Light等5套邮箱主题。下方截图为TorGuard DarK主题截图:
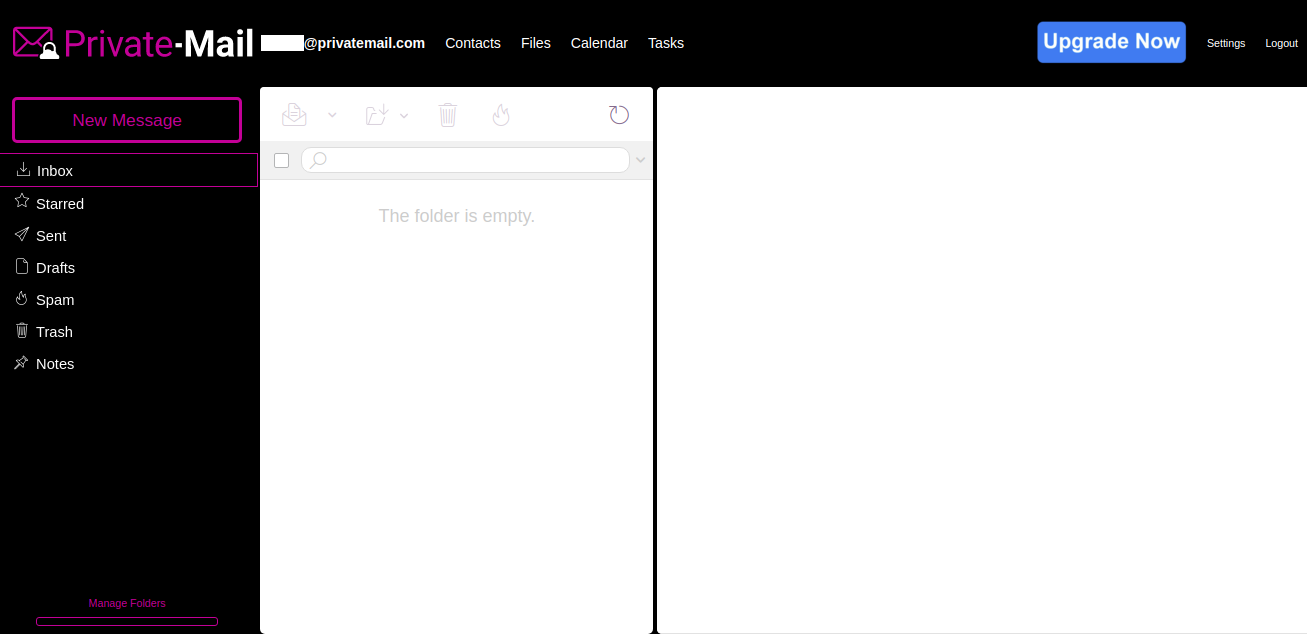
邮箱设置及功能
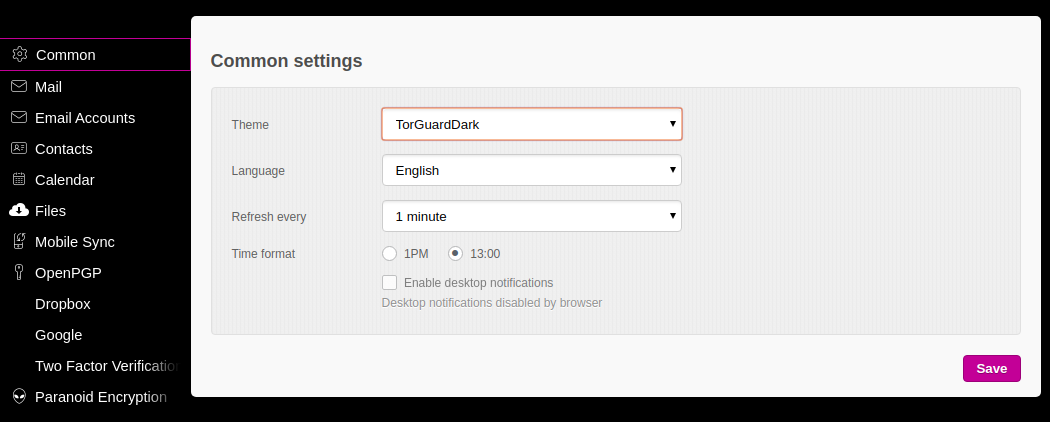
Common
可设置邮箱主题、语言(支持中文)、系统刷新时间、时间显示格式以及是否开启桌面浏览器邮件通知。
Mail
可设置每页可显示的邮件数量以及是否允许草稿自动保存。
Email Accounts
设置邮箱签名、自动转发、自动回复、邮件过滤及管理邮箱文件夹。
Contacts
通讯录每页可显示数量。
Calendar
日历相关设置。
Files
关于邮件预览、邮箱界面平板预览的设置。
Mobile Sync
日历、文件、联系人的DAV同步网址。
OpenPGP
选择开启OpenPGP后,可导入、导出以及生成密钥。
Dropbox
关联Dropbox账户。
Google
关联Google账户,便于添加、发送Google Drive文件。
Two Factor Verification
开启两步验证。
Paranoid Encryption
用于在本地浏览器非对称加密上传文件。
邮箱申请
登陆PrivateMail官网,下拉选择“Free 100mb”,点击“Buy Email”,注册即可。
存在问题
注册申请成功后,当时无法使用,过了2天后才能正常登陆,不知道是普遍存在的,还是我自己的问题。
]]>Confidesk的免费邮箱服务仅提供50MB的邮箱空间,但你可以通过邀请好友的方式来增加邮箱的容量,当然也可以购买订阅增加空间,但价格并不便宜。除邮箱功能外,还提供网盘和保险箱服务,如果邮箱账户连续1年未登陆将被删除。
邮箱注册成功后会自动生成GPG密钥,目前仅能导出公钥,经测试邮件解密功能能够正常使用。除此之外,Confidesk还提供一个固定链接,其他人可通过该链接发送加密邮件至你的邮箱账户,类似于留言版功能,但目前好像并不能正常使用。有兴趣的可以测试一下,我的链接如下:
域名添加比较简单,点击“Account” - “Mail Settings” - “Own Email Domains”添加即可,添加成功后将
chwww1.confidesk.com
添加MX域名解析即绑定成功。然后在“Email Aliases”中添加域名邮箱账户如”me@httpsmail.com“就可以正常收、发邮件了。
]]>Data Is Beautiful是国外社交媒体上的一个可视化数据制作频道,经常发布一些有趣的统计视频,非常直观易懂。近日,该团队就在YouTube上传了一则”1997-2019年最受欢迎电子邮件活跃用户”的视频,展示22年来电子邮箱活跃用户的排名变化。
时间线最早从1997年Q2开始,那时互联网世界才刚开始为人所知,全球范围内能排的上号的邮箱总共只有5家,分别是MSN Hotmail、AOL邮箱、雅虎邮箱、网易邮箱以及DoCoMo邮件。那一年,微软以4亿美元收购了Hotmail,达成一次强强联合的收购,成为当时活跃用户数排名第一的电子邮箱。而在国内,丁磊率先研发国内首个电子邮箱系统,并且刚推出网易邮箱也很快进入榜单,占据全球第四位置。
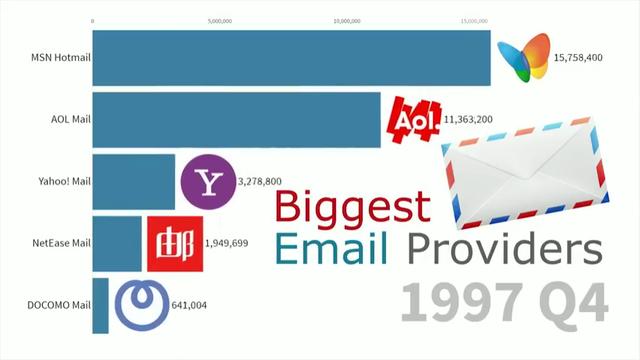
经过22年的发展,电子邮箱迎来众多新生力量,行业格局也发生了重大改变。截至2019年第3季度,谷歌Gmail邮箱成为全球最活跃的电子邮箱;网易邮箱凭借匠人出品也吸引了众多活跃用户使用,排在第二位,并且22年来从未跌出前4名;继承了MSN Hotmail用户积累的微软Outlook则位列第三名;第四名是拥有庞大QQ用户基础的QQ邮箱。
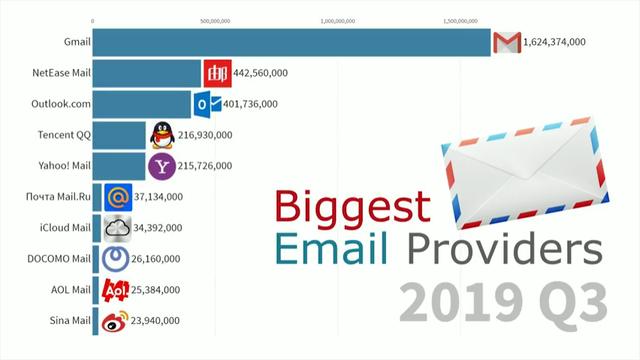
如今,虽然电子邮件已经不是互联网通讯的唯一选择,但几乎所有互联网网民都是电子邮箱的用户,夺取电子邮箱市场,相当于夺取互联网用户市场,因此其市场重要性仍然不可低估。而争夺电子邮件市场的关键在体验,无论Gmail、网易还是Outlook,都在不断加强用户体验环节的创新,未来市场竞争的变化如何,我们拭目以待。
]]>Gandi.net是一家法国的服务商,提供域名、主机、邮箱、SSL等网络服务,成立于1999年,2005年被收购。截止目前,Gandi.net在域名注册管理方面排名法国第一、欧洲第六、世界前15,但价格较贵。域名购买成功后,每个域名赠送2个容量为3G的免费邮箱,支持IMAP、POP3、SMTP邮件同步,支持无限别名和邮件转发,还可付费升级。
Webmail可选SOGo和Roundcube,Roundcube就不用介绍了,免费、开源的Webmail程序,很多著名的安全类邮箱都使用Roundcube作为邮箱的Webmail,如Riseup、A/I、cock.li等;SOGo也是一个比较出名的免费、开源Webmail程序,但使用的好像并不多,关于SOGo更多的信息可以登陆SOGo官网查看。就我个人来讲,还是比较喜欢SOGo的邮箱界面,SOGo相比Roundcube邮箱界面更加简洁,而且Roundcube也已经看烦了,有点审美疲劳了。
 ]]>
]]>邮箱托管于谷歌教育全家桶,邮箱后缀为“@mcc.edu”。
申请步聚:
打开申请地址:https://appsprod.mcc.edu/onlineapp/,注册账户填写入学申请信息。获取、验证美国人身份信息所需相关网站如下:
https://www.fakenamegenerator.com/advanced.php
填写完毕后会收到学校发送的邮件通知,包括学号及用户名;使用用户名@后缀登入会自动跳转到学校统一认证,用户名和初始密码(后4位学号+后4位SSN)登入后即可使用。
作为北卡罗来纳州社区学院系统和北卡罗来纳大学(UNC)系统之间的综合关联协议(CAA)的成员,DCCC获得的学分转入大学系统。 DCCC还向公众提供基本技能培训和通识教育发展(GED)计划。
邮箱后缀为@davidsonccc.edu,邮箱托管于谷歌教育全家桶,申请步聚如下:
找美国人信息注册申请入学,然后等候学校邮件通知,美国人身份信息获取、验证等相关网址如下:
https://www.fakenamegenerator.com/advanced.php
收到邮件后,打开邮件内的https://wa2.davidsonccc.edu/WebAdvisor/WebAdvisor?TYPE=P&PID=CORE-WMUI使用Last Name和SSN查询到用户名
再打开邮件内的https://reset.davidsonccc.edu/输入查询到的用户名和初始密码(Last Name首字母2位+MMDDYYYY,一个字母大写)登入初始化账号,设置密保和新密码
申请步骤
打开申请链接https://sys.bishop.edu/cgi-bin/admonline.mbr/login,点击“Get One!”注册新帐户;
按要求填写相关信息,SSN、姓名、生日、地址等相关信息可从以下网站获取、验证:
https://www.fakenamegenerator.com/advanced.php
提交入学申请,等待学校发送的通知邮件即可;学校邮件内有邮箱地址及初始密码
邮箱后缀为“@bishop.edu”,托管于谷歌教育全家桶。
以前介绍过,基于SquirrelMail和Rain Loop,Elude.in的SquirrelMail界面应该是目前最好看的。免费版邮箱的容量大小为50MB,支持两步验证。更多的信息可访问前期的文章:Eludein提供免费的暗网邮箱和电子钱包。
这款邮箱前期也介绍过,只能使用客户端,无Web界面,邮箱容量为500MB,邮箱注册需自己先申请邀请码,注册成功后会有paranoid.email、2048.email、4096.email、paranoid.is、mime.email等5个邮箱后缀,邮箱的激活及使用需要对GPG或PGP以及TOR有一定的了解。更多的信息可访问前期的文章:PARANOID只能用客户端收发邮件的加密邮箱。
Protonmail应该是目前最有名的安全邮箱服务,容量大小为500MB,支持两步验证和PGP,注册成功后,还会有一个用户名相同的“@pm.me”的邮箱,但免费版只能该短邮箱地址用来收件。
Riseup,老牌的邮箱服务,只接受邀请注册,邮箱界面为Roundcube,容量大小可自己设定,但最大不得超过1000MB,支持别名。
这个邮箱我也没有,注册也需要邀请且只能邀请3人,邮箱界面也是Roundcube,邮箱后缀为“@systemli.org”。
同样基于Roundcube的免费邮箱,最大的特色就是后缀多,网站的LOGO也很可爱,从2013年提供免费邮箱至今,用户超过50多万。
介绍过很多次了,详细信息可参照:
只能在Tor网络下使用,跟平常的邮箱之间是无法通信的。邮箱后缀较长为“@ torbox3uiot6wchz.onion”,邮箱界面同样基于SquirrelMail,但跟Elude.in的界面相比更难看了。
邮箱界面也是SquirrelMail,丑,邮箱容量大小为25MB,广告较多。
注册成功后,需要在支持TOR网络的邮箱客户端上激活,有点麻烦就不介绍了,用尝鲜的可以自己按官网提示进行配置。
注册成功后会有两个邮箱后缀”@tt3j2x4k5ycaa5zt.onion “和”@danwin1210.me”,容量大小为25MB。
支持两步验证
在“Setting”-“Security ”选项内可选择开通两步验证,毫无疑问开通后,Ctemplar更加安全。
支持邮件主题加密
同两步验证设置一样,在“Setting”-“Security ”选项内可选择开通和关闭。个人不建议开通,开通后邮件主题全是小星星,不方便邮件浏览及搜索;而且Ctemplar现在只能使用网页版且个人私钥无法导出,登录邮箱账户就能解密邮件主题,暂无实际意义。
但前期存在的一些问题仍然没有解决,如:
- 无法发送非对称加密邮件;
- 无法导出、修改个人密钥;
- 经过mailfence.com、disroot.org及Enigmail邮件发送测试,Ctemplar仍然无法解密PGP/Inline和PGP/MIME格式的加密邮件;
- 收到PGP/MIME格式的加密邮件后会自动发送邮件主题为“Mail delivery failed: returning message to sender”的错误邮件提示,提示邮件发送失败,但实际上能够收到邮件。
总之,作为一款主打安全的免费邮箱,CTemplar邮箱与Protonmail、tunamail等仍有不小的差距;但作为一款普通邮件来说,足矣。
]]>申请地址
https://www.inholland.nl/inhollandcom/enrolment/how-to-apply/
申请步骤
打开链接点Apply,点 Create Studielink-account without DigiD 创建账号。
填写个人资料、地址、联系邮箱,确认。(需要邮件验证邮箱)。
打开邮箱里的验证链接会自动登录到刚注册的账号,没有登录的选择Login without DigiD 登录。
Add previous education(我的答案,仅供参考)NO-Netherlands–HBO bechelor–Hogere Europese Beroepenopleiding–Add this previous education–Next下一页。
Choose a study programme(我的答案,仅供参考)Inholland University–HBO associate Degree–Part Time–BUSINESS IT & MANAGEMENT – FLEXIBLE VARIANT (IN DUTCH)–Select
Next。
NO–NO–Next。
I have checked all the details and they are correct.–Confirm。
提交申请后会收到邮件,等12-24小时会收到一封带有教育邮箱和密码的邮件。
Ga naar https://webmail.inholland.nl (dit is de link naar jouw Inholland mailbox)
Log in met de volgende inloggegevens:
User name: 65xxxxx@student.inholland.nl (= jouw studentenmailadres)
Password: W3lxxxxx
Zodra je inlogt, krijg je de melding “Password Expired”. Vul een nieuw wachtwoord in en bevestig dit op het volgende scherm. Houd hierbij rekening met de regels voor wachtwoorden* die je onderaan deze e-mail vindt.
使用说明
- 邮箱系统为Office365
- 不建议长期使用
本文转自:
]]>6月下旬,Twitter前设计副总裁Mike Davidson发推声称,Superhuman的“Read Receipts(阅读回执)”功能会在收件人不知情的情况下,详细记录收件人每次浏览邮件的时间和地点。
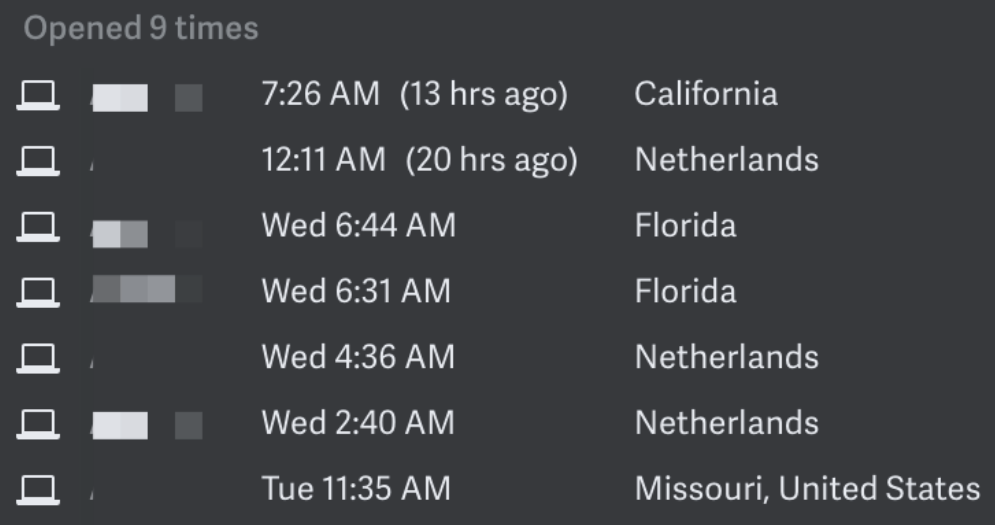
推文发出后Mike Davidson受到了一些Superhuman用户及投资者的批判,他们认为:
- 邮箱客户端已经这样做了很多年了,即使苹果的iMassage也这样做。
- 像MailChimp, PersistIQ, SendGrid和MailTrack也这样做。
- 其它的就不翻译了,感兴趣的可以阅读下方的参考文章
Mike Davidson在文章最后也给出了一些建议:
- 不要用Superhuman。
- 关闭图片预览。
大部分的邮件安全或隐私问题都是由邮件附件、邮件正文中的图片或HTML格式的邮件引起的,为安全起见最好设置为纯文本形式收、发邮件。
参考文章:
- 湾区日报:Superhuman-在监视你
- mikeindustries.com:Superhuman is Spying on You
EmailforFans提供的邮箱后缀较多,邮箱为格式“The+球队名称+Fan.com”,球队包括NFL(美国职业橄榄球大联盟)、NBA(美国职业篮球联赛)、MLB(美国职棒大联盟)、NHL(美国职业冰球联盟)、MLS(美国职业足球联盟)、NCAA(美国大学体育协会)。
NBA球队邮箱后缀
- TheBlazersFan.com
- TheBucksFan.com
- TheCavsFan.com
- TheCeltsFan.com
- TheChicagoBullsFan.com
- TheClippersFan.com
- TheGrizzliesFan.com
- TheHawksFan.com
- TheHeatFan.com
- TheHornetsFan.com
- TheJazzFan.com
- TheKingsFan.com
- TheKnicksFan.com
- TheLakersFan.com
- TheMagicFan.com
- TheMavsFan.com
- TheNetsFan.com
- TheNuggetsFan.com
- ThePacersFan.com
- ThePistonsFan.com
- TheRaptorsFan.com
- TheRocketsFan.com
- TheSixersFan.com
- TheSpursFan.com
- TheSunsFan.com
- TheThunderFan.com
- TheTimberwolvesFan.com
- TheWarriorsFan.com
- TheWizardsFan.com
如果喜欢英超的,可以去https://freeola.com/free-email/注册喜欢的后缀,以前注册了一个liverpoolfans.com的免费邮箱,无Webmail,只能通过客户端收信。
]]>获取邀请
不像Riseup等邮箱一样,PARANOID的邀请码获取非常简单,打开https://paranoid.email/invite,简单填写用户名和邮箱即可。大约10分钟左右(官方说法为45分钟之内)就会收到带有Paranoid邮箱注册链接的邮件了,建议用Google邮箱,用Outlook和域名邮箱申请的邀请码一直未到。
注册邮箱
收到含有注册链接的邮件后,打开注册链接按提示注册即可,注册成功后会获得5个后缀不同的邮箱地址:paranoid.email、2048.email、4096.email、paranoid.is、mime.email。
- paranoid.email和paranoid.is是主邮箱地址(之所以有两个主邮箱地址,是因为有些网站不能识别“.email”域名的邮箱地址);
- 2048.email和4096.email只接收PGP或GPG加密的邮件,如收到未加密的邮件,会使用主邮箱(paranoid.email和paranoid.is)的公钥加密邮件,然后自动回复发件人一封主题为“GnuGP Encryption issue”的邮件,提示发件人使用PGP或GPG加密邮件。
- mime.email后缀的邮箱地址不需要激活即可使用,在官网的描述中为“Private domain”,经测试在收到未加密邮件时会同时收到两封相同的邮件,不同的是一封为未加密邮件、一封为加密邮件。
激活邮箱
因个人所用操作系统为Linux,以下操作以Linux系统为主,Mac系统或Windows系统可按官网提示操作https://paranoid.email/wizard/start,大同小异。
生成密钥
终端输入
gpg --full-gen-key,密钥类型选默认“RSA and RSA (default)”、长度“4096”、有效期自己决定,以上确认无误后输入“Real name”和“Email address”,Email address为paranoid.email后缀的邮箱地址。添加邮箱地址
终端输入
gpg --edit-key 密钥ID编辑密钥,输入adduid添加“Real name”和“Email address”,Email address为paranoid.is后缀的邮箱地址,然后save保存退出。导出公钥
终端输入
gpg -a --export 用户名@paranoid.email导出公钥,复制备用。激活邮箱
分别点击paranoid.email和paranoid.is后缀的邮箱地址,粘贴公钥,导入后即可激活。
客户端配置
可参考https://paranoid.email/wizard/start
IMAP Server: imap.paranoid.email
IMAP Port: 993
SMTP Server: smtp.paranoid.email
SMTP Port: 25
如果使用TOR网络的话:
IMAP Serverp: aranoidlcx3y23p.onion
IMAP Port: 993
SMTP Serverp: aranoidlcx3y23p.onion
SMTP Port: 25
注意:SMTP端口为25,为安全起见,发送邮件最好用PGP或GPG加密。
邮件测试
邮件发送
没什么好说的,跟其它邮箱一样,因SMTP端口为25,邮件泄密风险大,建议加密邮件。
邮件接收
加密邮件
用自己的私钥解密即可。
非加密邮件
系统会自动用你自己公钥加密邮件,然后推送到你的收件箱,用自己私钥解密即可。
今天在检查邮件时看到EasyCrypt发的一封邮件,EasyCrypt将于6月24日关闭服务。
Dear EasyCrypt user,
We regret to inform you that due to insufficient funding, EasyCrypt end-to-end email encryption service will be shut down by 24.6.2019. We enjoyed the journey and we hope that EasyCrypt had been useful to you. Our team will continue further exploration of easy to use solutions to protect your privacy.
Please read the FAQ at https://easycrypt.co to learn how to export your PGP keys. You can then import them into to any standard PGP client such as Thunderbird, and will thus be able to decrypt and read the emails sent or received encrypted by EasyCrypt.
Please email us at support@easycrypt.co if you have questions.
Sincerely,
EasyCrypt Support
前期文章对EasyCrypt的介绍:
]]>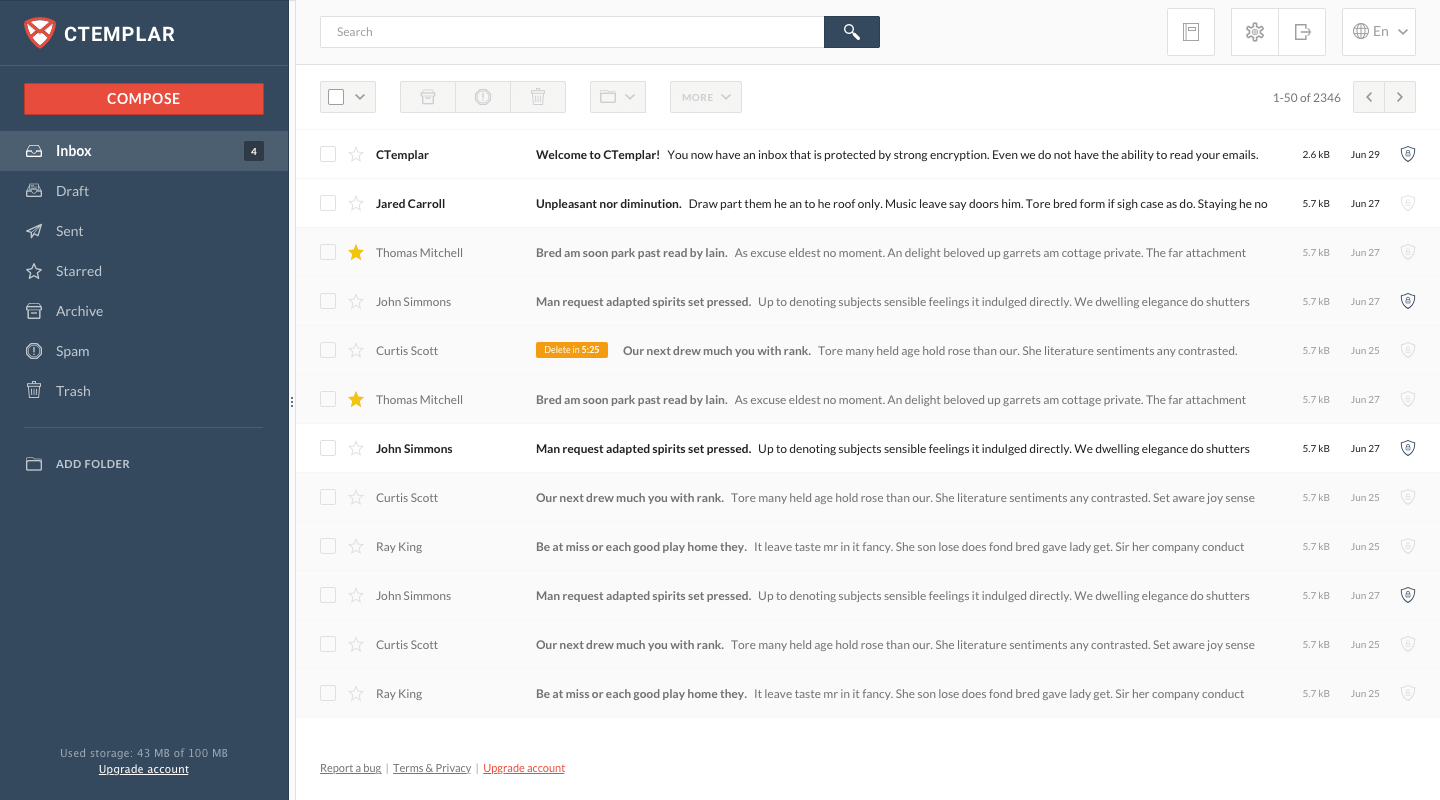
Ctemplar有4道防火墙来保证客户隐私安全:
Company
CTemplar位于冰岛,不属于“14眼联盟国家”(Fourteen Eyes包括澳大利亚、加拿大、新西兰、英国、美国、丹麦、法国、荷兰、挪威、比利时、德国、意大利、西班牙和瑞典,其前身是二战之后诞生的多国监听组织UKUSA),不受相关机构控制且代码开源、不记录IP地址。
Encryption
所有邮件端到端加密,是唯一一个不能解密用户加密内容的邮箱,原文为“We are the only service that is not able to decrypt our users encrypted content”。CTemplar认为所有的邮箱都留有后门以便解密用户数据,有些虽然开源但运行的和开源的并不一致,可见https://blog.ctemplar.com/ctemplar-comparison-table/,比如:
- Hushmail在2007年曾向加拿大法院提交过用户邮件等相关信息,其中涉及中国公司,相关报道见https://www.wired.com/2007/11/encrypted-e-mai/;
- Tutanota位于德国属于14眼联盟国家,
代码闭源(已开源,https://github.com/tutao),通过TOR网络注册帐户后会被自动封禁(经测试,通过TOR注册账户会提示你48小时内不能发送或接收邮件,48小时之后无法使用注册时的密码登录,需要用Recovery code重新设置密码后才能登录),且接受欧盟资金援助(见Tutanota Twitter账户,https://twitter.com/tutanotateam/status/904356393792266240); - Protonmail的代码问题见https://www.reddit.com/r/privacy/comments/a6dfhe/need_advice_on_new_anonsecure_email/ ,https://www.wired.com/2015/10/mr-robot-uses-protonmail-still-isnt-fully-secure/,https://eprint.iacr.org/2018/1121.pdf;其次根据瑞士和美国于1973年签署的“Swiss/US MLAT treaty”(瑞士/美国共同法律协助的协定,原文见https://www.rhf.admin.ch/dam/data/rhf/strafrecht/rechtsgrundlagen/sr-0-351-933-6-e.pdf),美国有权要求Protonmail将用户数据上交,另外Protonmail跟踪用户IP地址信息,即使在设置页面关闭,根据“Swiss/US MLAT treaty”也可跟踪;Protonmail接受过查尔斯河(Charles River Ventures)风投资金,见https://protonmail.com/blog/protonmail-has-raised-2m-usd-to-protect-online-privacy/,其旗下多家公司曾与FBI、CIA、NSA和国际刑警组织合作;Protonmail会要求用户提供手机号码如果通过VPN或TOR注册账户。
Legal
Iceland is only location in the world that designed it’s privacy laws to protect whistleblowers and journalists。
Technology
这个咱也不懂,但可以匿名注册和支付。
CTemplar在官网上列了一份清单,在多个方面与其它加密邮箱做了对比。

CTemplar的免费邮箱容量为1GB,每天有200封邮件的发送限制,注册简单,只需填写用户名、密码、恢复邮箱(选填)、验证码即可。邮箱支持中文,暂不支持两步验证,虽然在注册时会生成4096位的密码,但无法发送PGP加密邮件,只能发送对称密码加密的邮件;无论是PGP/Inline还是PGP/MIME的加密邮件,CTemplar目前都没有办法解密,也无法导出私钥。
]]>邮箱的使用非常简单,打开邮箱网址www.guerrillamail.com就会自动生成一个持续60分钟的免费临时邮箱,邮箱地址可以自己设定,也可以使用系统自动生成的随机地址。
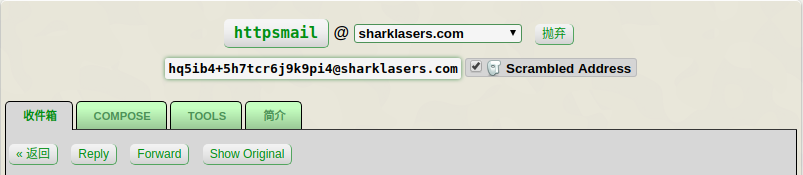
收件箱
收到邮件后可回复、转发以及查看邮件原始源码。
COMPOSE
每次只能添加一个邮箱地址,不支持抄送及密送,可添加附件,最大支持150MB,24小时后自动删除。
TOOLS
用于生成密码,输入“Domain”和“Master Passphrass”自动生成密码。
简介
就是简介。
如果想使用自己的域名可通过https://grr.la/ryo/guerrillamail.com/edit注册账户进行设置。除此之外,Guerrilla Mail也是一个开源项目,源码托管于Github: https://github.com/flashmob/go-guerrilla,可自己搭建服务器。
]]>Mailo就像是一个筐,除了提供免费的电子邮箱和域名邮箱外,还支持Qwant搜索、聊天、相册、网盘、日历、RSS订阅、任务清单、书签、笔记本Note、密码管理,甚至还提供免费的主机空间用于创建PHP网站,还有一些我都不明白怎么用的服务就不一个一个往上写了。
Mailo免费邮箱容量为1GB,最大附件支持为25MB,5个邮箱别名,支持PGP邮件加密和域名邮箱功能。除此之外,可选择后缀也比较多,包括mailo.com, net-c.com, netcourrier.com, netc.eu, netc.fr, net-c.fr, net-c.be, netc.lu, net-c.lu, net-c.nl, netc.it, net-c.it, net-c.es, net-c.cat, netc.pl, net-c.pl, net-c.ca, netcmail.com, francemel.fr, europamel.net, africamail.net, brusseler.com, emailasso.net, inmano.com, lavache.com, monemail.com, perso.be, teaser.fr, mailoo.org…
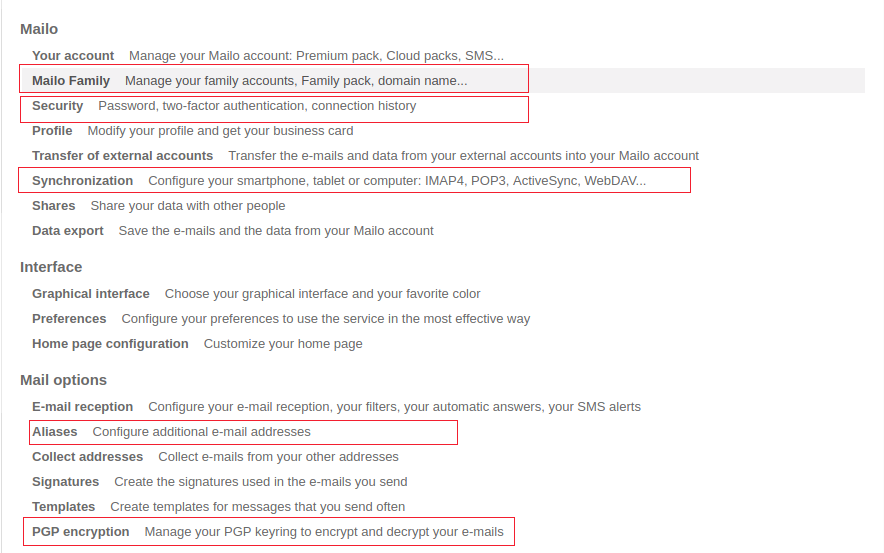
邮箱相关设置
Mailo Family
绑定域名、创建域名邮箱账户以及开通、设置网站空间
Security
两步验证
Synchronization
邮件同步设置,支持POP3、IMAP4、Exchange、甚至还支持通过RSS订阅的方式同步邮件。
Aliases
邮箱账户别名设置
PGP encryption
PGP邮件加密设置
需要提示一下,虽然在Mailo的描述中,Respect是经常提到的一个词,“fully respect your privacy and personal data”,但免费邮箱带广告。
]]>Pony.gg是一款非常小众但很有特色的免费邮箱,就像其Slogan: “Like mail, but email”一样,每天只会在固定的时间收发一次,可以设置在早上、中午或下午三个固定的时间点,除此之外,其它时间不会处理邮箱收发。
邮箱注册
打开注册网址:pony.gg/join,简单填写用户名、密码即可获得“@pony.gg”的免费邮箱,用户名最短支持1位数或字母。
邮箱界面
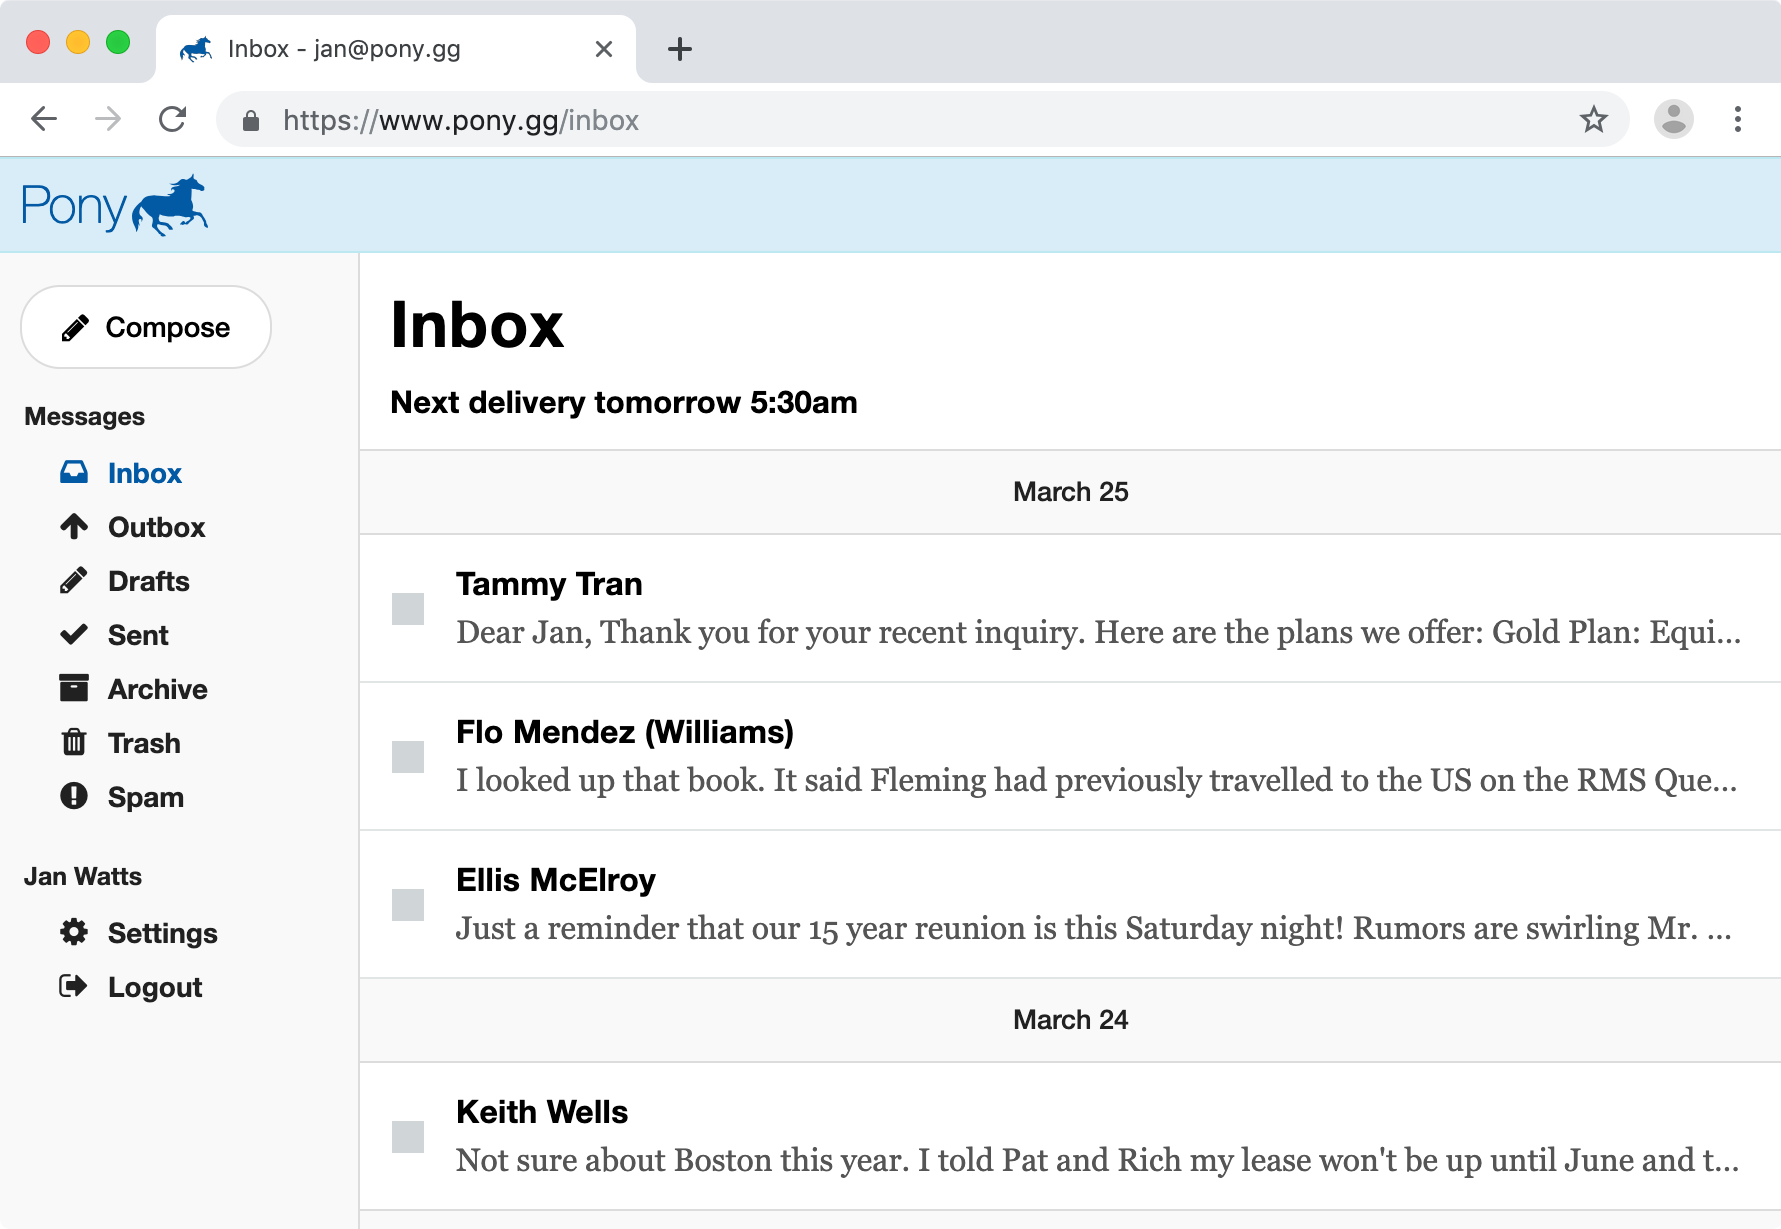
在右侧邮件的上方、”Inbox“下就可以看到设置的固定邮件收发点,每天上午5:30就会把你已写好的邮件发出去,然后把你收到的邮件放到Inbox文件夹里。左侧的”Outbox“文件夹就是存放已写好、需要发送的邮件,发送完之后就会自动移动到”Sent“文件夹。
邮箱的功能相对比较简单,发送邮件时不需要填写邮件主题,也不能抄送给其它人,一次只能发送给一个人,但可以支持发送20MB以内的附件
邮箱设置
除了邮箱的收发时间点及时区,其它也没有什么好设置的,时间点只能三选一,分早、中 、上三个时间点,”Location“如果选”China“就会在北京时间的5:30、12:00或18:30收发邮件,选其它地区就会以对应地区的时区为标准。
]]>科科尼诺县社区学院(弗拉格斯塔夫)创始于1991年,坐落在风景如画的亚利桑那州北部,它是一所友好的学校,每年有超过10000名学生在科科尼诺县社区学院学习。
CCC向所有学生开放,学校有来自世界各个国家的学生前来学习深造。在科科尼诺县社区学院,其所做的一切,就是要帮助学生改变生活。科科尼诺县社区学院提供职业培训让学生在职场里如鱼得水,同时更帮助学生掌握更多技能从而让学生找到更加称心的工作。其提供的课程可以为学生通向其它高等学府而铺路。科科尼诺县社区学院开设的的短期成人教育课程能够帮学生发掘其的兴趣所在,从而为学生的终身学习打下基础。
邮箱后缀为”@students.coconino.edu”,托管于谷歌邮箱
申请地址: https://selfservice.coconino.edu/prod/bwskalog.P_DispLoginNon
需要工具
美国居民身份信息
SSN验证
美国居民居住地址
申请完毕后等待学校审核邮件,内有个人学号,学校平台登入ID和学校邮箱地址。
]]>在设置上比较简单,在”Services”中找到“WorkMail”,打开后按要求添加即可,方式有“Quick setup”和“Standard setup”两种,我们选择最简单的“Quick setup”。在“Organization name”填入英文或汉语拼音的组织名称(建议填写域名),然后点击“Create”。等不到一分钟,当“Status”处变为“Active”后就可以继续配置了。
先选中“Domain”添加自己的域名,然后在域名注册商处配置域名解析:”Domain ownership”用处验证域名是否为你所有;“Mail setup (required)”添加MX记录;“Mail setup (recommended)”添加SPF、DKIM和DMARC,避免邮箱进入垃圾箱。当“Status”状态变为“Verified”即代表各项记录通过验证。
最后选中“Users”添加用户,输入“User name“和”Display name“点击下一步,”Email adress“后缀有两个,一个是”你组织名+ awsapps.com“的两级域名后缀,一个是你自己添加的域名后缀,然后输入两次密码,点击”Add user“就创建成功了。其它设置选项可以自己慢慢摸索。
邮箱的登陆地址在”Organization settings“下的”Web Application“里,格式为:”https://组织名.awsapps.com/mail“,打开网址输入用户名和密码登陆即可。邮箱界面也挺简洁、好看,邮件收发正常。唯一不满的是没有归档功能,需要自己建归档文件夹然后移动。

域名设置
进入域名解析系统
- 解析MX
| 主机记录 | TTL | 记录类型 | 优先级 | 记录值 |
|---|---|---|---|---|
| @ 或 留空 | 3600 | MX | 10 | mx1.forwardemail.net |
| @ 或 留空 | 3600 | MX | 20 | mx2.forwardemail.net |
- 添加TXT记录,设置接收邮箱账户(把me@httpmail.com换成你自己的邮箱)
| 主机记录 | TTL | 记录类型 | 记录值 |
|---|---|---|---|
| @ 或 留空 | 3600 | TXT | forward-email=me@httpsmail.com |
- 添加SPF记录
| 主机记录 | TTL | 主机类型 | 记录值 |
|---|---|---|---|
| @ 或 留空 | 3600 | SPF 或 TXT | v=spf1 a mx include:spf.forwardemail.net -all |
邮件测试
默认是支持Catch-All的,即发送到“任意前缀@你的域名”都会被转发到你所设置的收件邮箱地址。
发送邮件
ForwardEmail只负责邮件的转发,是无法发送邮件的,但可以与Gmail搭配实现发送邮箱的功能。
- 登陆Gmail,选择“设置”,在“账号和导入”选项“用这个地址发送邮件”右侧点击“添加其他电子邮件地址”,在打开的页面中填入域名邮箱的地址,点击下一步打开SMTP服务器设置页面。
- 将SMTP服务器改为“smtp.gmail.com”,端口587不变,用户名为Gmail邮箱的前缀(不包括@gmail.com),选择“使用TLS的安全连接”,密码填入第3步生成的应用密码。
- 打开myaccount.google.com,选择”安全性”选项,在”登录 Google“一栏中选择”应用密码“,然后选择”邮件“应用,生成应用专用密码后复制到密码一栏,点击”添加账户“,Gmail会发送一封带有确认码的邮件到你的域名邮箱,输入后验证即可。
- 用Gmail发送测试邮件。
自建服务
ForwardEmail为个人创建,如担心服务安全和稳定性,可参考https://forwardemail.net/#/?id=self-hosted-requirements在自己的服务器上自行搭建。
其它问题
其它设置及问题,可访问ForwardEmail官方网站:https://forwardemail.net/
]]>之所以推荐Elude.in就只有一个原因:好看。Elude.in有两个WebMail界面,一个基于SquirrelMail,一个基于Rain Loop。Rain Loop跟其它使用该界面的免费邮箱如Disroot.org相比无太大的差别,SquirrelMail邮箱界面则有天壤之别。
这是Elude.in的SquirrelMail邮箱界面
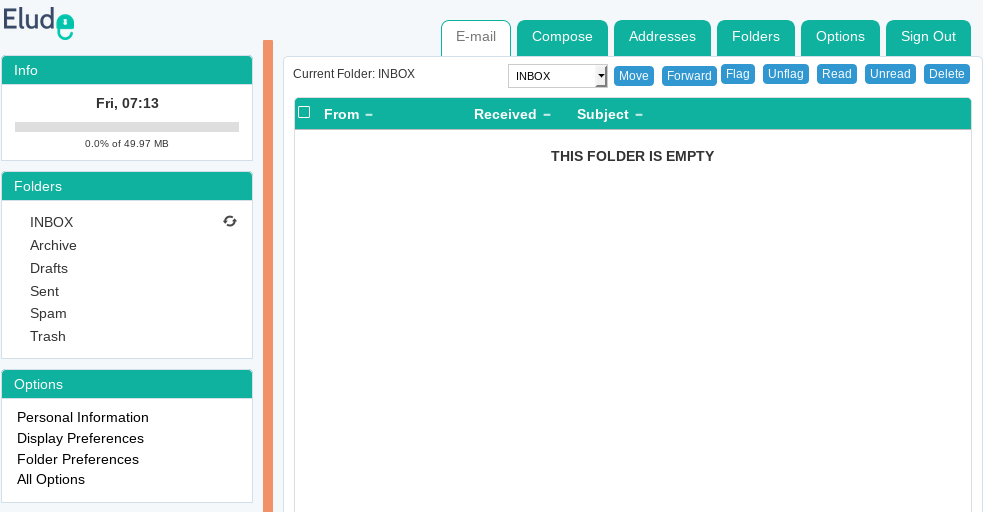
这是Riseup.net的SquirrelMail邮箱界面
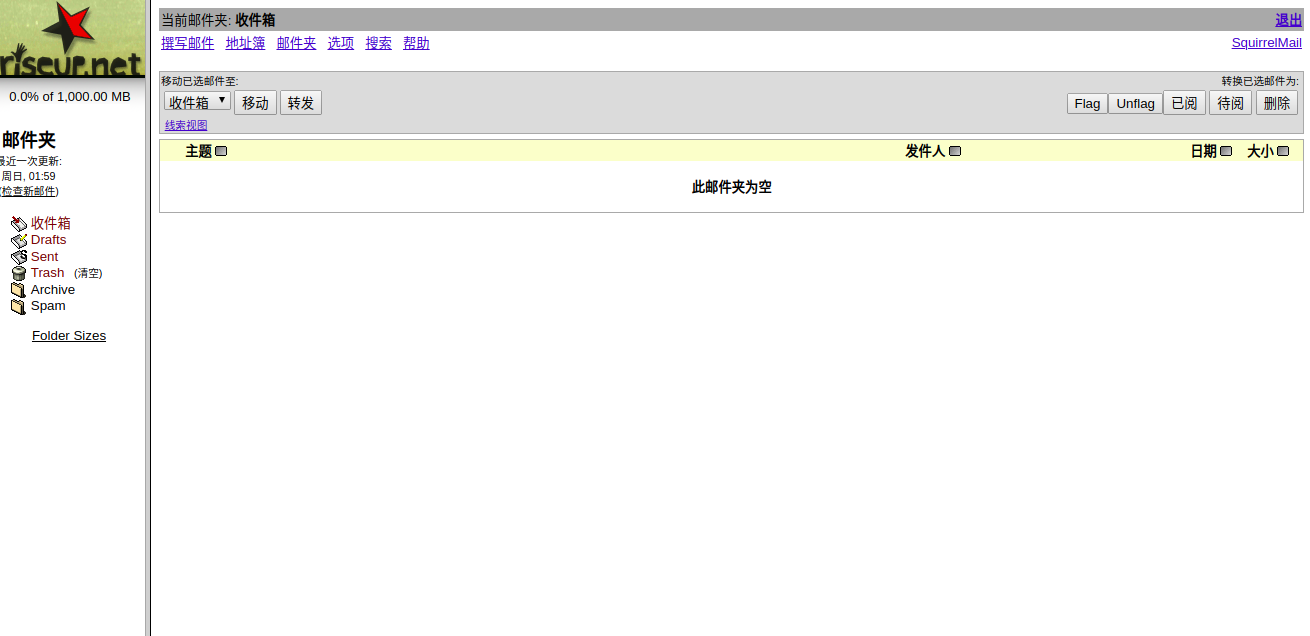
除了好看之外,Elude.in跟其它暗网邮箱一样,全盘加密、邮箱存储加密、通过TOR网络传输,当然邮箱空间也不大,只有50MB,附件最大支持25MB。如果觉得邮箱空间太小,可以通过捐赠比特币或门罗币的方式扩大邮箱容量到1GB,为了方便捐赠,Elude.in也“非常贴心地”提供比特币和门罗币钱包服务,邮箱账户就是你的钱包账户,还支持两步验证。
注册非常简单,不需要太多个人信息,打开注册地址http://eludemaillhqfkh5.onion/signup,只需要填写姓名(自己编一个就行)、用户名(至少6位数)、密码和验证码即可注册成功,获得一个“@elude.in”和一个“eludemaillhqfkh5.onion”的邮箱地址。
]]>德克萨斯中部学院(CTC)是德克萨斯州基林的一所社区学院, 它成立于1965年,在欧洲设有分校。德克萨斯中部学院于1965年由德克萨斯州中部的公民建立,服务于德克萨斯州贝尔县的西部。校园建在纽芬堡和Killeen和Copperas Cove之间捐赠的500多英亩土地上。1967年9月,学校向2,068名学生敞开大门。自1969年以来,CTC已获得南方学院和学校协会的认可。在CTC注册的学生可以从文学副学士学位课程中选择学位课程,理学学士学位课程,应用科学学士学位课程,或常识科学副学士。有40多个证书课程。
邮箱为谷歌邮箱,邮箱地址格式为“xx@stu.ctcd.edu”。
申请地址
美国人身份信息可参考上一篇文章
提交成功后等激活邮件即可,初始密码规则为firstname第一个字母小写+lastname第一个字母小写+mmddyy
克拉福顿山学院位于美国加利福尼亚州,是一所提供专科类教育及成人教育,职业培训的综合类学院。克拉福顿山学院的专科毕业生们可以选择理科就业,或者进入4年制的本科类大学继续攻读。克拉福顿山学院开设有32个专科专业和25个职业培训专业。
申请步骤
获得美国身份
验证SSN
注册CCC
https://www.opencccapply.net/uPortal/f/u63l1s1000/normal/render.uP
申请学校
https://www.craftonhills.edu/admissions-and-records/apply/apply-for-admission.php
注意事项
邮箱格式为“xxx@student.sbccd.edu“
初始登陆密码为”Temp+6位数生日密码(年月日各两位)“
申请时如果地址有问题可重新选择
安装
- Chrome: Chrome web store
- Firefox: addons.mozilla.org
配置
Key Management密钥管理
- Generate key生成密钥:打开页面按要求填写,填写完后点击“Generate”即可生成密钥。
- Import Key导入密钥:
- 通过密钥服务器 keyserver.ubuntu.com搜索姓名、邮箱或密钥ID导入公钥
- 导入密钥文件
- 粘贴密钥ASCII
- 密钥列表以两个小钥匙图标开头的是密钥对(key pair),包括私钥和密钥,可以用于解密自己收到的邮件;只有一个小钥匙的是公钥(收件方)用于发送加密邮件。
Encryption加密解密
PGP加密方式有两种
PGP/Inline: 只加密邮件正文(纯文本),然后以纯文本的形式发送。
1
2
3
4
5
6
7
8
9
10
11
12
13
14
15
16
17
18
19
20
21
22
23> > -----BEGIN PGP MESSAGE-----
> >
> > wcFMA5UK+sUWEayMAQ//dapllMiq1mSZr6XlKuPkAVhtyaeD3oHs7e+dCiXh
> > oPwb1Jq7NhE8KFCsMyWqzocFUQe6aDZ0rCwAsfGi3GMqpYEL6P5aWJhkS1zu
> > Ryv6ntFqsnU8Qb8/UhtpQPxGHOjYGJ39fJFJsZTjrWbLefWEgn4qvim8HaOe
> > iLCPYNFF1rQh/RWJnpwrztabTxccq3+MsdCb8Xrtd6/wHIk2+7DzAHWgrcea
> > RnNXt6Gs/EjzI28YmdNfqgTdO/hpA085vUMKNFs4Pa3qzoAT+K8K9A8sqM7c
> > Et0uN/1Ute474ueycE7L8Bh4mO2ajF3Nk6V4vbM9mnDwE/Nc/1n63u8QVVWZ
> > V6Lpw7QQDtk6ADp1sTqTGfrvn/rsTBjGvMFaMFhAuG8tebe4VW9UUWA2xRMq
> > 7bBXeTspyJcjq312v6j8DKnshQAFOBIbQBSzO8h24zOaEdD4eHZtaS7K7nMR
> > RGMdXgd5VI9cQIM+3hKCjL8roVkhwwsOzKyWjDH2H6AENsor0350+7916g+7
> > X/bkiTEz5IqJ+f9kVz48ey0BbpdsIvjDA47CcoosW4q7xvZ927cwqOAByQ7B
> > z2EYpShHHTA0KqAt7hecyTbVTGVx4XfhY0obCZBPMOizTD3OPg82OSTPNG/T
> > XE31aWQl5gR//zNUtL5nZsA6lWc8mujH5gYedIhH/G3SwCoB4y0bMrLVppSa
> > k6UDFWggU65NpJT3eBYQrh14amjKzofwfqJ2IP57/Znihn9gNiPA7VHXwcUr
> > V71IAIRFYg4pS0AQ1sjl2zvUtpJ+x19DVtIBF5au8tHrMtHnF+8G5g8IjNCw
> > 8vi/jpRR5g2eqHsw+uybW0RB3rcEmZT1KWr/6/OlW8W9T8x4Ed5n/iNpuGxo
> > Db7NAiirOAwC1TBO0Oemfh93LNZY0oPBlUU4c+0JfpSYW0+EGYuEU8uVKKkO
> > eDvOPQd6SbTW8KQUr+LyE5/DCqm87+pkvTs4cOc7ZO6nxiK1iaApam29a5Y=
> > =zbky
> > -----END PGP MESSAGE-----
> >
>PGP/MIME: 加密邮件正文和附件,然后以”.asc”附件形式整体发送。
文件加密解密:上传文件,点下一步,选择“公钥”加密,“私钥”(一般指密钥对)用来解密。
文本加密解密: 直接在文本档内输入即可,可以添加附件。
Options其它选项
- Authorized Domains 支持Mailvelope的邮箱列表,可以自行添加但不一定完美支持。以mail.com为例,网站填写”mail.com”,”Domain pattern”填写“*.mail.com”就添加写成了。
- Key Server 存储公钥的服务器,建议用Ubuntu的服务器。
使用
以Mail.com为例,登陆邮箱打开新建邮件页面。
在邮件正文文本框右侧有一个
 ,点击图标,输入收件人和邮件正文后点击加密,就会在邮件正文生成PGP信息。
—–BEGIN PGP MESSAGE—–
Version: Mailvelope v3.1.0
Comment: https://www.mailvelope.com
wcBMAyrFRE9mxE8TAQf7BG4fpw5ea4XZ/P5c+/r66wDgMJcLlGBBUiMf3SDu
TChDmkhSa7DhtnYT5ozDChY6LmT9C72Sn5ogGAqPBWqLsHfje0IgRmMRalHa
nYppkEi3p6HfyUjuS+89iwvVTiROf+HIyocPPc77MuHf/sXxrYb7xvreh7Wk
fTbuaoiOpw0Qu6qhIz4KEFoordnDRNXq+x0Wq2Zw3w3KY1LqapS/bzK/RILa
QEr6kRAEGgI5GEJDovKuk1w0f9W/tQqbZtiHhPFSPiyFNU8e/RatWX806M2F
8tDX8D3C0G+9dVxKx4j8R8f+WYQjPHDRq3bDzNEZLQZTESxdjwnz/Zavv3i5
kcHBTAOVCvrFFhGsjAEP/03u1i5AqvN0PlANHAWr7Czsw/Gi0h0T8Kuq5tRP
kDiLrP1Ij21Wv9hrHyL1gvOcsHozrSogTCjfsxAfXPsI9kYK0F6BCbY7yuOc
eyJMRvklfXivv4gOJUe34lCGq/j2HTyjx4HDokA6o1MxaW0D0NYxHqwyLF4W
E0eeUes9dEXrwI5REHzP5zuV3IZtCTXGD2+WZ13KNQCIftawKaiMmUsvq291
GRyzj/ErKjUSsPhWnGx2kAuWeakxPdApkvkYRQFPLFeLiiw+WiJ6MPx26lsp
4LMHXeDGfpanxkqa5zrA8CMElfxhVLHWWa8BL8zn7Ue1Kv+0Ji6naM0pujM8
JNe2r1619a+H08HIWM2yC6KHzqsNpPpyhpw2omenI2c/G+XrEGLGx/Efezjo
xc7fBgcpv4qBpMJ3c9KccAo0e2V9dDbToBlFMG0SyDIdBvZZrhg4EKQxNHYT
dPwMORXz8Rmq+VVs9IhSKpjlYHKbeAOfoJwaN5W7so/noEy0hc7e7NaoHGLz
/0MTzKxhO4iK2RJOwm/43/wQofK/HcUW3I6XAnHytktwYWonu/hV+yCLzeYa
esfsrLcYLAEoQCvXxPUh/Yk1TEGkB2qeceLBhKs9oIUmPFBxMwfYQqyUPOuS
PM3u3kM0cul+NaxKnnXDj2EHndstDrhemabWDuZ8jlQP0kEB9X7mo9WBbKVC
80FMG8WAwV38UScceFSXZykViFxnDeJaCBLdjVvcXXQ9F30iqmSMhFAXoNYA
LsjigYwaUHcfHg==
=NE2I
—–END PGP MESSAGE—–填写收件人和邮件主题后点击发送。
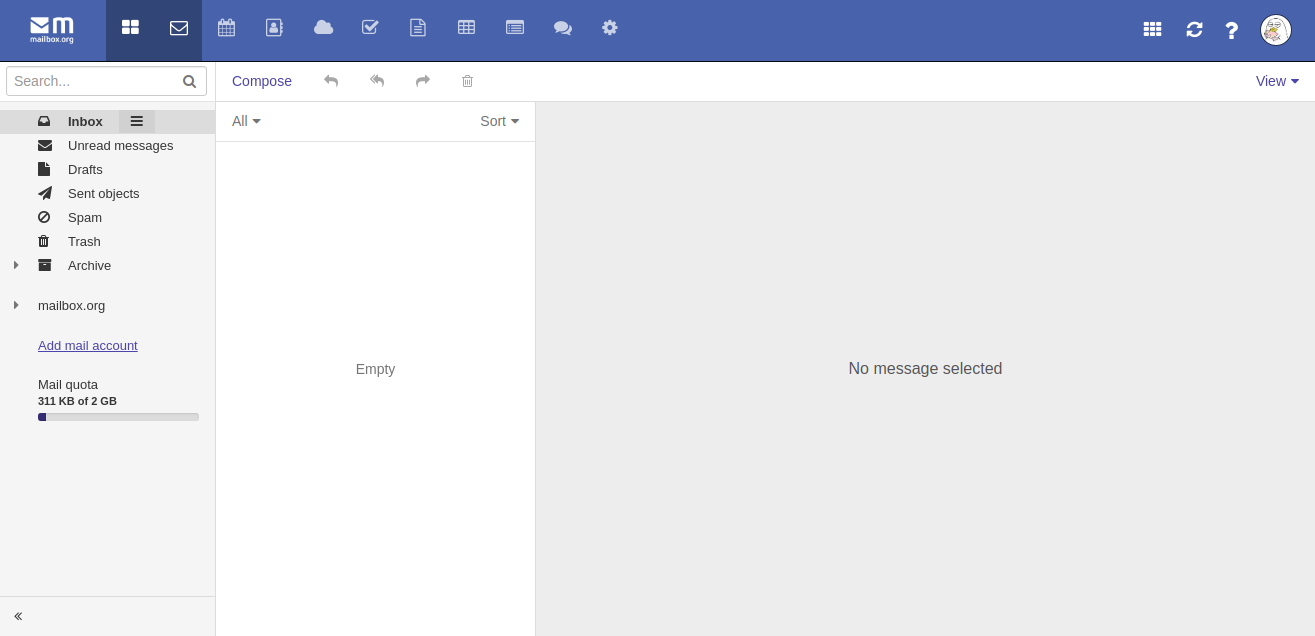
Mailbox支持的支付方式较多,包括Paypal、Bitcorn、银行转账等(支付时会收取转账费用,以充值12欧元为例,转账费用根据支付方式的不同大约在0.13-0.58之间),其收费方案主要有三种:
| Secure Mail | Team Mail | Business Mail | |
|---|---|---|---|
| 邮箱容量 | 2GB | 5GB | 自己选择 |
| 网盘容量 | 100MB | 100MB | 自己选择 |
| 邮箱别名 | 3个 | 25个 | 25-10002个 |
| 价格(欧元) | 1/月 | 2.5/人/月 | 25-250 |
我个人使用的是1欧元/月的Secure Mail,在官网注册成功会有一个月的免费试用,如果是用户推荐会有3个月的免费试用(如想体验3个月的免费服务可以发送邮件到me@httpsmail.com)。注册过程非常简单,但邮箱设置比较复杂,我只把几个主要的功能设置写一下:
使用自己的域名:在菜单栏点击“小齿轮”即可打开设置页面,选中“E-mail Aliases”,在打开的页面“Add external address”处添加“用户名@域名”格式的邮箱地址(如me@httpsmail.com),点击“Add”会显示你的Securitycode,然后在域名注册商处添加TXT解析,等待Mailbox验证。验证通过后就可以打开“Please refer to the detailed notes on using your own domains in our Help section”添加MX、SPF、DKIM、DMARC了。
使用CatchAll功能:跟上一个步骤一样,在“Add external address”处添加“@域名”格式的邮箱后缀即可,如“@httpsmail.com”。
设置临时邮箱地址:Mailbox可以一次创建11个临时邮箱,30天后到期,用完即抛。选中“Disposable addresses”后点击“New disposable addresses”即可创建后缀格式为“@temp.mailbox.org”的临时邮箱。
Have I been pwned:是跟https://haveibeenpwned.com/合作的、用于查看使用mailbox邮箱注册的其它网站是否泄露密码的功能。
开启两步验证:在左侧设置列中选择“One Time Passwords”,在“PIN”和“Repeat”输入4位数密码,在“OTP security level”选择第二或第三项,在“OTP Method”选择第一个,然后在下方列出的选项中选择合适的系统和软件“在Provision your OATH soft token第二项中我选择的time based”,点击“enroll your token”,最后选择“Enable Token”。跟其它网站的两步验证不同,Mailbox开启两步验证后,邮箱的登陆密码变为“PIN+Token”的方式,原有的邮箱密码不能再登陆邮箱。
邮件加密:打开“PGP in Webmailer”会看到两种加密方式,一种是“Simple and Easy with the Guard”,另一种是借助Mailvelope浏览器插件,选择第一种即可。点击菜单栏最右侧个人图像,选择“Setting”,展开左侧“Security”菜单,打开“mailbox.org Guard”设置页可能起先相关设置,拉到最下方选中“Show advanced settings”就可以管理你的密钥了。
最后,经过半年的使用,设置复杂、登陆邮箱较慢(可能是个人网速原因,但也有其他人反映过)是两个主要的减分项,除此之外堪称完美。
]]>
从邮箱的界面来看,功能上还算比较齐全,还支持PGP(虽然在BETA阶段,通过测试来看对PGP的支持非常完美)。最上侧的菜单栏从左往右依次为:
- Member Home:可以从下拉的二级菜单“Account Info”中查看邮箱账户的基本信息、修改密码、升级或删除账户。
- Purchase:购买其它服务。
- Write Email:该菜单包括3个功能,发送“Anonymous Email”、“Messaging & File Sharing(自毁邮件)”和“PGP Secure Email(PGP加密邮件)”。
- Folders:文件夹,可以查看收件箱、发件箱、垃圾箱等。
- Address Book:添加、删除联系人邮箱地址的通讯录。
- Other Services:其它的收费服务。
- Setting:包括设置转发地址、邮箱别名、签名、自动回复等。
- Security Center:跟前面的“Account Info”差不多,可以删除账户、修改密码。
注册过程比较简单,有两个邮箱后缀可以选择:一个较长一些@anonymousspeech.com,一个稍短一些@vistomail.com。打开官网https://www.anonymousspeech.com/registration.aspx#registration注册即可,跟Mailfence和msgsafe这两个加密邮箱一样,邮箱登陆名和邮箱地址不一样,增加了安全性。
注册完之后在菜单栏“Member Home”-“Account Information”-“Membership Information”可以看到在“Membership Expire Date”一列,邮箱账户为“Trial Account(试用账户)”而非免费邮箱或永久。在 Anonymous Email FAQ可以看到Anonymous Email对此的解释:
We allow you to test our service and send test emails for free. (Limitations apply)
However non-paid accounts are not protected with our anonymity guarantee.
即,非付费用户不享受匿名保护,在“Membership Information”也可以看到“Anonymity Guarantee: OFF”。除此之外,免费用户在发送“Anonymous Email”时会带一条大长尾巴,发送其它邮件不受影响。
]]>This email was sent via http://www.AnonymousSpeech.com
the worlds leading anonymous email provider.
Paid memberships do not show this message.
Abusive language and identity theft strictly forbidden!
Abuse: http://www.anonymousspeech.com/bannedemail.aspx
账户注册
- 网页的最下方有个语言选项,支持中文(繁体),我也是最后才看到的,下面的步骤我就不改了,哈哈;
- 打开官网https://www.hostiero.com/email/,选中“Free”那一款,点击“Start Free”;
- 在“Choose a Domain…”一项中选中“I will use my existing domain and update my nameservers”,然后输入你自己的域名,点击右侧的“Use”;
- 在“Configure”设置页面“Choose Billing Cycle”处有两个选项:“Monthly”和“Annually”,一个是按月,一个是按年,因为选择的免费款所以价格都是0.00,建议选按年计费的;
- 其它的选项除了“Free - 1GB Mailboxes”可以调到3外,其它的选项不需要调整,要注意右侧的“Order Summary”确认一下价格是不是0.00;
- 将页面拉到最下方,在“Additional Required Information”处选中“Domain Verification”进行域名验证;
- 将域名的MX记录按要求解析到“mx.hostiero.email”后,点击右侧的“Continue”;
- 按要求注册一个新的账户,如果有账户的直接选择“Existing Customer Login”输入邮箱和密码登陆即可,确认后会发送验证邮件到你的注册邮箱,登陆邮箱完成验证就可以顺利登录客户中心了。
邮箱设置
- 点击顶部“Services”菜单,打开“My Service”,在“My Products & Services”就能看到免费邮箱的订单了,刚开始“Status”那会显示“Pending”状态,等大约5分钟或收到官网邮件后状态就会变为“Active”,选中后进行邮箱的管理页面;
- Email Account:点击“Add Mailbox”按要求添加账户,状态为“Active”就可以登陆使用了;
- Email Aliases:给已有的邮箱地址添加别名;
- Distribution Lists:就是Mailing List邮件列表服务;
- Domain Aliases:域名添加别名;
- Go To Webmail:登陆网址https://hostiero.email
- 页面最下方“Additional Information”为DKIM签名,要域名解析中添加TXT记录,主机记录添加dkimselector值,记录值填dkimkey的值。
- 根据mail-tester检测结果,在域名解析中添加TXT记录,记录值为“v=spf1 a mx include:relay.mailchannels.net ~all”。
邮件测试
- outlook:进了垃圾箱
- mail-tester:9分 无SPF扣1分

邮箱简介
好像自从Protonmail火了之后,支持端到端加密的邮箱越来越多,但大多有一个共同点:后缀都不怎么样。msgsafe.io于2016年建立,当年为了推广还在Twitter上搞了几个送礼物的活动,包括大疆无人机和Amazon礼品卡,2018年的时候有几次连网站都打不开,以为已经死了呢,前几日在整理邮箱的时候发现又能登陆了,稳定性也比以前强了不少,但从Twitter、Reddit还有官网Blog来看,虽然“活着”,好像死了,至少是处于一个半死不活的状态,当然日常使用还是没问题的。
msgsafe的免费版包括1G的邮箱容量、10个邮箱地址(可选择的后缀较多,目前有45个)、每日发送邮件数量为25、转发到自己邮箱的数量为100。收费版在功能上要多一些,在Reddit上有人反映用了收费版后无法取消订阅,所以安全起见不要选择收费版。
邮箱注册
跟Mailfence一样,用户名非邮箱地址只用于登陆,注册步骤非常简单,打开注册地址:https://www.msgsafe.io/register#top,只需要填写用户名,密码和验证码,填写完之后会让你选择一个套餐,选“TRY FOR FREE”即可,然后就是创建邮箱地址,可以点击”Click for random”随机生成,也可以自己选择。”Country of origin”选的是哪个国家,邮件源码中的IP地址就是哪个国家的。
邮箱设置
- Dashboard 主要显示你邮箱的账户状态和邮件使用状况。
- Preferences 一些最基本的设置,如姓名、语言、时区、国家等。
- Contacts 联系人相关设置,支持导入GPG公钥。
- Identities 添加邮箱地址
- Linked email addresses 可以添加已有的邮箱地址,收到邮件后会自动转发到该地址。
- Internet domains 添加域名
邮件测试
无论是发送、接收还是转发,对GPG的支持非常完美。
注意事项
- 免费版只有10个邮箱地址,创建后删除也占用一个。
- 免费发送邮件时会自带小尾巴。
- 邮箱私钥无法导出。
- 玩玩即可,不建议当做主力邮箱使用,更不要订阅其它套餐。
Mailfence.com,1999年成立于比利时,2013年开始提供注重安全与隐私的免费邮箱服务(与Protonmail同年,比Tutanota晚2年)。
注意事项
- 注册时所填Username并不是你的邮箱地址前缀,仅用于登陆邮箱,邮箱地址会根据你注册时所填的First name和Last name给你必个选项让你自己选择,如果不满意可在生成邮箱地址前修改你的First name和Last name。
- 免费邮箱如果12个月内不登陆使用就会冻结,4个月后删除账户。
邮箱注册
注册步骤很简单,用代理(仅用加拿大IP测试)打开Mailfence.com官网,在首页有一个“Sign me up”按钮,非常醒目。只需要简单填写First name、Last name、Email、Username(7位数以上)、Passport(10位数以上)和验证码就注册成功了。
基本功能
- 邮箱界面是非常干净的三栏界面,但跟Protonmail和Tutanota相比还是有点丑。
- 邮箱和网盘容易都是500M,除此之外还有日历功能。
- 网盘支持WebDAV,日历支持CalDAV,通讯录支持CardDAV。
邮件加密
- 依次点击”Setting”-“Messages”-“Encryption”,打开GPG设置选项。
- Settings:勾选第一个选项会用你的私钥签署你所发出的所有邮件;勾选第二个选项设置你私钥密码记忆时长。
- My personal keys:你的私钥,点击上方”Add personal key”生成或导入私钥,生成密钥时可以不设置”passprase”
- “Other public keys”:联系人的公钥,可以导入也可以在keyserver上查询,只有对方有公钥地址才能发送PGP或GPG加密邮件。
- 加密方式:第一种是用对称加密的方式发送一个地址链接,打开链接后输入密码查看即可;第二种使用Opengpg非对称加密方式。
- 发送GPG加密邮件:在”Encryption”选择”Use Opengpg”,输入对方邮箱地址即可,如果在”Other public keys”没有对方的公钥,会自动在keyserver上搜索对方的公钥地址。
邮件解密
收到加密邮件后点”Decrypt it”就可以了。
Mailfence优势
- 因登陆用户名与邮箱账号不同,与其它类似的免费邮箱(protonmail、tutanota、disroot)相比,安全性更强。即使通过社工脱库等方式知道了你的邮箱地址和密码(如果密码与其它密码相同的话)也很难猜出你的登陆用户名,邮箱安全也能得到保障。
- 在Opengpg测试过程中,Protonmail和Mailfence无论在发送加密邮件还是解密收到的邮件都未出现任何问题,Disroot发送的加密邮件无法在邮箱中直接打开。
声明:
A/I是一家意大利非营利性组织,其日常运营资金来自于用户的定期捐赠,目前主要为活动家提供免遭政府监视的安全服务,私人用途建议申请Mailfence、Protonmail和Tutanota等免费邮箱。
A/I is free for use, but is not for free.
更新于2019年5月29日。
Autistici/Inventati,简写为“A/I”,官方读音为[au’tistiʧi]-[iŋ’vɛntati], 或 [iŋvɛn’tati],2001年建立,好像和Riseup.net一样是唯二需要填写申请书、经人工审核后才创建账户的,不同的是Riseup还可以通过邀请码的方式申请邮箱账户。根据我个人的申请经验,相较于Riseup,Autistici的申请更麻烦一些,耗时也更长。
| Autistici/Inventati | Riseup | |
|---|---|---|
| 申请方式 | 填写申请书,人工审核 | 填写申请书或邀请码申请 |
| 两步验证 | 支持 | 不支持 |
| 翻墙访问 | 不需要 | 需要 |
| 邮箱容量 | 无限 | 不确定(以前需自己设置) |
| 别名数量 | 5个 | 无限 |
| 邮箱界面 | RoundCube | RoundCube或Squirrelmail |
| 中文支持 | 不支持 | 支持 |
申请流程
- 打开官网地址:https://www.autistici.org/,在页面下方点击“Get an account”。
- 把文章读一下,尤其是黑体加粗的在填写申请书时需要注意一下,最后点击下方的“Request a service”进入申请填写页面。
- 按规定填写完后会给你一个网址,保存一下或者填写自己的邮箱以邮件的方式发过来,然后等就可以了,考虑到时差问题,一般都是在晚上8点左右回复。
邮箱使用
这个没什么好说的,设置界面较简单,需要设置的选项也比较少,登陆之后更改密码、设置密码回复问题、打开两步验证就可以正常使用了,可以创建5个邮箱别名。
]]>
Criptext.com目前正处于Beta阶段,跟myMail一样无Web版,所以需要先下载客户端然后才能注册,其客户端跨平台支持Linux、Windowns、Mac、IOS和Android。与其它主打安全的邮箱相比,“端到端加密”和“开源”并不稀奇,“使用Signal通讯加密协议”和“不在服务器存储邮件(所有的邮件只存储在自己的设备中,但支持各设备之间邮件同步,不知道是如何实现的)”是其两大有别于其它安全邮箱的主要特色。
Criptext在官网上也列出了自己的特色,分别与Protonmail和Gmail进行了对比:
| Criptext | Protonmail | Gmail | |
|---|---|---|---|
| End to end encryption 端到端加密 | YES | YES | NO |
| Doesn’t manage your keys 不存储密钥 | YES | NO | NO |
| Doesn’t collect email data 不收集邮件数据 | YES | NO | NO |
| Forward Secrecy 邮件转发保密 | YES | NO | NO |
| Signal Protocol 支持Signal协议 | YES | NO | NO |
除此之外,还支持邮件撤回(需在1小时之间,普通邮件不支持)和邮件轨迹跟踪,但每一封邮件都带一个“Sent with Criptext secure email”的小尾巴。
具体使用方法如下:
- 下载邮箱客户端(可点此下载),注册后缀为@criptext.com的邮箱账户。
- 收、发邮件与平常一样,但发送给非criptext邮箱时可选择发送普通邮件或加密邮件,加密邮件就是发过去一个链接输入密码后才能看到。
如上图所示,界面非常简洁,功能简单甚至有些简陋,除邮件收发功能正常外,无其它多余功能,甚至连通讯录都没有,简单到“极致”。
邮箱特点
1、Unlimited users 可添加无限个邮箱用户且允许联系其它Pingly邮箱账户
2、Email on your domain 可以使用自己的域名,目前为止暂不支持修改域名
3、Team chat 支持团队成员内部聊天,估计一般也用不到
4、Search recent 5k messages 强大的邮件搜索功能,可搜索最近的5000封邮件
5、5GB total storage 邮箱容量达5G,不确定是每个5G还是总共5G,个人用户足够用了
6、Email sending limits 暂未确定每日发送邮件的限制数量,个人使用问题应该不大
注册账户
1、点击https://pingly.com/signup,打开注册地址;
2、在“Organization name” 中填写企业或组织名称并点击”Next”;
3、输入域名,如httpsmail.com,不要带www;
4、输入其它相关联系信息并一路Next后就注册成功了。
验证域名
1、在域名解析中按页面添加TXT记录;
2、点击“Verify”,验证域名(如初次验证不通过可等几分钟之后再试)。
设置DNS
1、按页面要求分别设置DKIM、CNAME和MX记录;
2、域名解析设置完毕后依次点击验证,验证完毕后就可以正常使用了。
邮件测试
1、在浏览器中打开https://www.mail-tester.com/?lang=zh,复制格式为“***@mail-tester.com“的邮箱地址。
2、用Pingly邮箱发送一封邮件到上一步复制的邮箱地址。
3、回到测试网站,点击查看邮件得分情况。
4、测试得分:10分(满分)。
]]>上传公钥
收件人上传
以Linux为例,在终端运行
1
gpg --keyserver keyserver.ubuntu.com --send-keys Key-id
其中,keyserver.ubuntu.com为公钥存放的服务器,Key-id为公钥ID或公钥指纹Fingerprint
发件人上传
在浏览器中打开keyserver.ubuntu.com,在“Submitting a new OpenPGP Key”下方粘贴公钥ASCII码,然后点击“Submit”确认即可。收件人也可以按此方式上传自己的公钥。
注:支持的Keyserver列表可点击此处查看:https://sks-keyservers.net/status/
发送邮件
浏览器中打开网址:https://encrypt.to/

输入对方的Email地址,Key-id或公钥指纹,点击“Try now”。在Key-id或公钥指纹前需要加“0x”(阿拉伯数字0,非字母o)
在第一栏“Message”中写你想要发送的信息,第二栏“Your Mail”中写你的个人邮箱地址(如果希望对方回复的话),然后点击“Encrypt & Send”按钮,对方就能会收到一封标题为“你的邮箱地址 has sent you an encrypted mail”的邮件,同时你也会收到一封标题为“Thanks for using Encrypt.to”的邮件,提示你已发送成功。
高级账户
如果你想注册体验更多功能的话,可以注册一个高级账户,每年11美元,支持发送附件,保密性更强。
发送测试
如果你没有朋友使用PGP的话,可以在浏览器中打开https://encrypt.to/0xEF91B2A40DCD2A84给我发送测试邮件。
]]>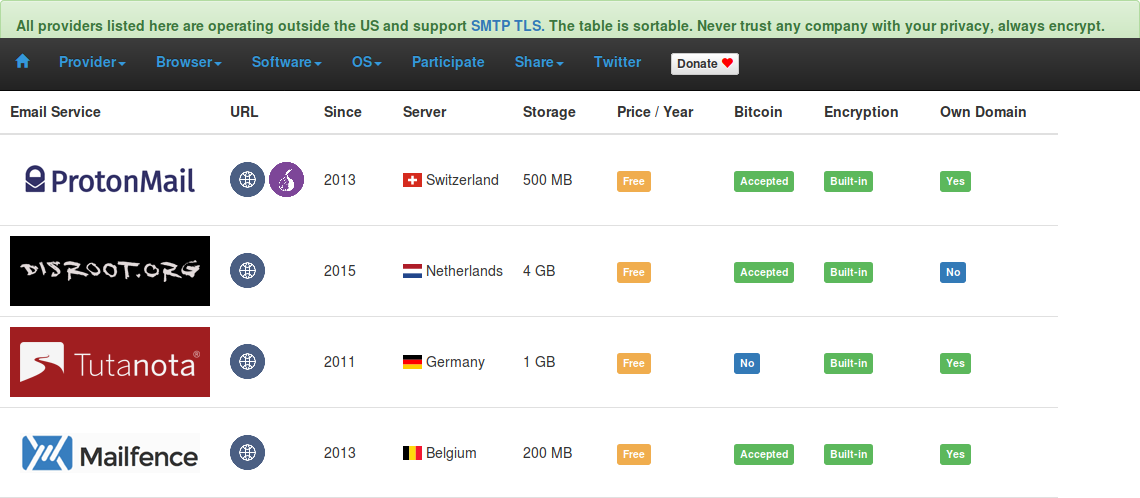
注册登陆
点击https://user.disroot.org/打开登陆页面,点击左下角“New User Registration”开始注册。
选中“I’m not a robot”,点击“Verify”确认。
验证通过后填写相关信息,包括用户名、姓名和密码,完成后点击“Continue”,在弹出的页面选中“I Agree”后点击“Continue”就生成账户了。
设置安全问题,点击“Save Answers”,一直“Continue”就注册成功了。
在“Disroot Apps”就可以看到你可以使用的所有服务了,点击第一个“Cloud”就可以进入你的邮箱了,也可以直接点击mail.disroot.org。
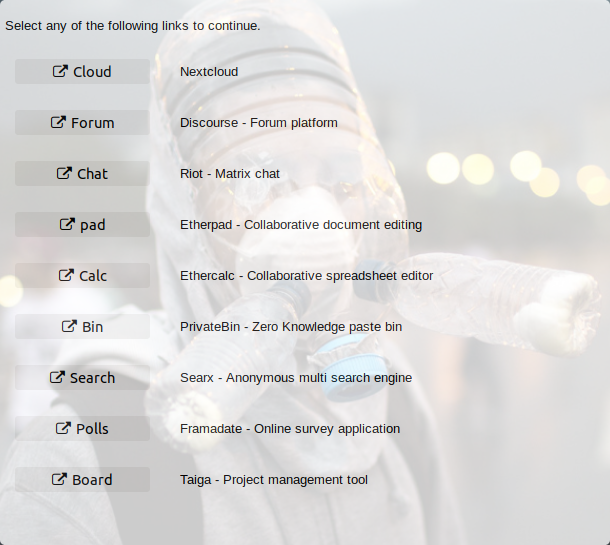
其它服务
除免费邮箱外,disroot还提供网络硬盘、日历、任务、记事本、新闻订阅、视频聊天、圈子、书签、Riot、电子表格、项目管理、搜索、网络调查以及以太板等服务。
]]>本文以刚刚申请的加拿大学院EDU邮箱为例,该EDU邮箱申请方法见:免费申请加拿大学院EDU邮箱
创建账户
- 登陆EasyCrypt官方网站:https://easycrypt.co/,输入邮箱地址,点击“GET A FREE ACCOUNT”,页面出现“Verification email sent. Please check your Inbox and Spam folders.”后检查自己的邮箱是否收到验证邮件,很有可能在垃圾箱里面。
- 打开邮箱,点击邮件中的“Get a free account”按钮,就会打开EasyCrypt的注册页面。
- STEP 1:输入密码,然后点击“Next”会弹出一个警告提醒,提醒你要注意记住密码,密码确认完毕后点击红色的“I have written down my password, proceed”,网站就会自动创建一对密钥。
- STEP 2 :网站会自动识别出邮箱地址为Gmail域名邮箱,点击“Next”授权EasyCrypt“Read, send, delete, and manage your email”,允许后就创建成功了,点击“Login to EasyCrypt”登陆。邮箱地址不同,该步骤会有细微的差别。
系统设置
登陆后界面如下:
点击右上角的小齿轮,有“Setting”和“Account”两个选项,“Setting”根据个人爱好设置。
进入“Account”设置页中,“EasyCrypt password”用于修改EasyCrypt登陆密码。
在“Advanced”页面,你可点击“View / Export keys”导出创建的密钥(强烈建议导出备份);点击“Import keys”可以导入你自己的密钥替换系统自动生成的密钥;“Delete account”就是删除账户。
收发测试
发送邮件
点“Compose”弹出发送邮件页面,在收件人一栏输入地址,如果输入的邮箱地址变绿,则代表EasyCrypt的服务器中有该邮箱地址的公钥,下面的小锁标志也会变绿并显示锁上状态(也可以通过点击小锁选择加密或不加密),相反则不能发送加密邮件。在“From”一栏可勾选“Attach public key ”将个人公钥发送给对方以便对方加密回复。
登陆Gmail,在发件箱里,刚才发送的邮件会显示为“BEGIN PGP MESSAGE”,摘录如下:
-----BEGIN PGP MESSAGE-----Version: OpenPGP.js v2.3.3
`Comment: This is an encrypted email. To view in EasyCrypt, go to https://webmail.easycrypt.co/wcFMA7+ka7BRfYmKARAAsrn9jKHNFW6BTrd9BBxi9N1sLiHH3bQqRf4DH6nINCdFmgy1279q8osJ+SnhLeCre28sN4V2m+XRAzGNEv4uQWR07bt5RkHMbkqU8IUTvQpNK1ZaB9NOylxtTvc+mTsPYTz203R28hsAqIFZQqlgTij+v1xVSFlEJ4cTWv8zDWGSKid4FMbhCZpWjzSRk374ZBbBenDfHUPPqcuJoI/oxzYDFW79P4p5j4Sno9rw4cUu7j8un9OfMCsButbTHv+CgUXCUxM6A521+XOzKTz36bq+tIWT8C/g5I+IUjj3EMmrMuB5ZGnj67wATLKLV+b6yJD2ypmfUZFegy+1UClNeKddkyhGkRqZo6h/CYg6k1YuYshS8m3dt/sEuaJIbBBbVzwF3hRu2qvq7Tz2NXXy5BF41lZJ7al1VLyI+u8RSxr+QAG6Ymmx+9qL2VXNgMxAb3P6G7ye7NCV8TLRZLLVfYKR9hoRJqF3YOTjj0szY6+2jMsQIXrouGzveOP/rvO/DIpMLwUqcpmfmycrfQA5BCRSSqLYtPf7+7sNvpYjiJgWK4qH5JU6k6KMPSMtJXGfm0Ulp0/cSrKdeTostRj79lIWMO1gjkuiNWrndldplQCoLk6KA1lgymXrzfUhFrK2mApABIedaD/amcyNmV0MdSc+fwPSAAc/YzlIy/vCOI7BwUwDlQr6xRYRrIwBD/98wOHggW7K7/qFHEcWPiXQSm/qU9nLmE7k2Y2rn0KX500dkItrGbWmA4iVgbEA84dV2TgMBVsZfHWUibKBDKpkLIPgYPw3B+GhDDN6h4QzIr9aEXrXSJ47SF/LljxhFTNN+MG6ea7LEy2SEUOWvoXGgXBJjWIAGKy2D6pxD0Exe1PpZuC
接收邮件
在GMX.com收件箱内,收到的的邮件内容同样为“BEGIN PGP MESSAGE”:
-----BEGIN PGP MESSAGE-----Version: OpenPGP.js v2.3.3Comment: This is an encrypted email. To view in EasyCrypt, go to [https://webmail.easycrypt.co/](https://webmail.easycrypt.co/)wcFMA7+ka7BRfYmKARAAsrn9jKHNFW6BTrd9BBxi9N1sLiHH3bQqRf4DH6nINCdFmgy1279q8osJ+SnhLeCre28sN4V2m+XRAzGNEv4uQWR07bt5RkHMbkqU8IUTvQpNK1ZaB9NOylxtTvc+mTsPYTz203R28hsAqIFZQqlgTij+v1xVSFlEJ4cTWv8zDWGSKid4FMbhCZpWjzSRk374ZBbBenDfHUPPqcuJoI/oxzYDFW79P4p5j4Sno9rw4cUu7j8un9OfMCsButbTHv+CgUXCUxM6A521+XOzKTz36bq+tIWT8C/g5I+IUjj3EMmrMuB5ZGnj67wATLKLV+b6yJD2ypmfUZFegy+1UClNeKddkyhGkRqZo6h/CYg6k1YuYshS8m3dt/sEuaJIbBBbVzwF3hRu2qvq7Tz2NXXy5BF41lZJ7al1VLyI+u8RSxr+QAG6Ymmx+9qL2VXNgMxAb3P6G7ye7NCV8TLRZLLVfYKR9hoRJqF3YOTjj0szY6+2jMsQIXrouGzveOP/rvO/DIpMLwUqcpmfmycrfQA5BCRSSqLYtPf7+7sNvpYjiJgWK4qH5JU6k6KMPSMtJXGfm0Ulp0/cSrKdeTostRj79lIWMO1gjkuiNWrndldplQCoLk6KA1lgymXrzfUhFrK2mApABIedaD/amcyNmV0MdSc+fwPSAAc/YzlIy/vCOI7BwUwDlQr6xRYRrIwBD/98wOHggW7K7/qFHEcWPiXQSm/qU9nLmE7k2Y2rn0KX500dkItrGbWmA4iVgbEA84dV2TgMBVsZfHWUibKBDKpkLIPgYPw3B+GhDDN6h4QzIr9aEXrXSJ47SF/LljxhFTNN+MG6ea7LEy2SEUOWvoXGgXBJjWIAGKy2D6pxD0Exe1PpZuC在EasyCrypt中则显示为:
其它事项
非EasyCrypt用户可以通过邮件以附件的形式将你的公钥发到邮箱: registerpublickey@easycrypt.co,这样EasyCrypt就会有你的公钥了,EasyCrypt用户在给你写邮件的时候就会提示可以加密了。
]]>
前期准备
- 一个加利福尼亚(CA)地址,可点击此处申请。
- 一个有效的SSN号码,加州SSN一般以545开关,共9位数,可点击此处验证是否有效。
- 个人信息,可在此处随机生成,注意年龄要合适,18岁以上。
- 可能需要:Google Voice用于邮箱登陆验证,国内手机可能也可以。
以上信息也可以在http://www.fakeaddressgenerator.com/一次生成,但不一定准确,同时还需要注意一下年龄。
创建账户
- 在浏览器中打开https://home.cccapply.org/,在下拉列表中选择“Canada College”然后点出“Apply”。
- 在打开的新页面中,点击“Apply to Canada College Now”,可以看一下上方的相关注意事项。
- 创建账户,“Legal Name”和“Date of Birth”按生成的个人信息填写,“Social Security Number”取消“I plan to apply for admission to college or financial aid.”,在下方填写“Social Security Number”然后点击“Continue”。
- 填写邮箱、电话和地址,“Second Telephone Number”可不填写。
- 填写用户名、密码、安全码和安全问题,点击创建账户会提示已创建成功,并给你一个CCCID,检查一下邮箱是否收到注册成功的邮件,然后点击继续开始申请。
开始申请
- 在“Introduction”页面点击“Start Application”。
- “Enrollment Information”页面下拉列表中分别选取“Summer 2018”、“Undecided on goal”和“Administration Assistant”后点击继续,一定要选“Summer 2018”,否则可能注册不成功。
- “Account and Mailing Information”页面中“Current Mailing Address”可填写新的地址或勾选第一项“My mailing address is the same as the Permanent Address in my OpenCCC Account above”。
- Personal Information:“Gender/Transgender”一栏按生成的个人信息填写,尽量按正常人思维填写;“Parent/Guardian Educational Levels”可都选“BA”;“Race/Ethnicity”自己选择就行。
- “Education”页可分别选择“First-time student in college”、“Not a graduate of…”、“ I was independently homeschooled.”、“No degree”和“None”。
- “Citizenship/Military”页选“US”和“none apply to me”就可以了。
- “Residency”中除第一项“California Residence”选“Yes”其它选“No”。
- “Needs & Interests”页中“Main Language”选“Yes”,“Financial Assistance”分别选“Yes”和“No”,其它看个人喜好随意填写,“Programs & Services”可多选,3到4项即可。
- “Consent”勾选“I consent”。
- 确认信息
- “Review Application”页面中两个要全部勾选,然后提交。
- 提交后会转到新的页面显示你的相关信息,可保存后点继续。
- “Application Survey”只把两个选项勾选一下就可以提交了。
等邮件吧
- 第一封:包括你的登陆地址、Student ID和你的密码“生日的月+日+年的后两位”,登陆后修改PIN。(我的PIN码忘记了,没修改,目前没发现什么影响)
- 第二封:你的邮箱地址和登陆地地址
- 第三封:你邮箱的密码
登陆邮箱
登陆时会提示你设备不识别需要验证手机,用Google Voice验证通过,然后更改安全邮箱就可能使用了。
]]>该邮箱目前暂在Beta阶段,申请后大约2个小时之内就会收到包含注册地址的邀请邮件,按邮件提供的网址和邀请码就可以顺利注册了,邮箱后缀为@ox.io。
界面如下图,可在设置中将语言调为中文,支持POP3和IMAP,功能较为齐全。
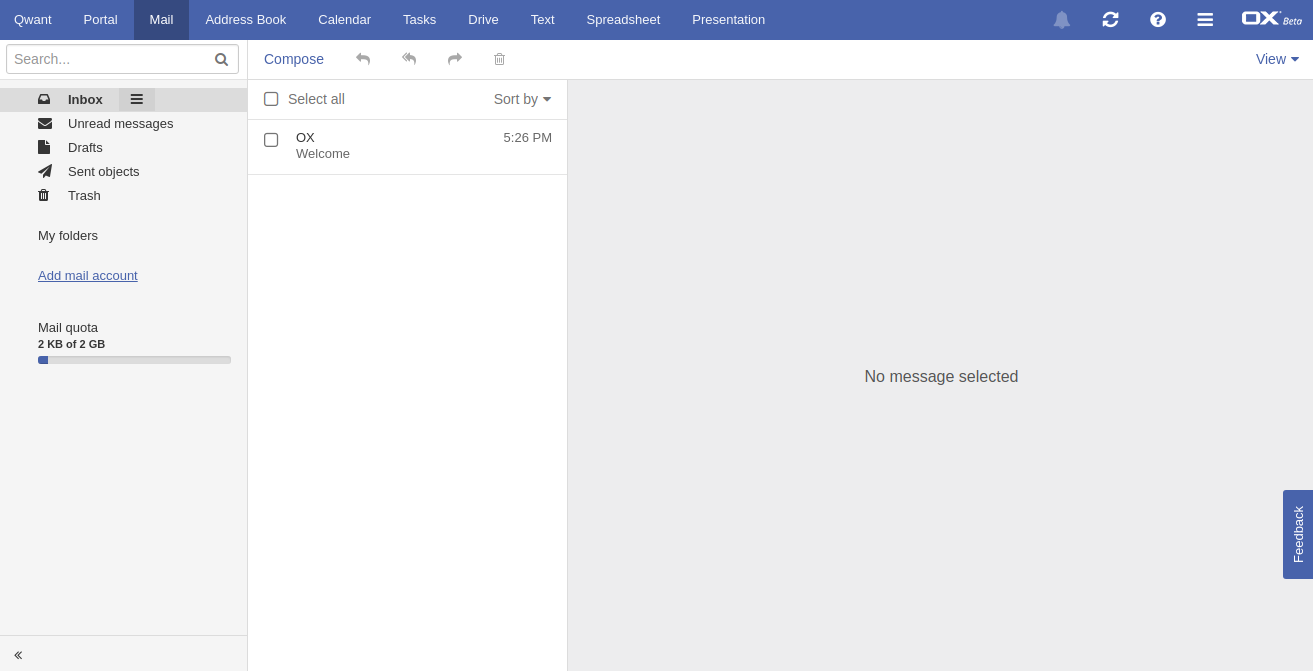
最近在处理邮件发送的时候发现了Mailgun这款神器;它和Gmail配合可以完美地实现免费域名邮箱。因此,在这里分享给大家。本文作者为香菇肥牛,原文地址为https://qing.su/article/131.html 转载需经过作者同意且需注明原文链接。谢谢!
首先要说明一下,Mailgun每个月发送10000封邮件以内是免费的。对于个人和小型团体来说,10000封的月发送量绰绰有余了。
整个域名邮箱的实现如下面的示意图所示。可见,我们整合了Mailgun和Gmail实现了和G Suite一样的功能,曲线救国。下面我就来介绍一下具体怎样部署GMail和Mailgun.

首先,我们要去mailgun.com注册一个账号。注册账号并验证邮箱后,可以登录到后台,然后在Domains选项卡中点击Add New Domain.
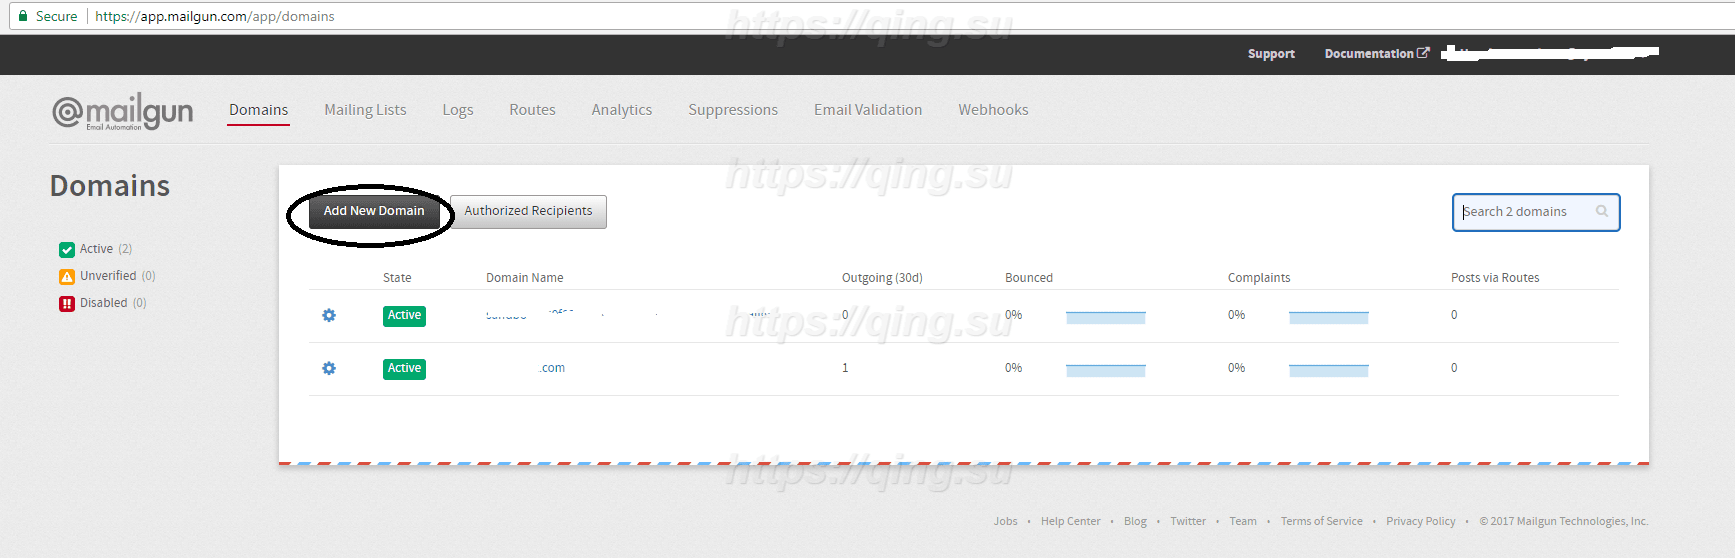
输入域名 (比如example.com) 之后点击下一步,会提示修改DNS记录。请移步你的域名DNS解析商,添加好对应的DNS记录。相关的记录一共有5条,其中2条TXT记录,2条MX记录,1条CNAME记录。添加好后点击页面底部的Continue to Domain Overview, 进入管理控制台。

在控制台中,顶部有提示,DNS需要24~48小时生效。如果确认自己更改的DNS已经生效了,就可以点击控制台中的Check DNS Records Now, 如上图。如果DNS设置无误,那么这个域名就可以开始使用了,我们可以看到此时域名的状态已经变成了绿色的Active. 现在,我们首先要给这个域名设置转发,使得我们的Gmail邮箱能够收取域名邮箱的所有信件。
点击顶部Routes选项卡,然后点击Create Route, 如下图所示。

在Create New Route界面中,Expression Type选择Catch All, Actions勾选Forward并输入你的GMail邮箱地址,其他所有选项保持默认即可,最后点击下面的Create Route.
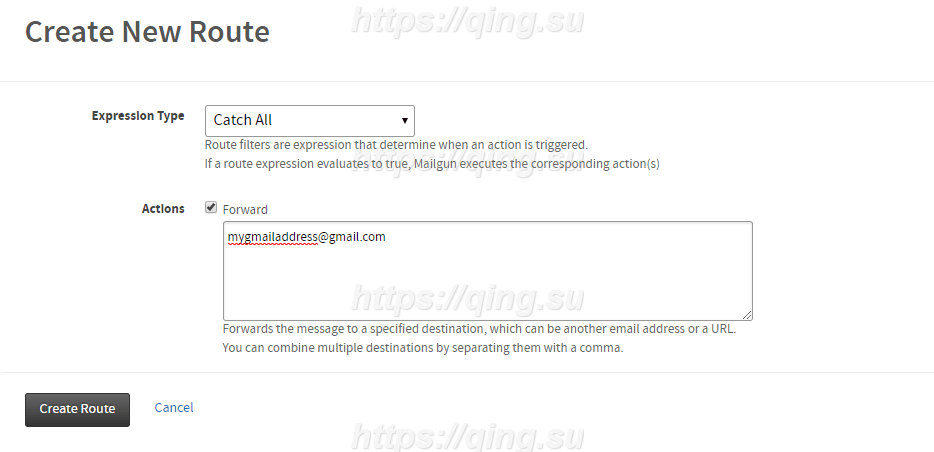
这时,我们回到Domains列表中点击我们自己的域名,应该能看到如下图的页面,其中包含了SMTP服务器和密码,以及API等内容。我们只需要知道服务器密码即可。

至此,Mailgun的设置完毕,我们需要登录GMail, 设置收发信。
登录你的个人Gmail后台,在Settings里面找到Accounts and Import, 点击Add another email address, 如下图。

在弹出的小窗口中,输入姓名和你要使用的域名邮箱,这里以admin@example.com为例。勾选Treat as an alias, 然后点击Next step. 在服务器配置的页面输入我们刚才的服务器信息、SMTP用户名和密码。端口为587,加密方式选择TLS. 如下图所示。填好后点击Add account.

如果用户名和密码输入无误,GMail会向你的admin@example.com邮箱发送一封验证邮件,而此时,这封邮件已经被转发至你的GMail邮箱了,所以只要点击收到的邮件中的验证链接就大功告成了。
至此,我们完成了GMail和Mailgun的整合,以及免费域名邮箱的设置。所有发往admin@example.com的邮件均会被Mailgun转递至你的GMail邮箱,而你的GMail邮箱可以直接以admin@example.com的名义发信,和普通的域名邮箱没有任何差别。收件人是无法知道你是用GMail发信还是用其他独立的域名邮箱发信的。如果需要添加多个域名邮箱或者别名,只需要重复执行上述GMail的配置即可。
如果大家在使用过程中遇到任何问题,欢迎在这里留言,我将即使回复。本文作者为香菇肥牛,原文地址为https://qing.su/article/131.html 转载需经过作者同意且需注明原文链接。谢谢!
Single Invite
注册riseup账户的方法主要有两种:自己写申请注册或两个人邀请注册,现在简化为单人邀请注册。
Personally Encrypted Email Storage
除服务器全盘加密外,个人邮件也开始加密,如果忘掉密码只能通过Riseup提供的Recovery Code重置。
Switched to New Systems for Account Management and Support
个人账户管理网址改为https://account.riseup.net,比以前的更好看、简洁。
]]>Vivaldi是一位意大利神父,也是巴洛克音乐作曲家,同时还是一名小提琴演奏家,具体信息详见百度百科。
申请地址:https://webmail.vivaldi.net/
登陆地址有两个:https://webmail.vivaldi.net/和https://mail.vivaldi.net,两个地址的界面截然不同,前者较为简洁,后者基于Roundcube,个人更喜欢前者。
特点
- 支持自动转发
- 提供日历服务(在https://webmail.vivaldi.net/界面)
- 支持DAV Sync,包括CalDAV和CardDAV(在https://webmail.vivaldi.net/界面)
- 支持中文
长相
https://webmail.vivaldi.net/
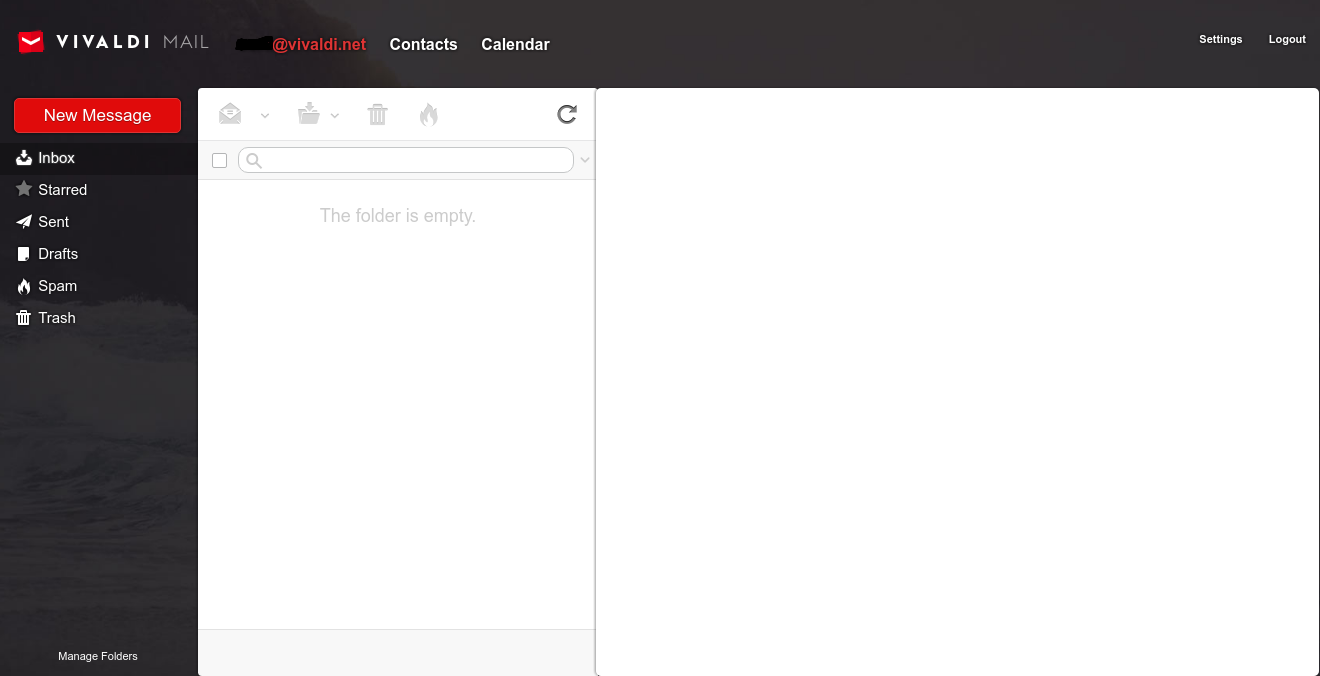
https://mail.vivaldi.net
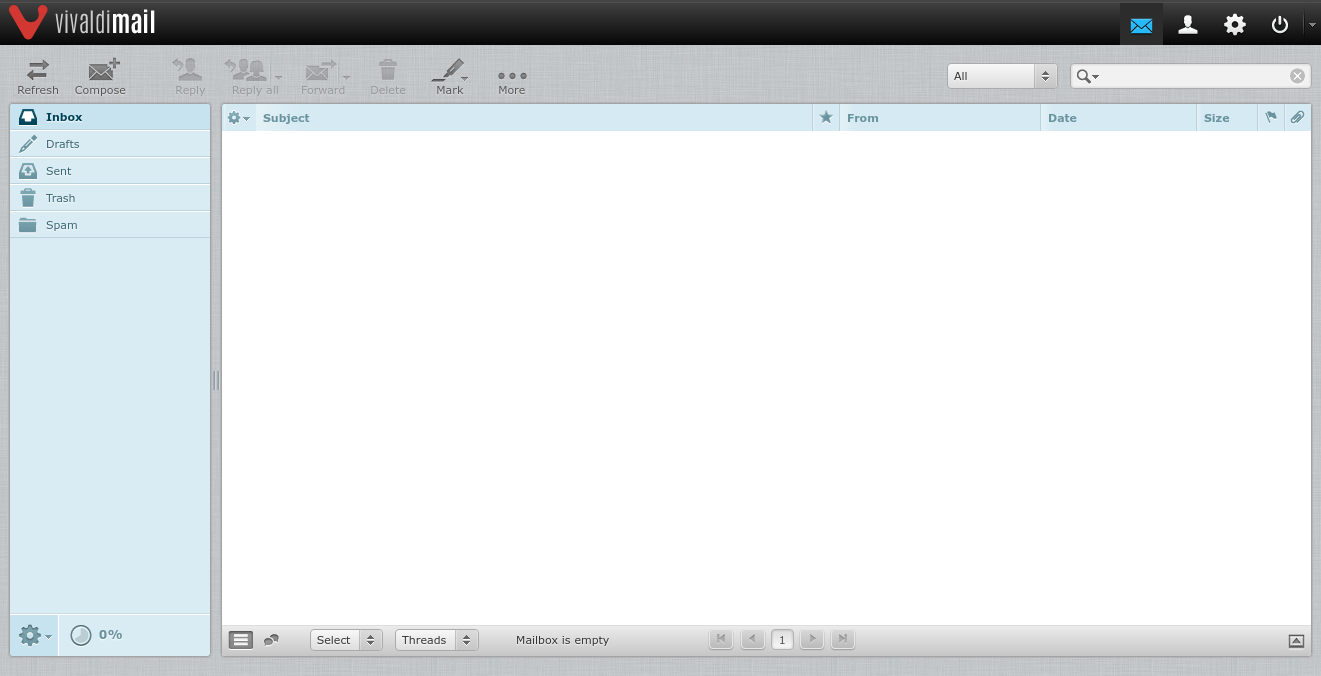
Protonmail
价格:免费,提供付费高级帐户
容量:500M
国家:瑞士
两步验证:是
创建年份:2013年
是否开源:是
客户端:Android、Iphone
其它功能:无
TutaNote
价格:免费,提供付费高级帐户
容量:1GB
国家:德国
两步验证:否
创建年份:2011年
是否开源:是
客户端:Android、Iphone
其它功能:无
Mailfence
价格:免费,提供付费高级帐户
容量:200MB,
国家:比利时
两步验证:是
创建年份:2013年
是否开源:否
客户端:
其它功能:支持Microsoft’s Exchange ActiveSync、支持OpenPGP、日历、网盘、付费用户支持POPS、IMAPS和SMTPS
原文地址:https://www.makeuseof.com/tag/3-secure-encrypted-email-providers-online/
]]>目前提供两种套餐:
- 5GB容量,15$/年。
- 20GB容量,30$/年。
打开Protonmail,按“F12”。
输入用户名、密码和两步验证码,点击登陆。
在下方的“网络(Internet)”中搜索“auth”并点击(Method为POST),在右侧“Response”标签下就可以看到”PrivateKey“了。
复制后粘贴就可以了,格式如下:
—–BEGIN PGP PRIVATE KEY BLOCK—–
Version: ProtonMail v0.1.0
Comment: https://protonmail.com
…………………..
—–END PGP PRIVATE KEY BLOCK—–
- Protonmail.com: 只能导出系统生成的GPG公钥,密钥可通过浏览器获取,支持两步验证。
- Cock.li: 支持在线新建PGP密钥,可供选择后缀较多。
- Scryptmail.com: 支持在线新建或导入PGP密钥,支持两步验证,可设置3个别名和一次性邮箱地址。
- Mailfence.com: 可在线新建和导入,支持两步验证,登陆名与邮箱地址可设置不一样。
- Invmail.io: 支持在线新建和导入。
- Scramble.io: 系统自动生成密钥。
试着发了一封中文的html邮件,支持不是很好,收费帐户功能可能会多一些,下面就是pingly.com的邮箱界面。

注册会员账号
- 先打开https://tw.51240.com/,随便找一个台湾的身份证号码和姓名。
- 点击https://www.tp.edu.tw/member/law.jsp,下拉后点同意,填写相关个人资料。
- 填完资料后提交,一般就能申请成功了。
申请EDU邮箱
- 用刚申请的用户名和密码登陆https://www.tp.edu.tw/。
- 在“我的服务”一栏中点击“申请信箱”。
- 填写资料就可以了。邮箱后缀为@tp.edu.tw。
教育邮箱优惠
目前实测已经成功的有:
- Office365: https://www.office365.com/
- CamScanner: https://www.camscanner.com/
注册地址:https://www.migadu.com/en/index.html?src=steley
特点
- 支持添加1个域名
- 无限个邮箱帐户
- 支持中文
- 支持别名
- 支持转发
- 1G容量
- 支持Catchall
- 有病毒防护功能
- 支持DKIM、SPF和DMARC
- 全程https连接
- 支持IMAP、POP3、SMTP
- 支持自定义黑、白名单
- mail-test.com测试得分10/10,查看详细结果https://www.mail-tester.com/web-sgwd1
不足
- 每天只能发20封邮件,接收无限制
- 每封邮件带一个“Sent via Migadu”的小尾巴
- 暂不支持“两步验证”
注册地址
https://www.migadu.com/en/index.html?src=steley